Wet felted vessel….

Yesterday I decided to make another vessel, along the lines of my yellow and grey one, but this time I wanted a simpler, more rounded finish.


I started by making several strips of green Merino, wet felted (very lightly) onto organza.

By laying a sheet of Lutradur over a piece of Vilene and applying paint, the paint soaked through and gave me two options to use as the body of the vessel.

I chose to work with the Vilene and attached the felt and organza by machine before using a soldering iron to make cutouts.

This is the finished vessel.


Wet felting with a book resist….

A few weeks back I read Ruth’s review on the Felting and Fibre Studio about the fascinating wet felted items that members had created using a “book resist”.  I’d never heard this term before but when I read the Book Resist Tutorial by Teri it all made sense and I realised how a lot of the 3D items I had seen previously in exhibitions and on-line had been made.  Wet felting with a book resist opens up new possibilities allowing you to create seamless complex shapes in one piece.
I was particularly interested in the amazing octopod.  I am planning to make an explorers outfit for the Asylum Steam Punk Festival in August and a felted octopus could be one of my accessories…..maybe draped over a shoulder or clinging to the skirt!

Unfortunately I got so carried away with the felting I forgot to photograph the resist before covering it.  It had to be cut to remove it but this shows you roughly how it looked.  It was made from 4 sheets of A4 acetate, cut into 8 sections and sewn together in the centre as a “book”.

resist made from A4 acetate sheets

Each section was covered in turn with three layers of varying shades of yellow Merino and gently rubbed.

covering the resist with Merino

prior to removing the resist

resisit removed and rolling complete

After removing the resist the octopod was rolled, rubbed and thrown around to finish the felting process.  The tentacles are now done but I will add a wet felted body later in the week to take him from octopod to octopus.

the finished octopod waitng for a body

Wet Felting Using Resists……

I’ve just completed two pieces of work in response to the first quarter challenge from the Felt and Fibre Studio.  The challenge was to make a felted piece using resists in a way you wouldn’t normally use them.  If you check out the F&F site here you will see some amazing work which has been made with “book” resists and my first reaction was to have a go at one of those.  It then occurred to me that maybe I should go back to basics first and have a play at making craters and holes before getting too adventurous!

This was the first one I did, a flat wall hanging with machine and hand embroidered surface design.  The craters are filled with red satin fabric and hand embroidered knots.

Red spot resist piece

image

The second piece is a pod, very similar to the one I made with Jenny Pepper at the advanced pod workshop up in Hutton Buscle.

image

image

I am on a mission now to try to create an octopus using the book resist technique……….

Wet Felting and Textural – The Fate of Constance

Wet felting and textural

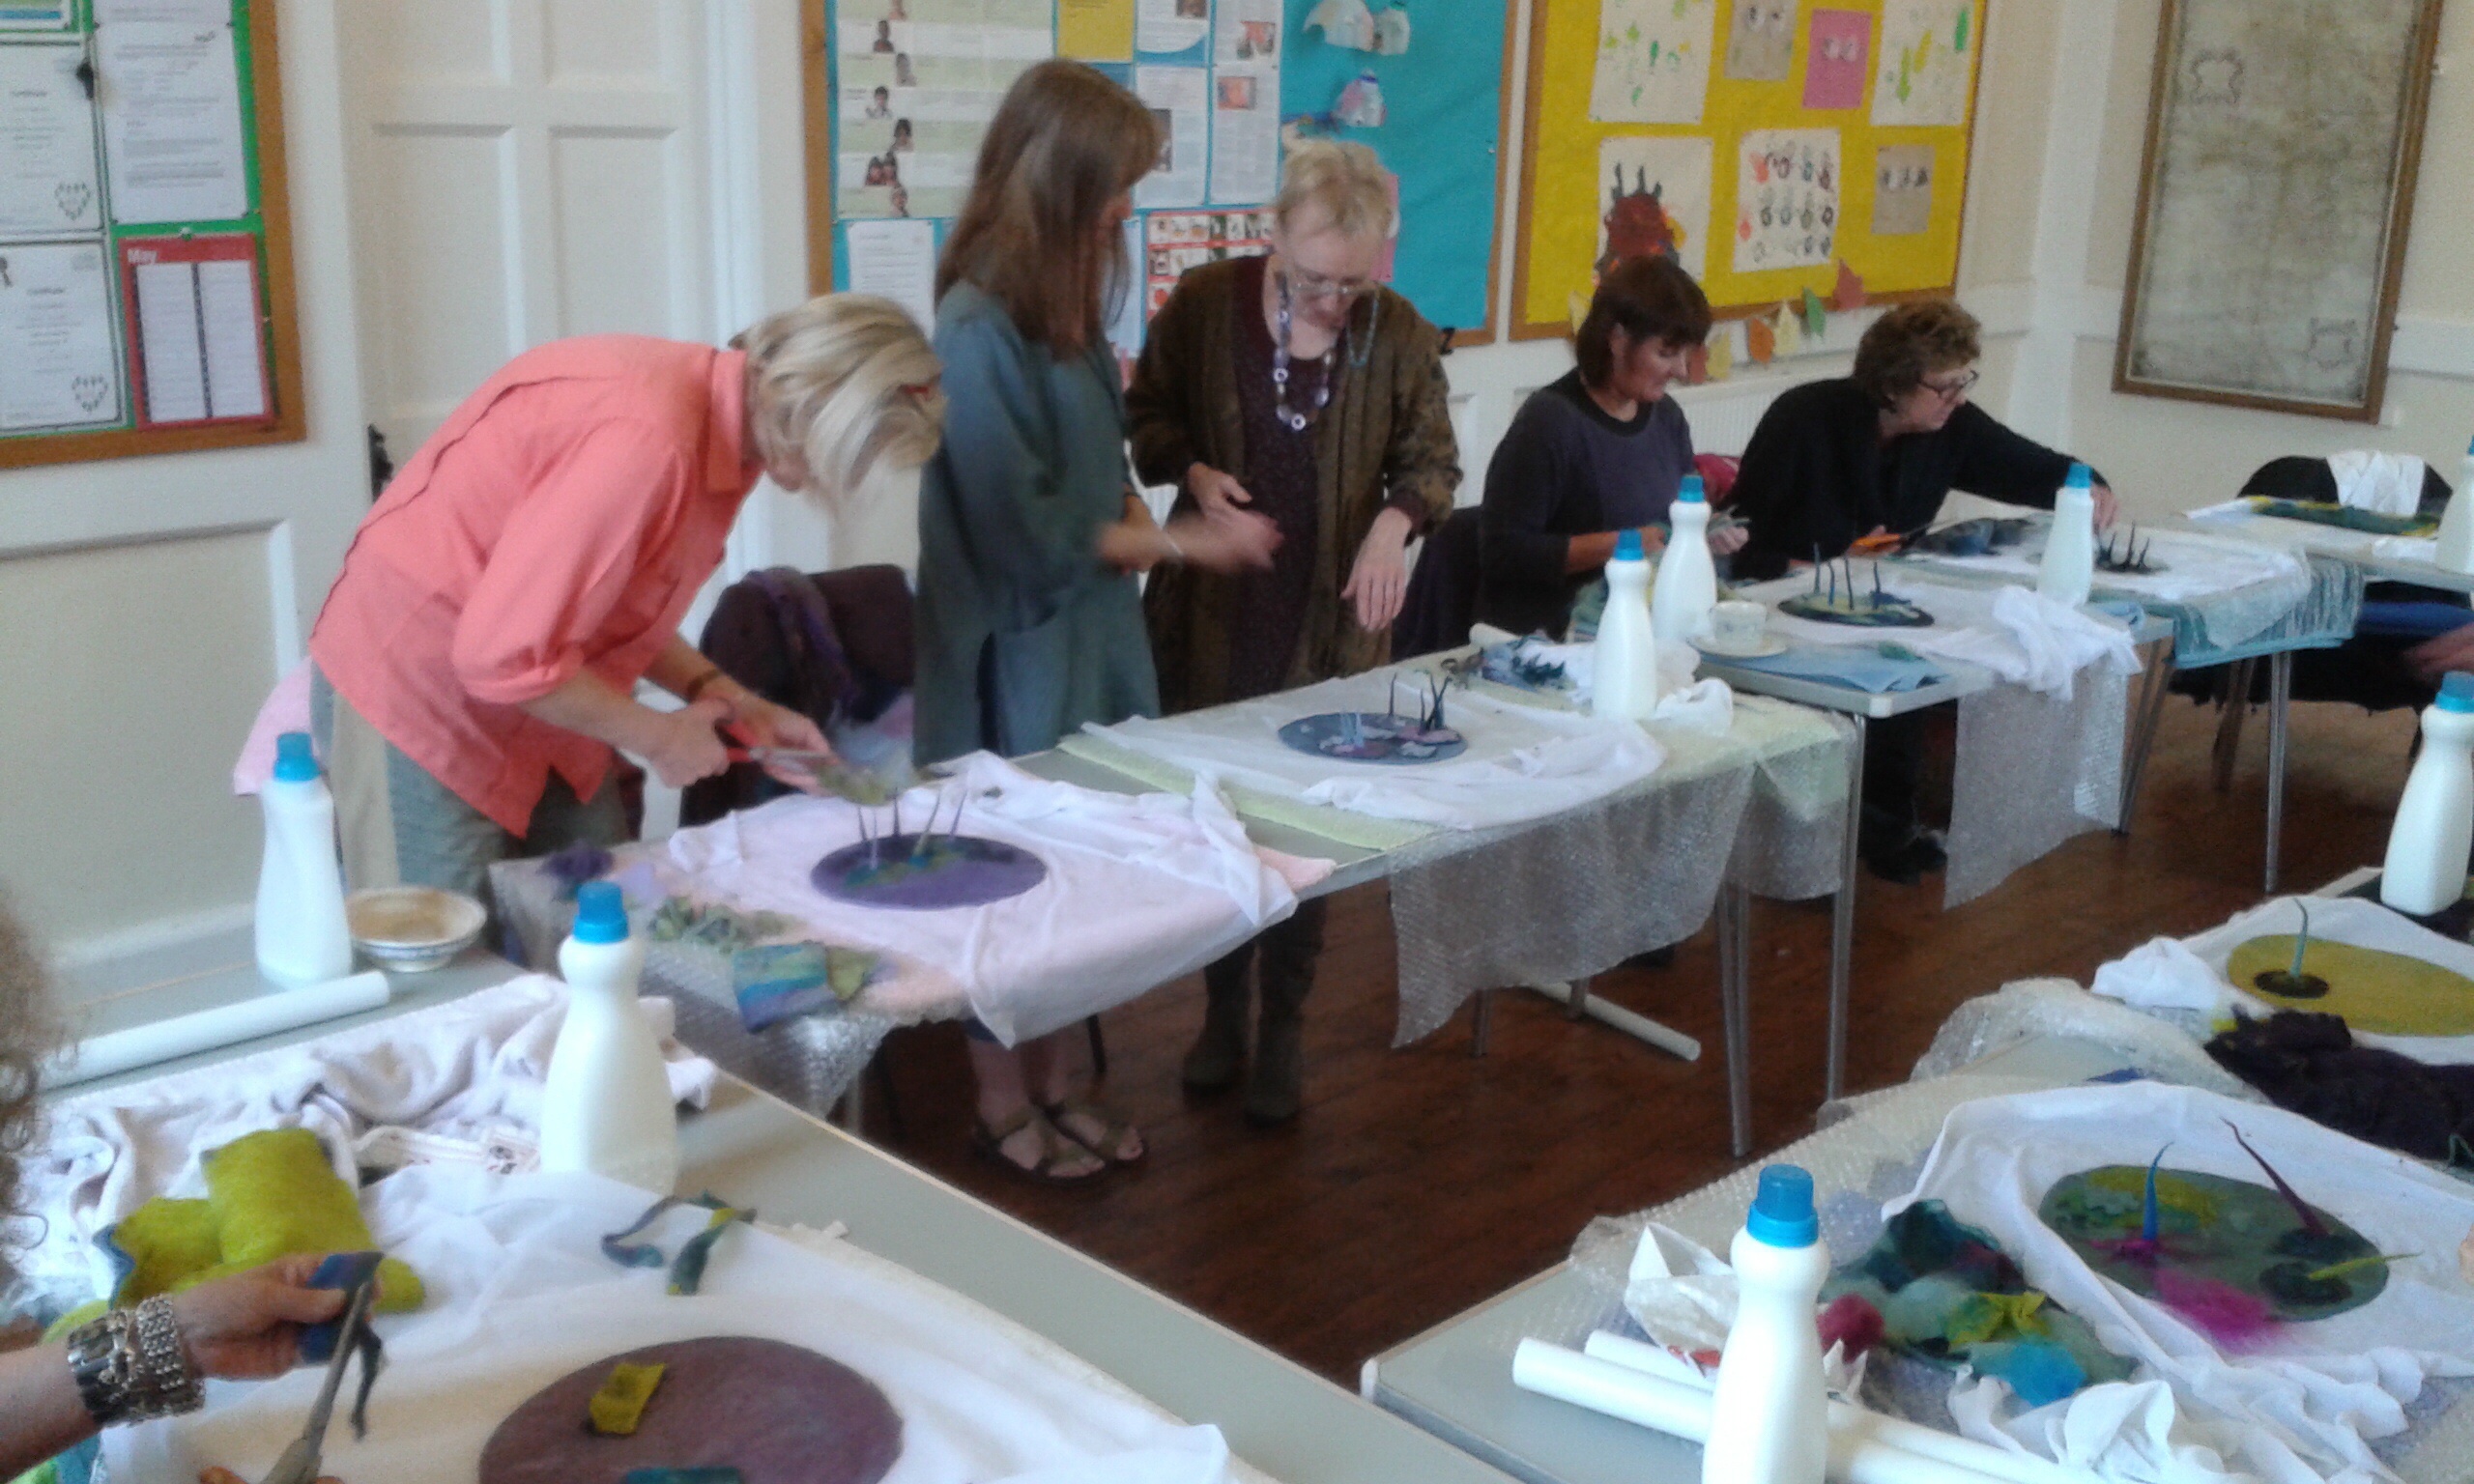
Our latest challenge at the Cranwell contemporary textile group has been to produce a piece of work based on a poem.  We could use any poem, any style and any techniques, but the finished piece had to be 20″ x 15″, quilted, and it had to include lettering in some form or other.

With such a “loose” brief the first thing I decided on was that, whatever poem I chose, I would use wet felting and my finished piece would be very textural. I sat down with my sketch book and thought through some of the odd lines I knew from well known poems. Nothing lept out to inspire me until the words “Oh what a tangled web we weave, when first we practise to deceive” came into my head. I didn’t know who the poet was or which poem it came from but a quick search on Google told me it was from an epic written in 1808 by Sir Walter Scott entitled Marmion: A Tale of Flodden Field.

I know very little about poetry but this surely has to be one of the longest poems ever written! It took me longer to read the poem than it did to make the quilt! You can read a potted version of the plot on Wiki, but basically it’s a story in which good triumphs over evil. One of the characters is a “fallen” nun called Constance who is condemned to death for her misdeeds and walled up alive on Lindisfarne. It was the fate of Constance which inspired my design.

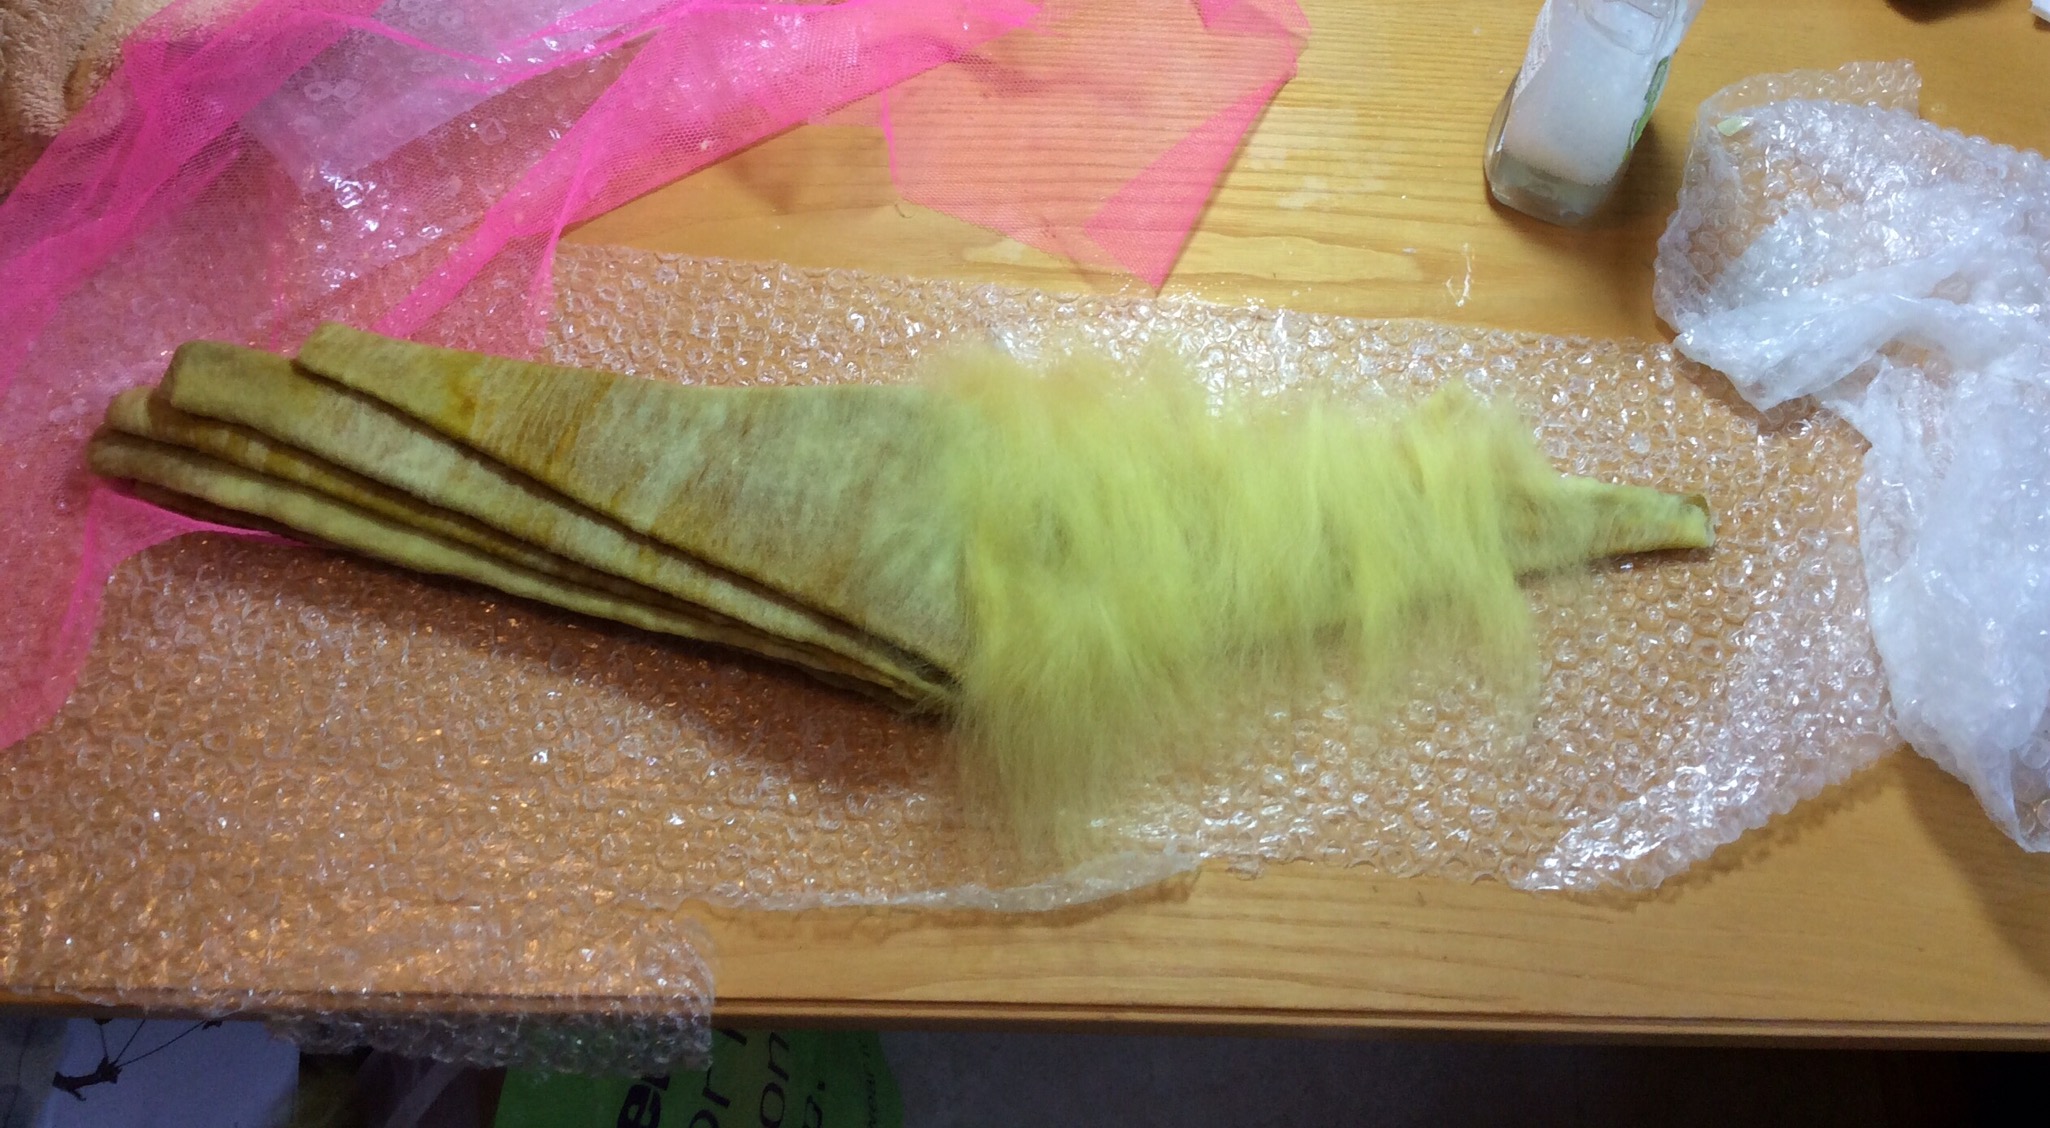
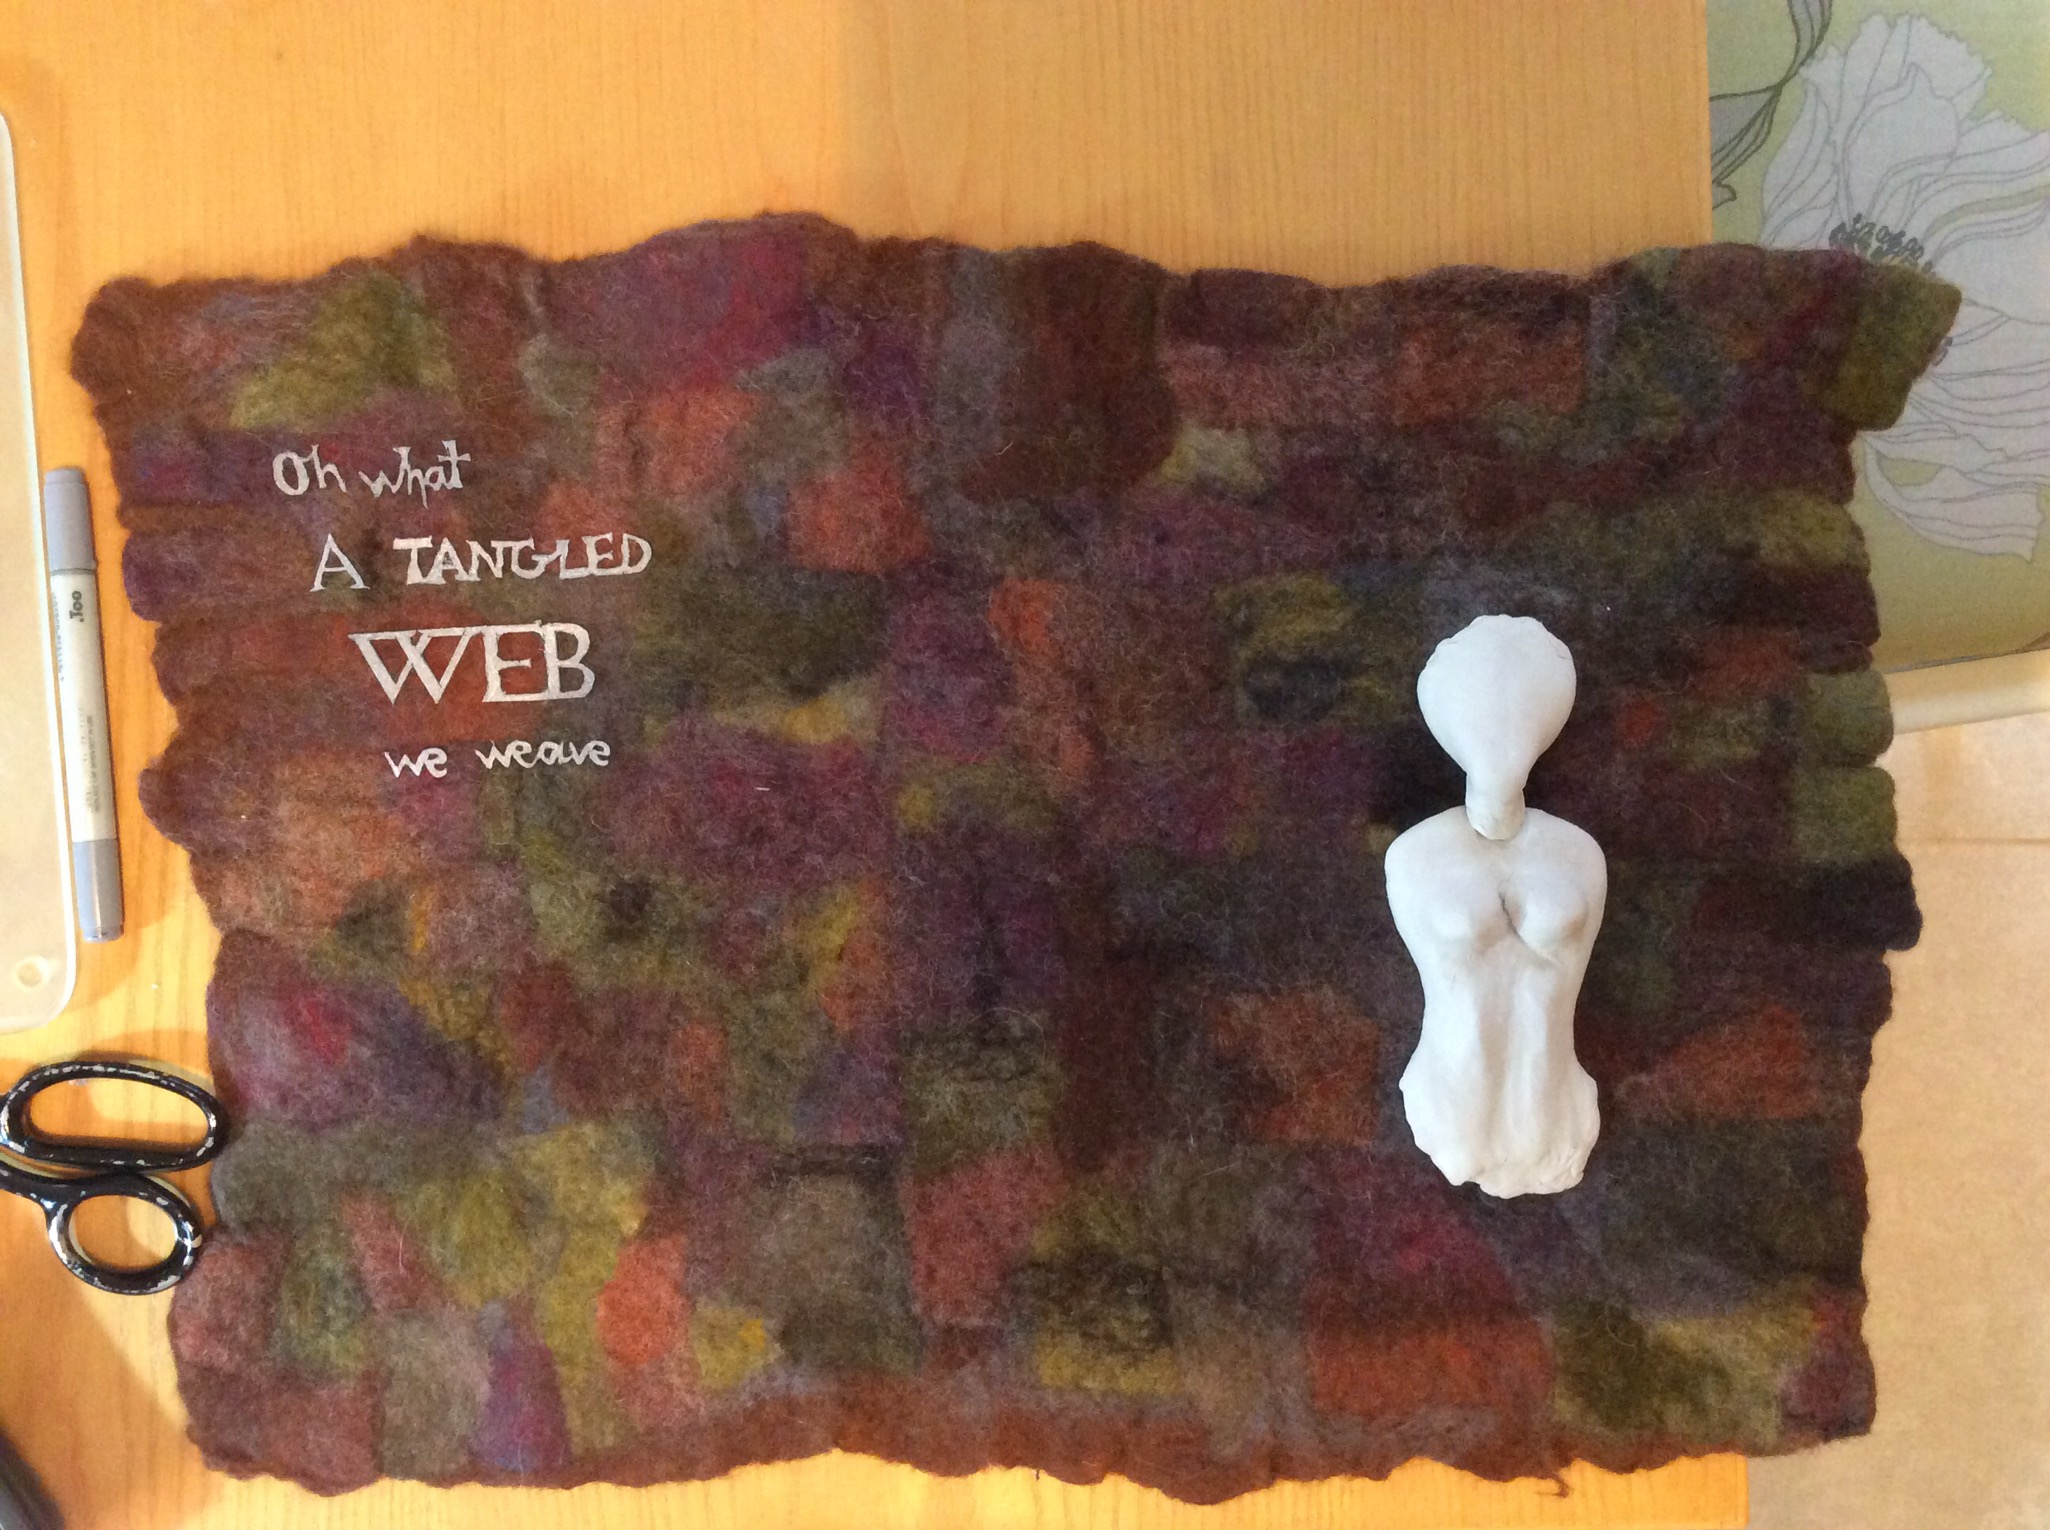
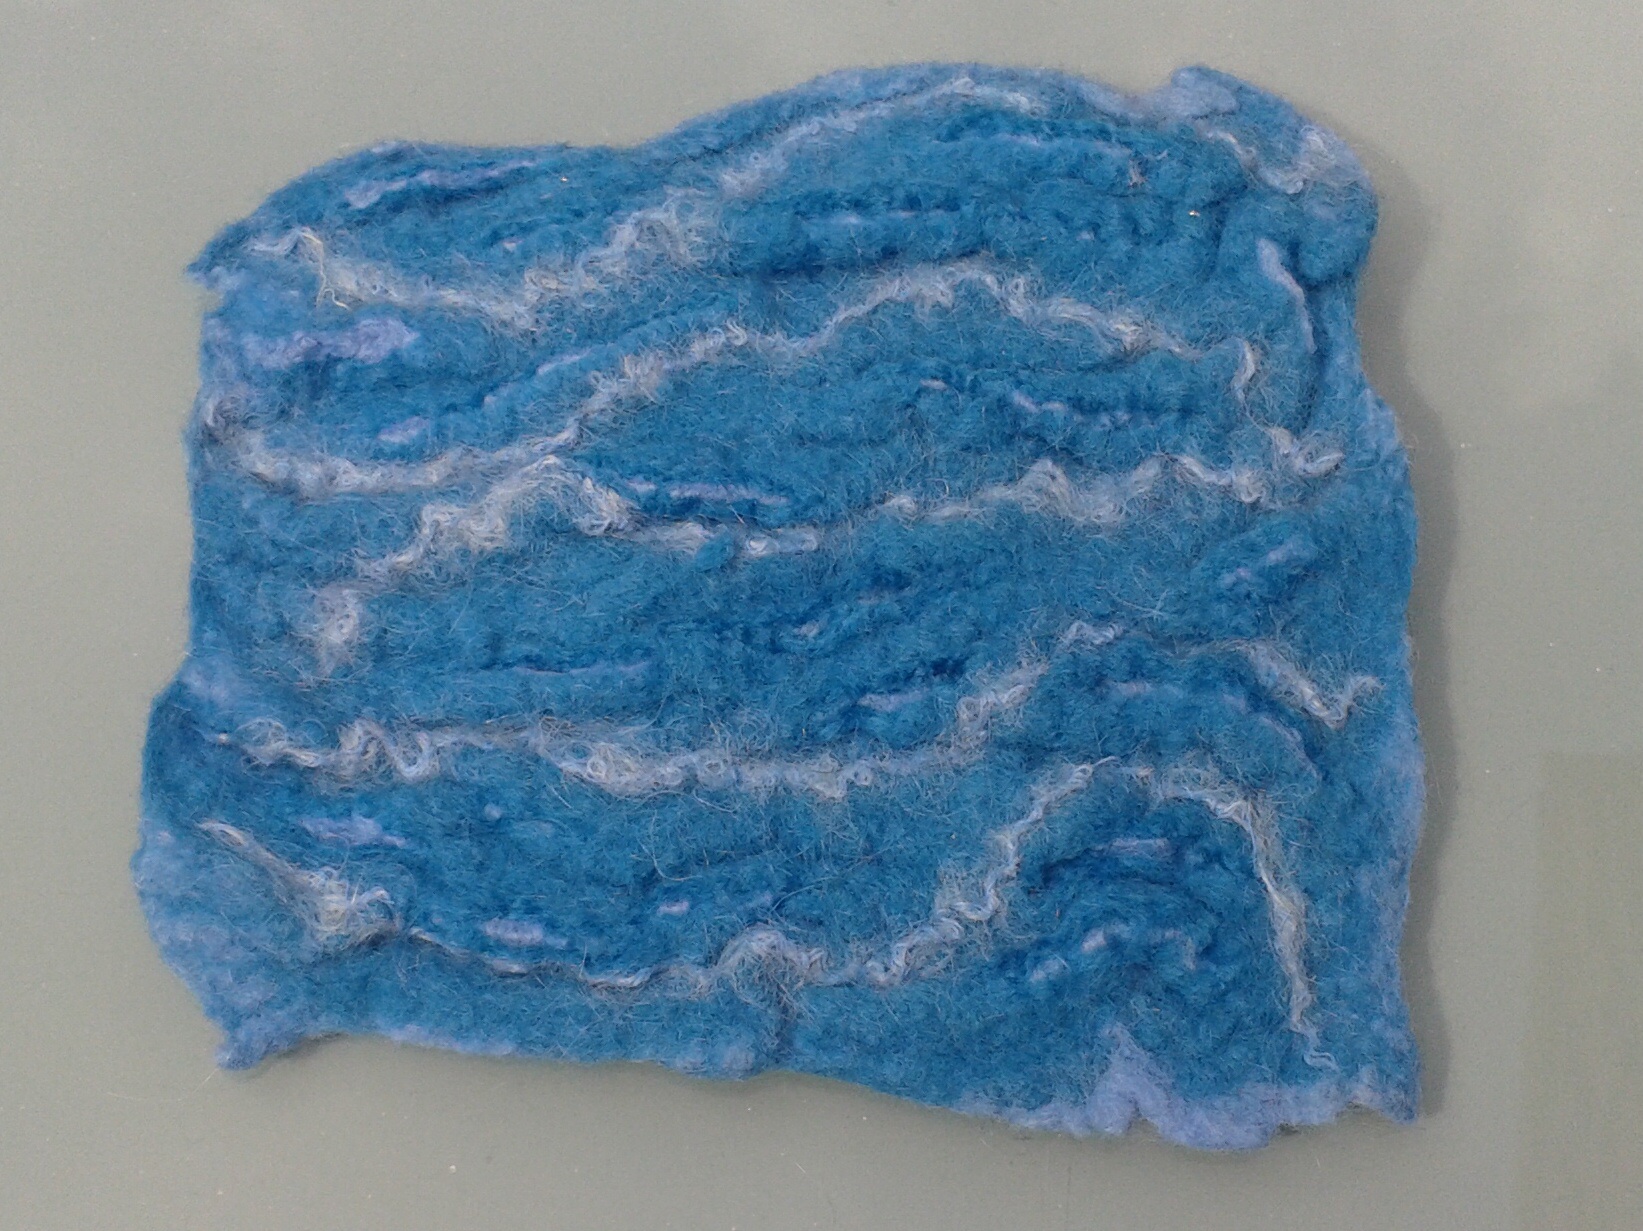
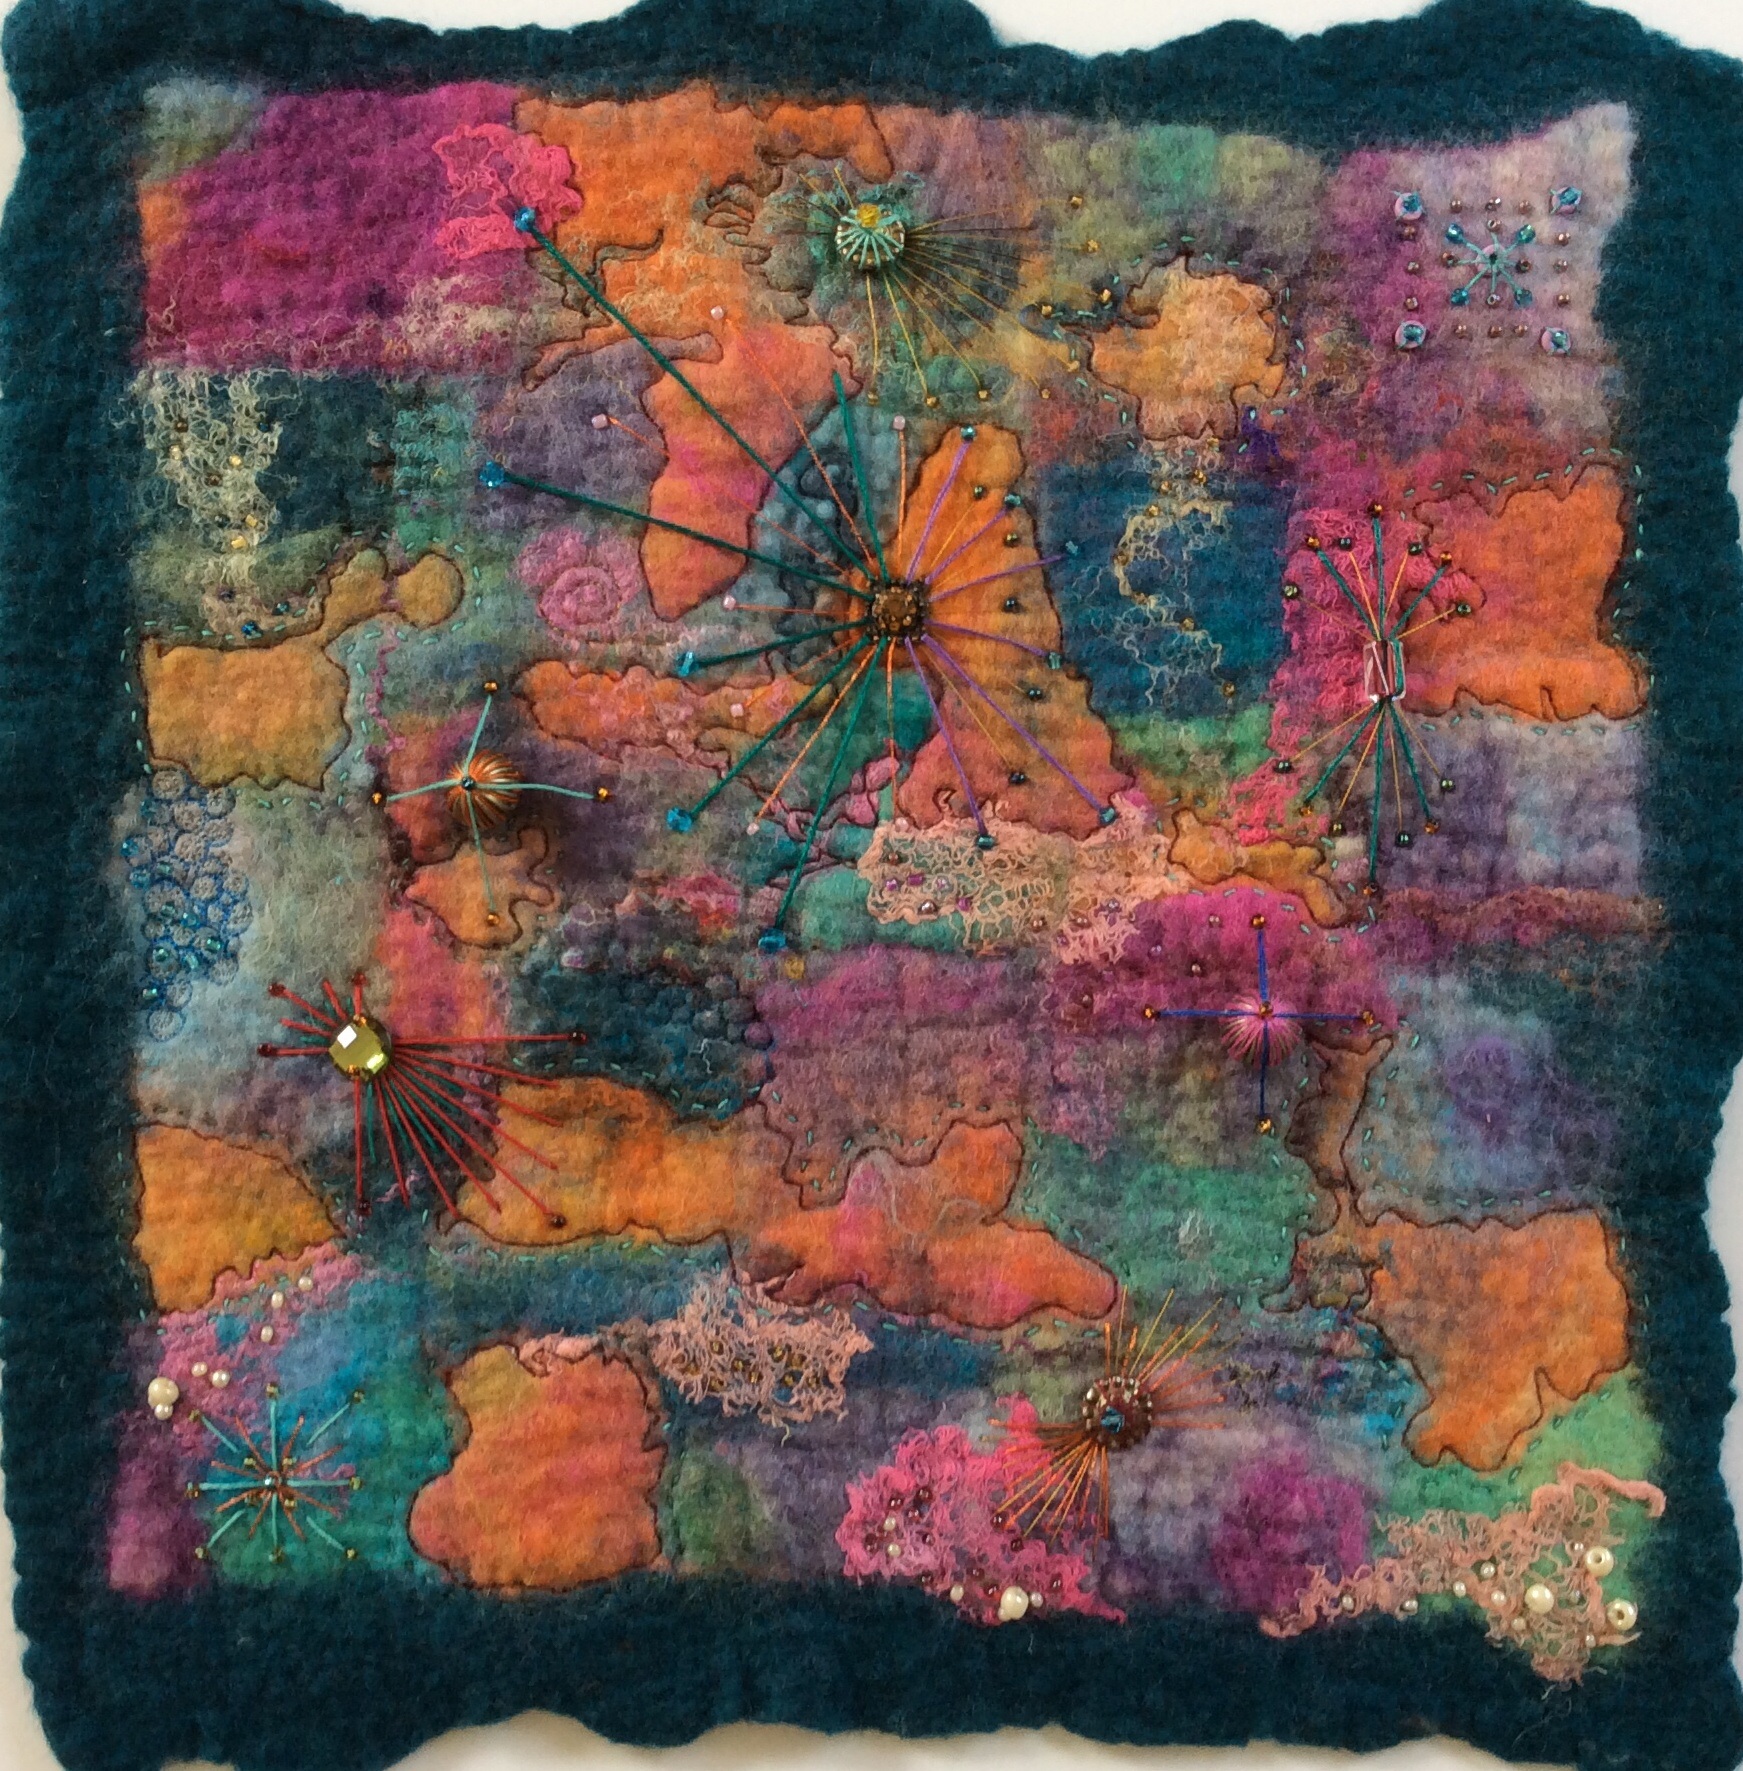
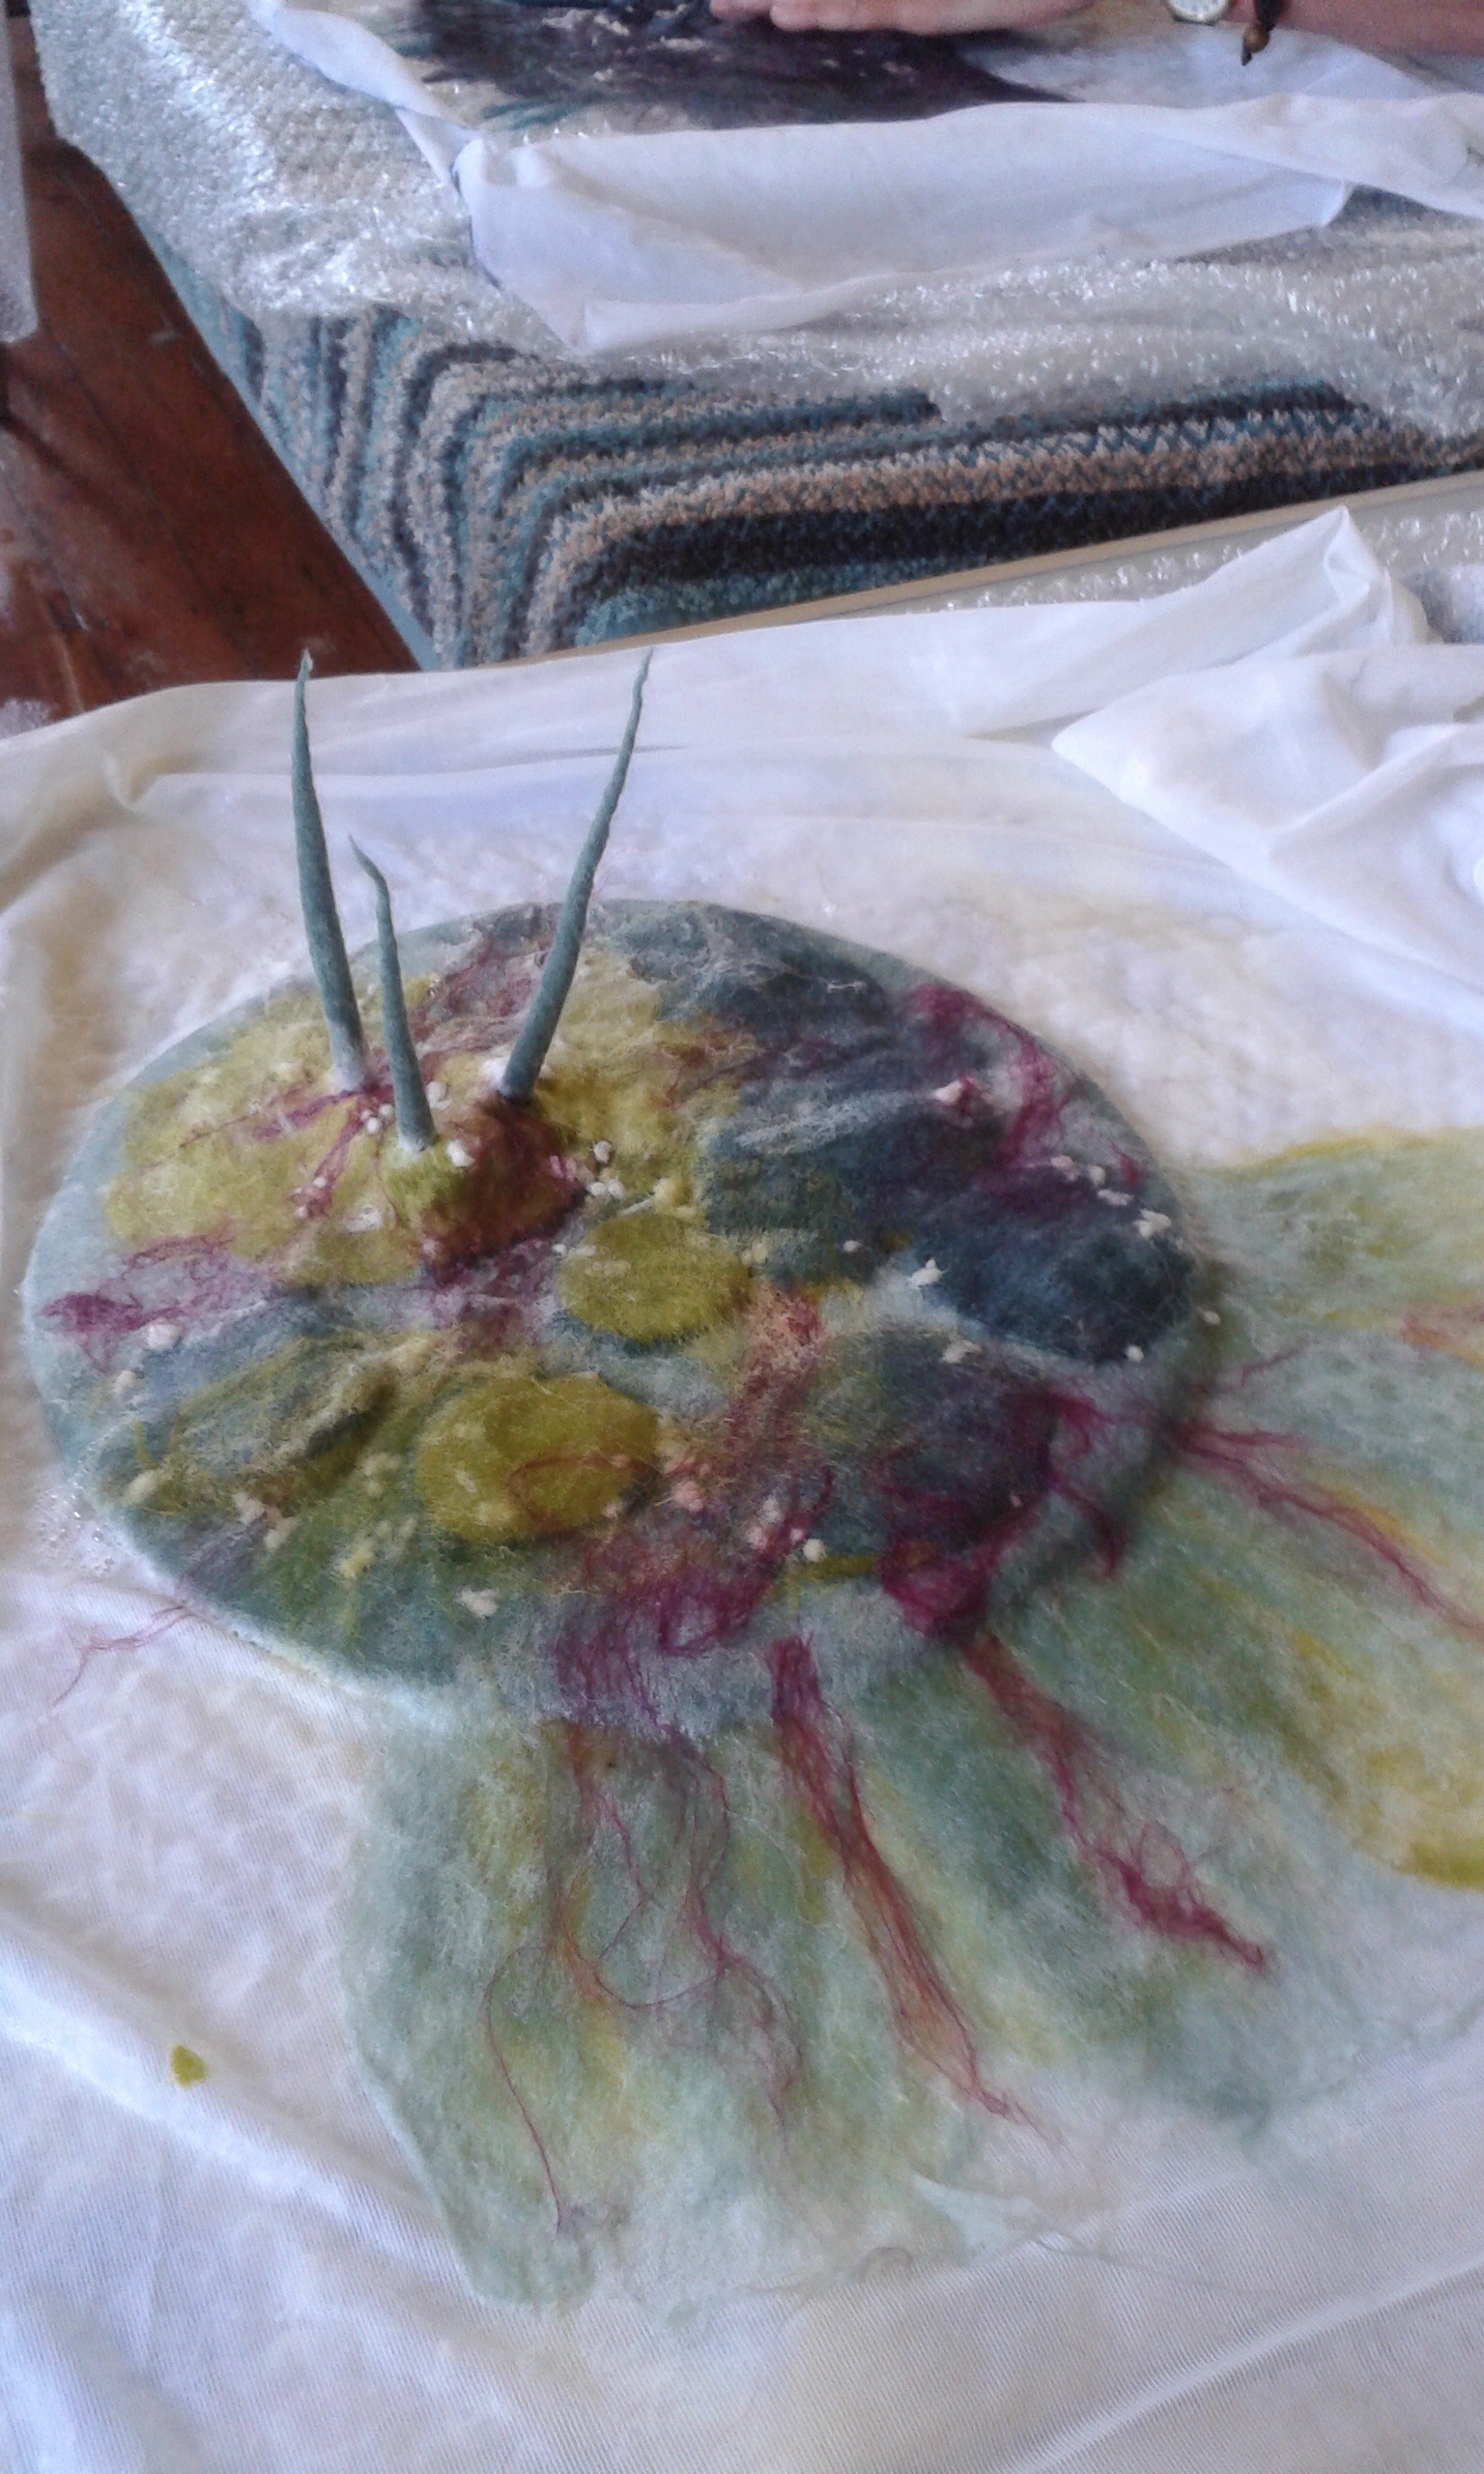
Using Merino wool, the background colours were laid out and wet felted to prefelt stage, then cut into smaller pieces, relaid and felted thoroughly.  This technique is one I particularly like and the one I used in memories of a Greek holiday.

Carded Merino is wet felted for the background.

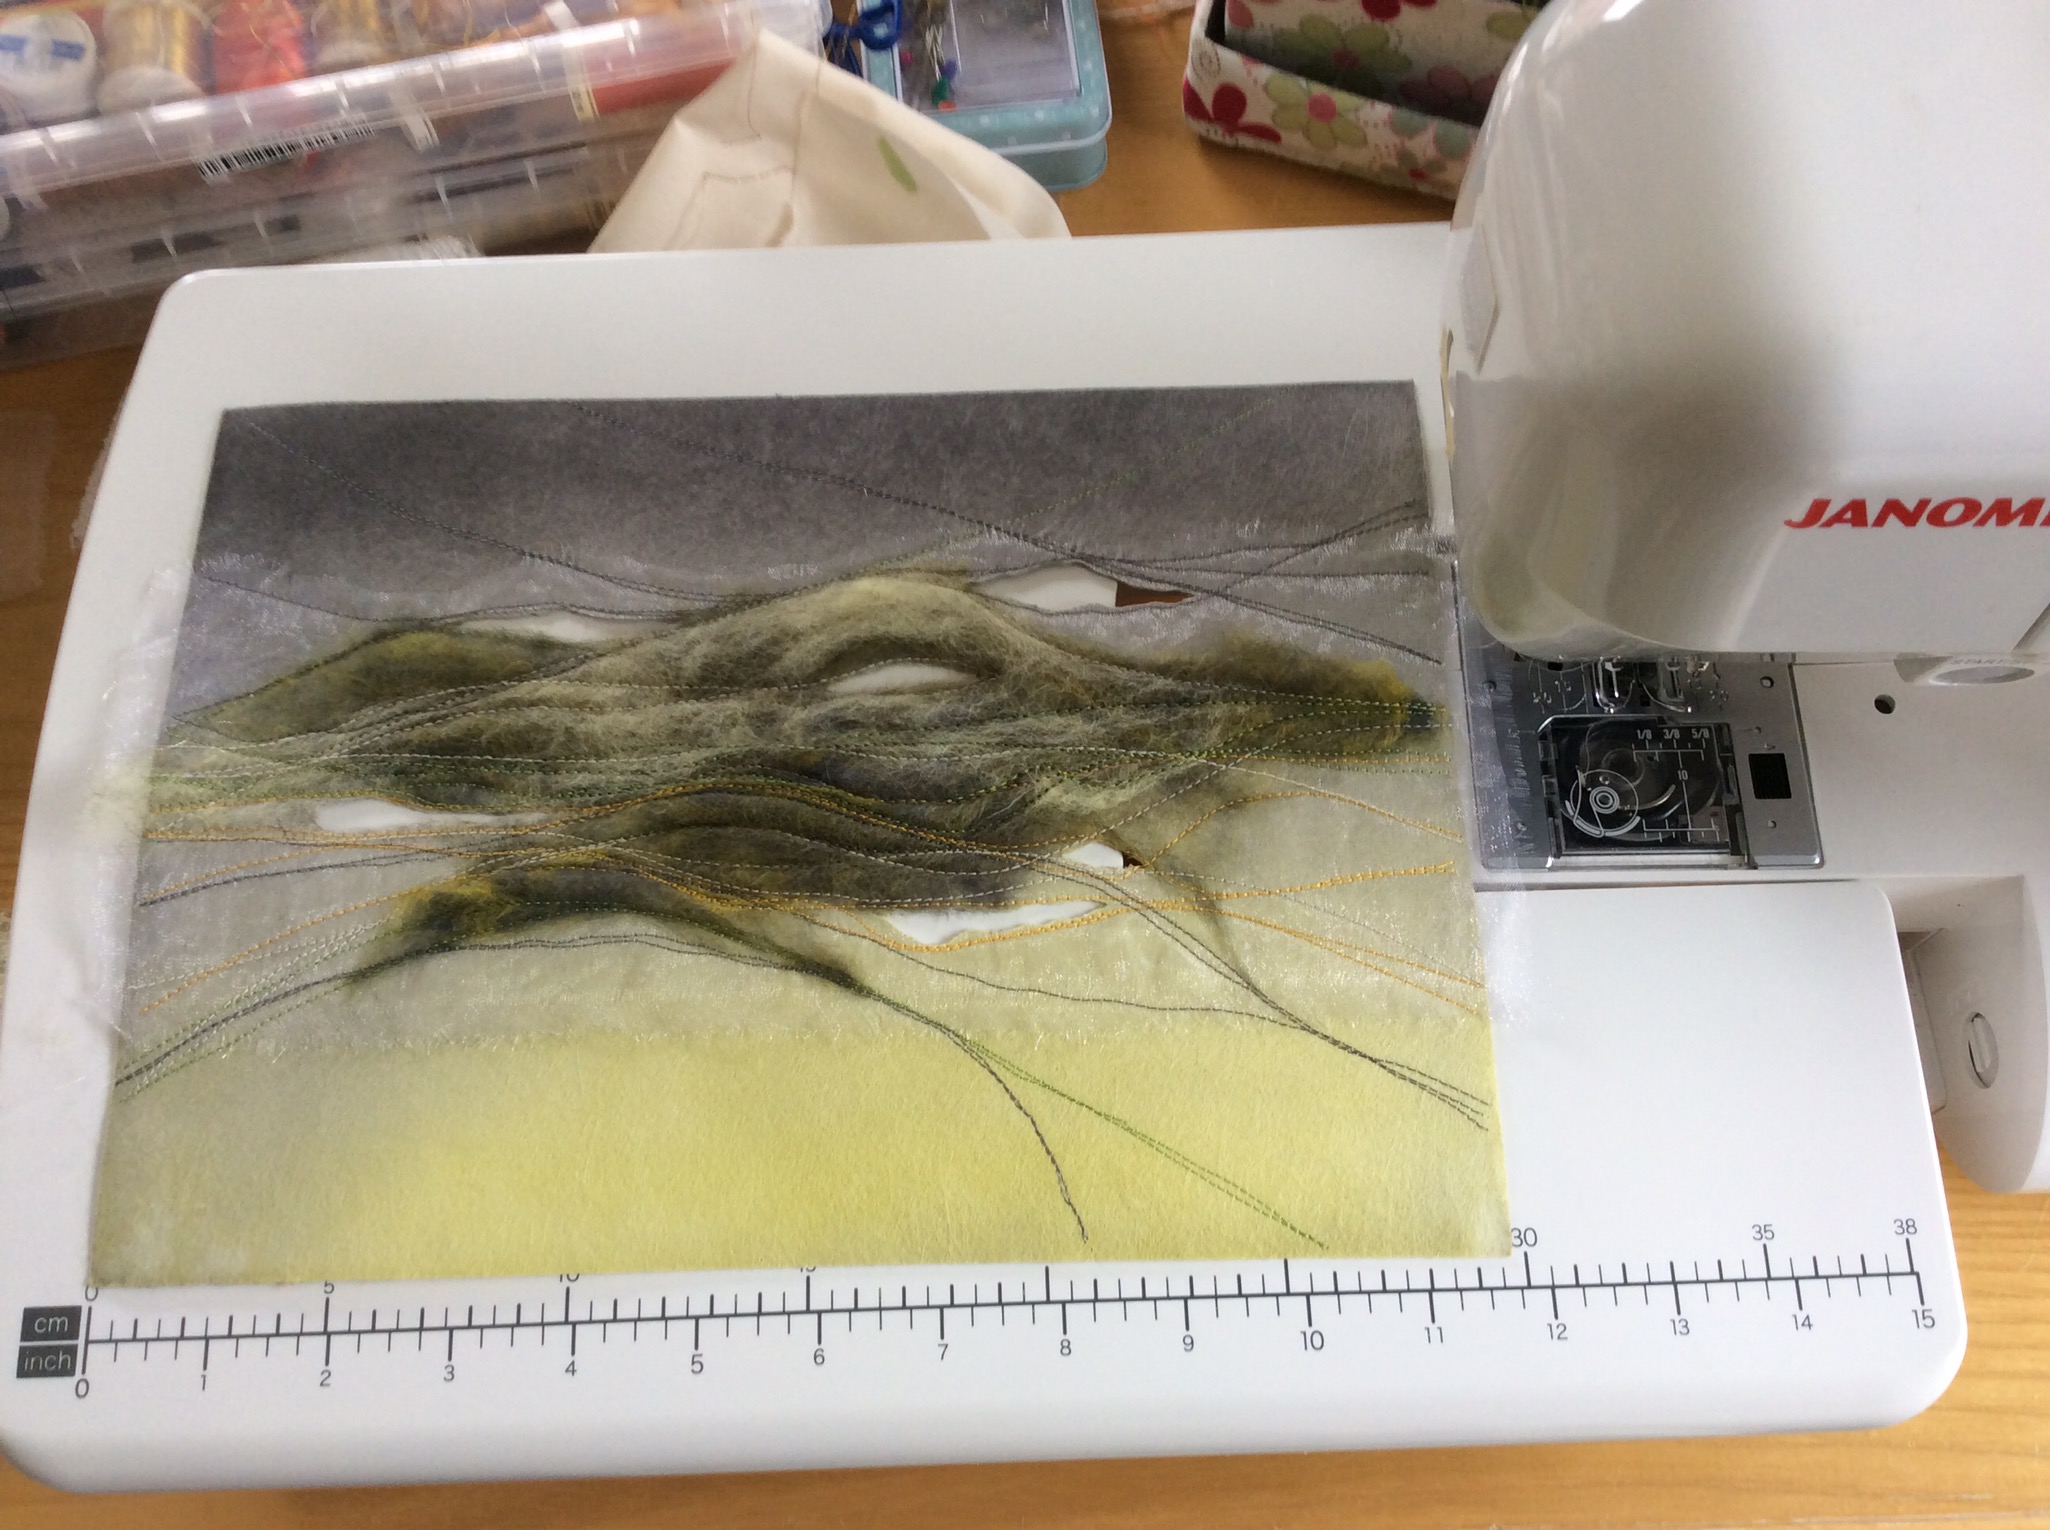
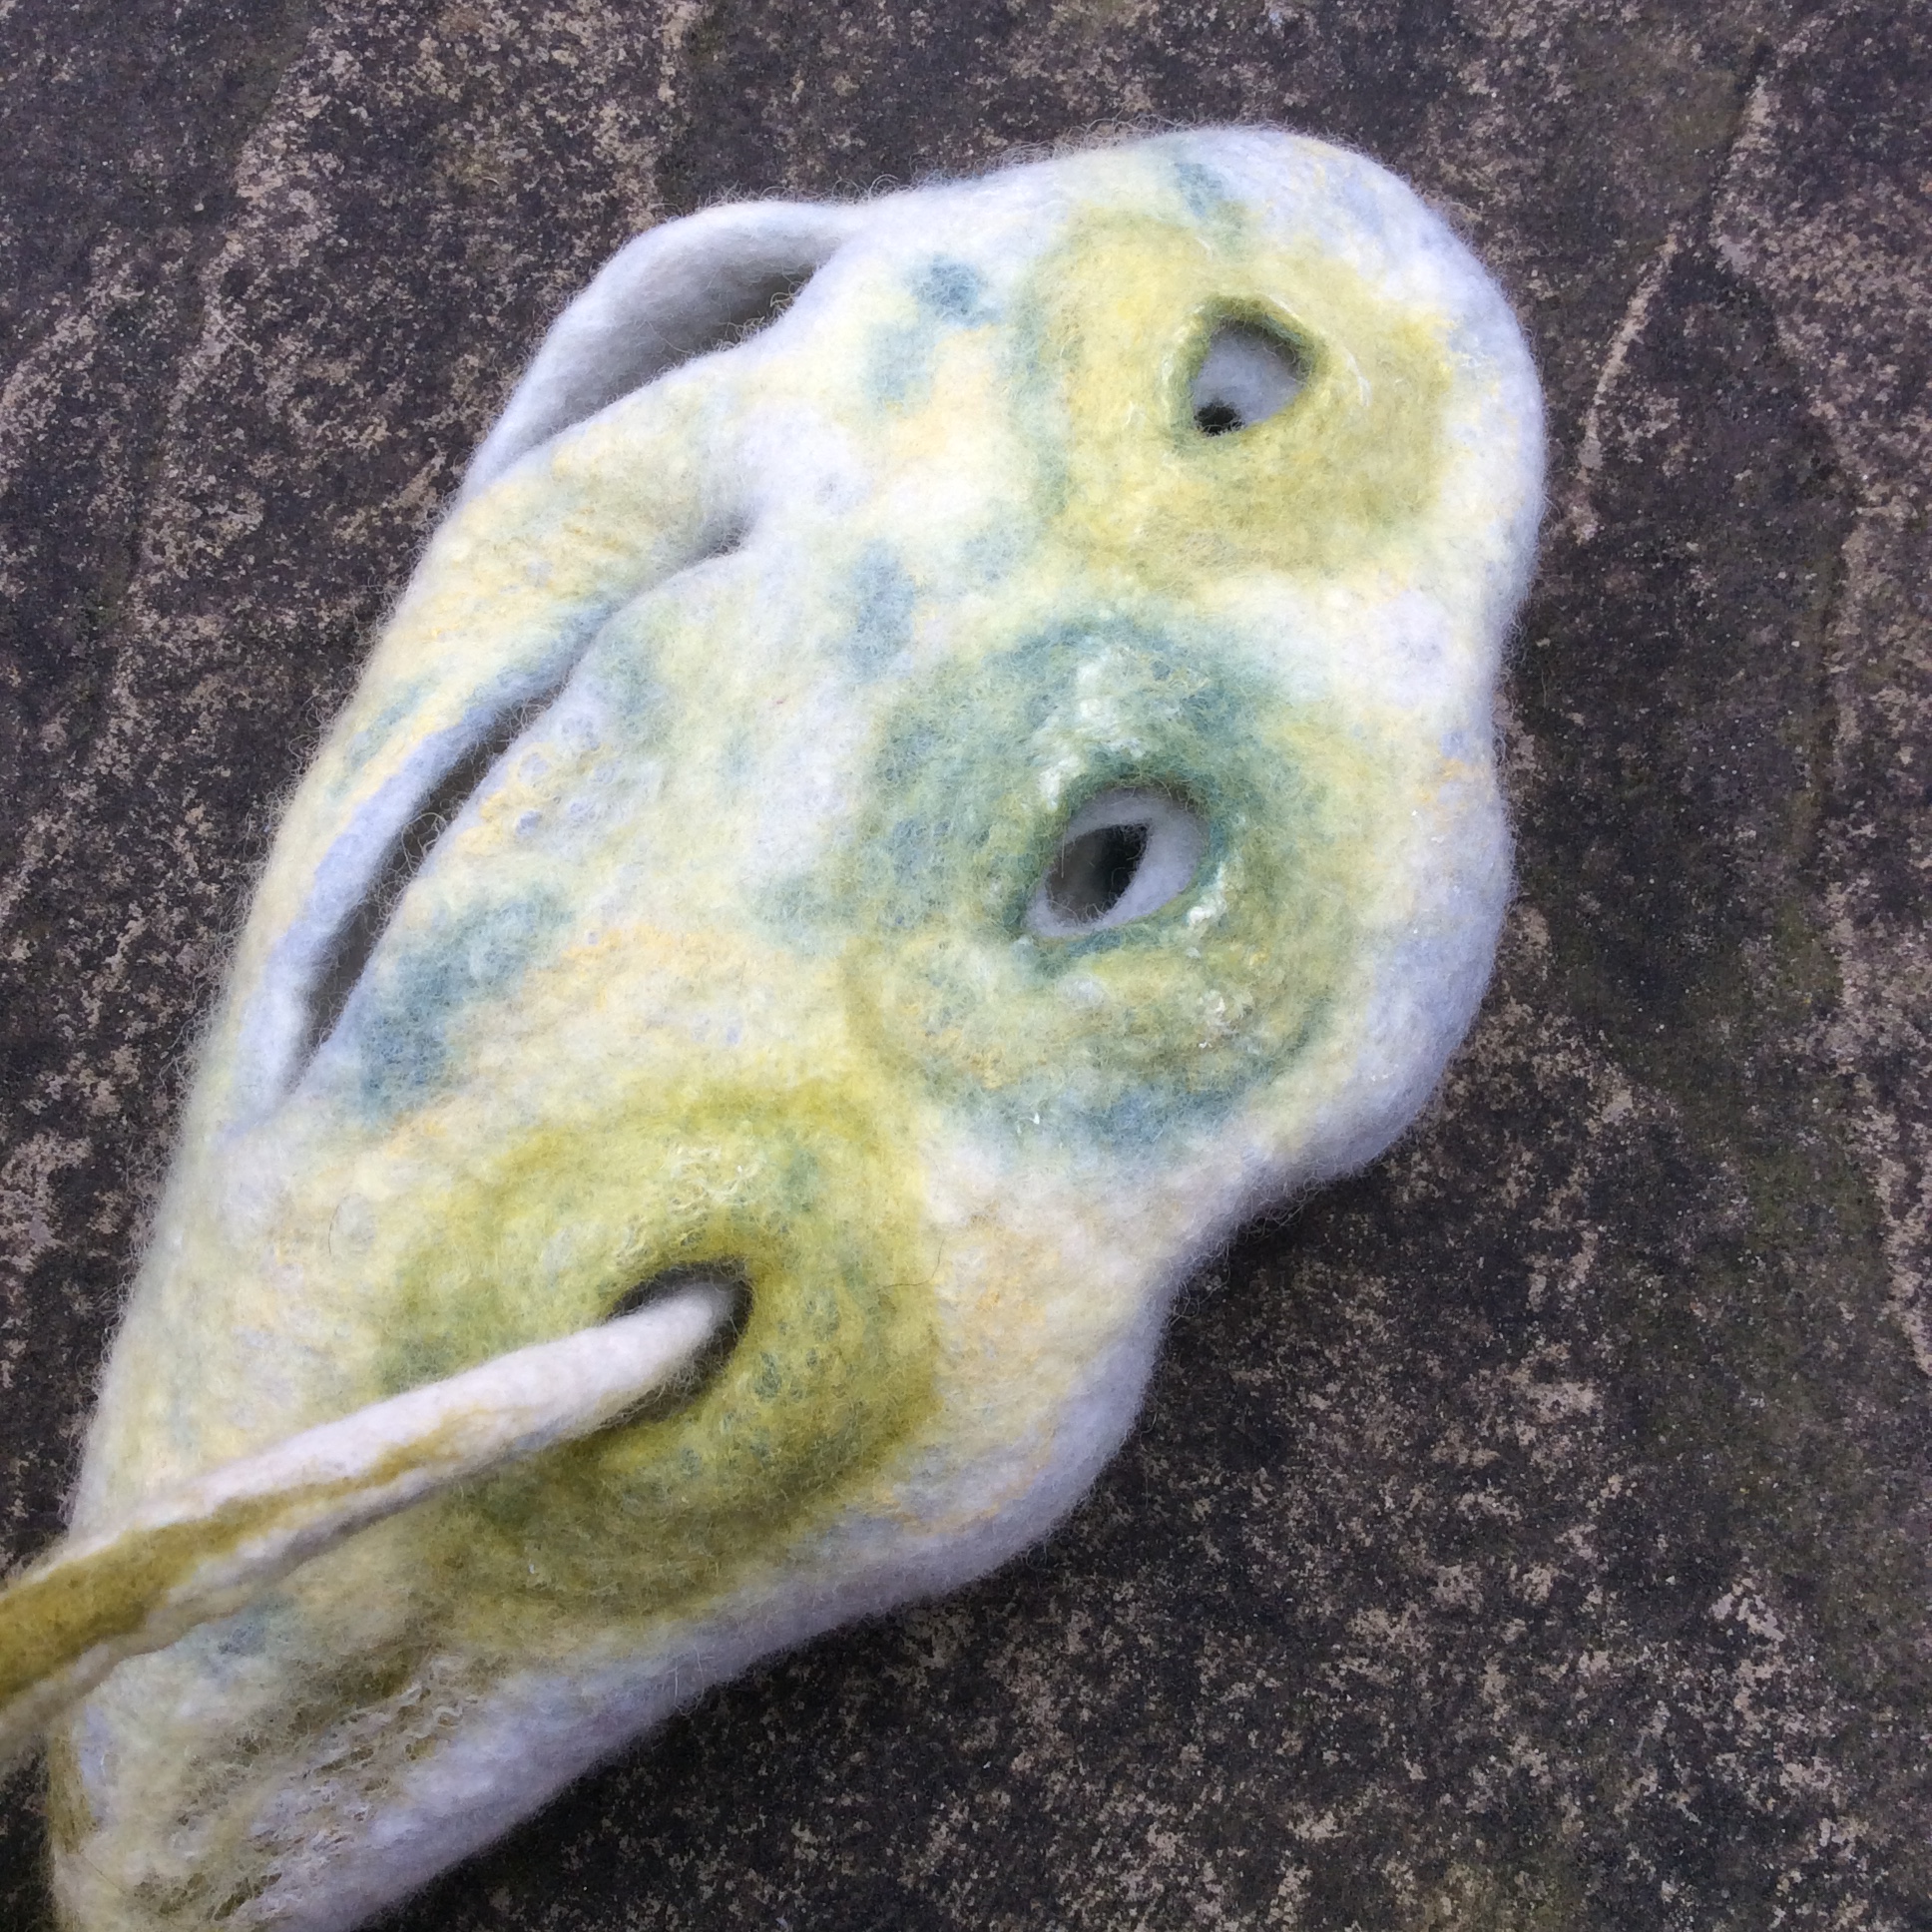
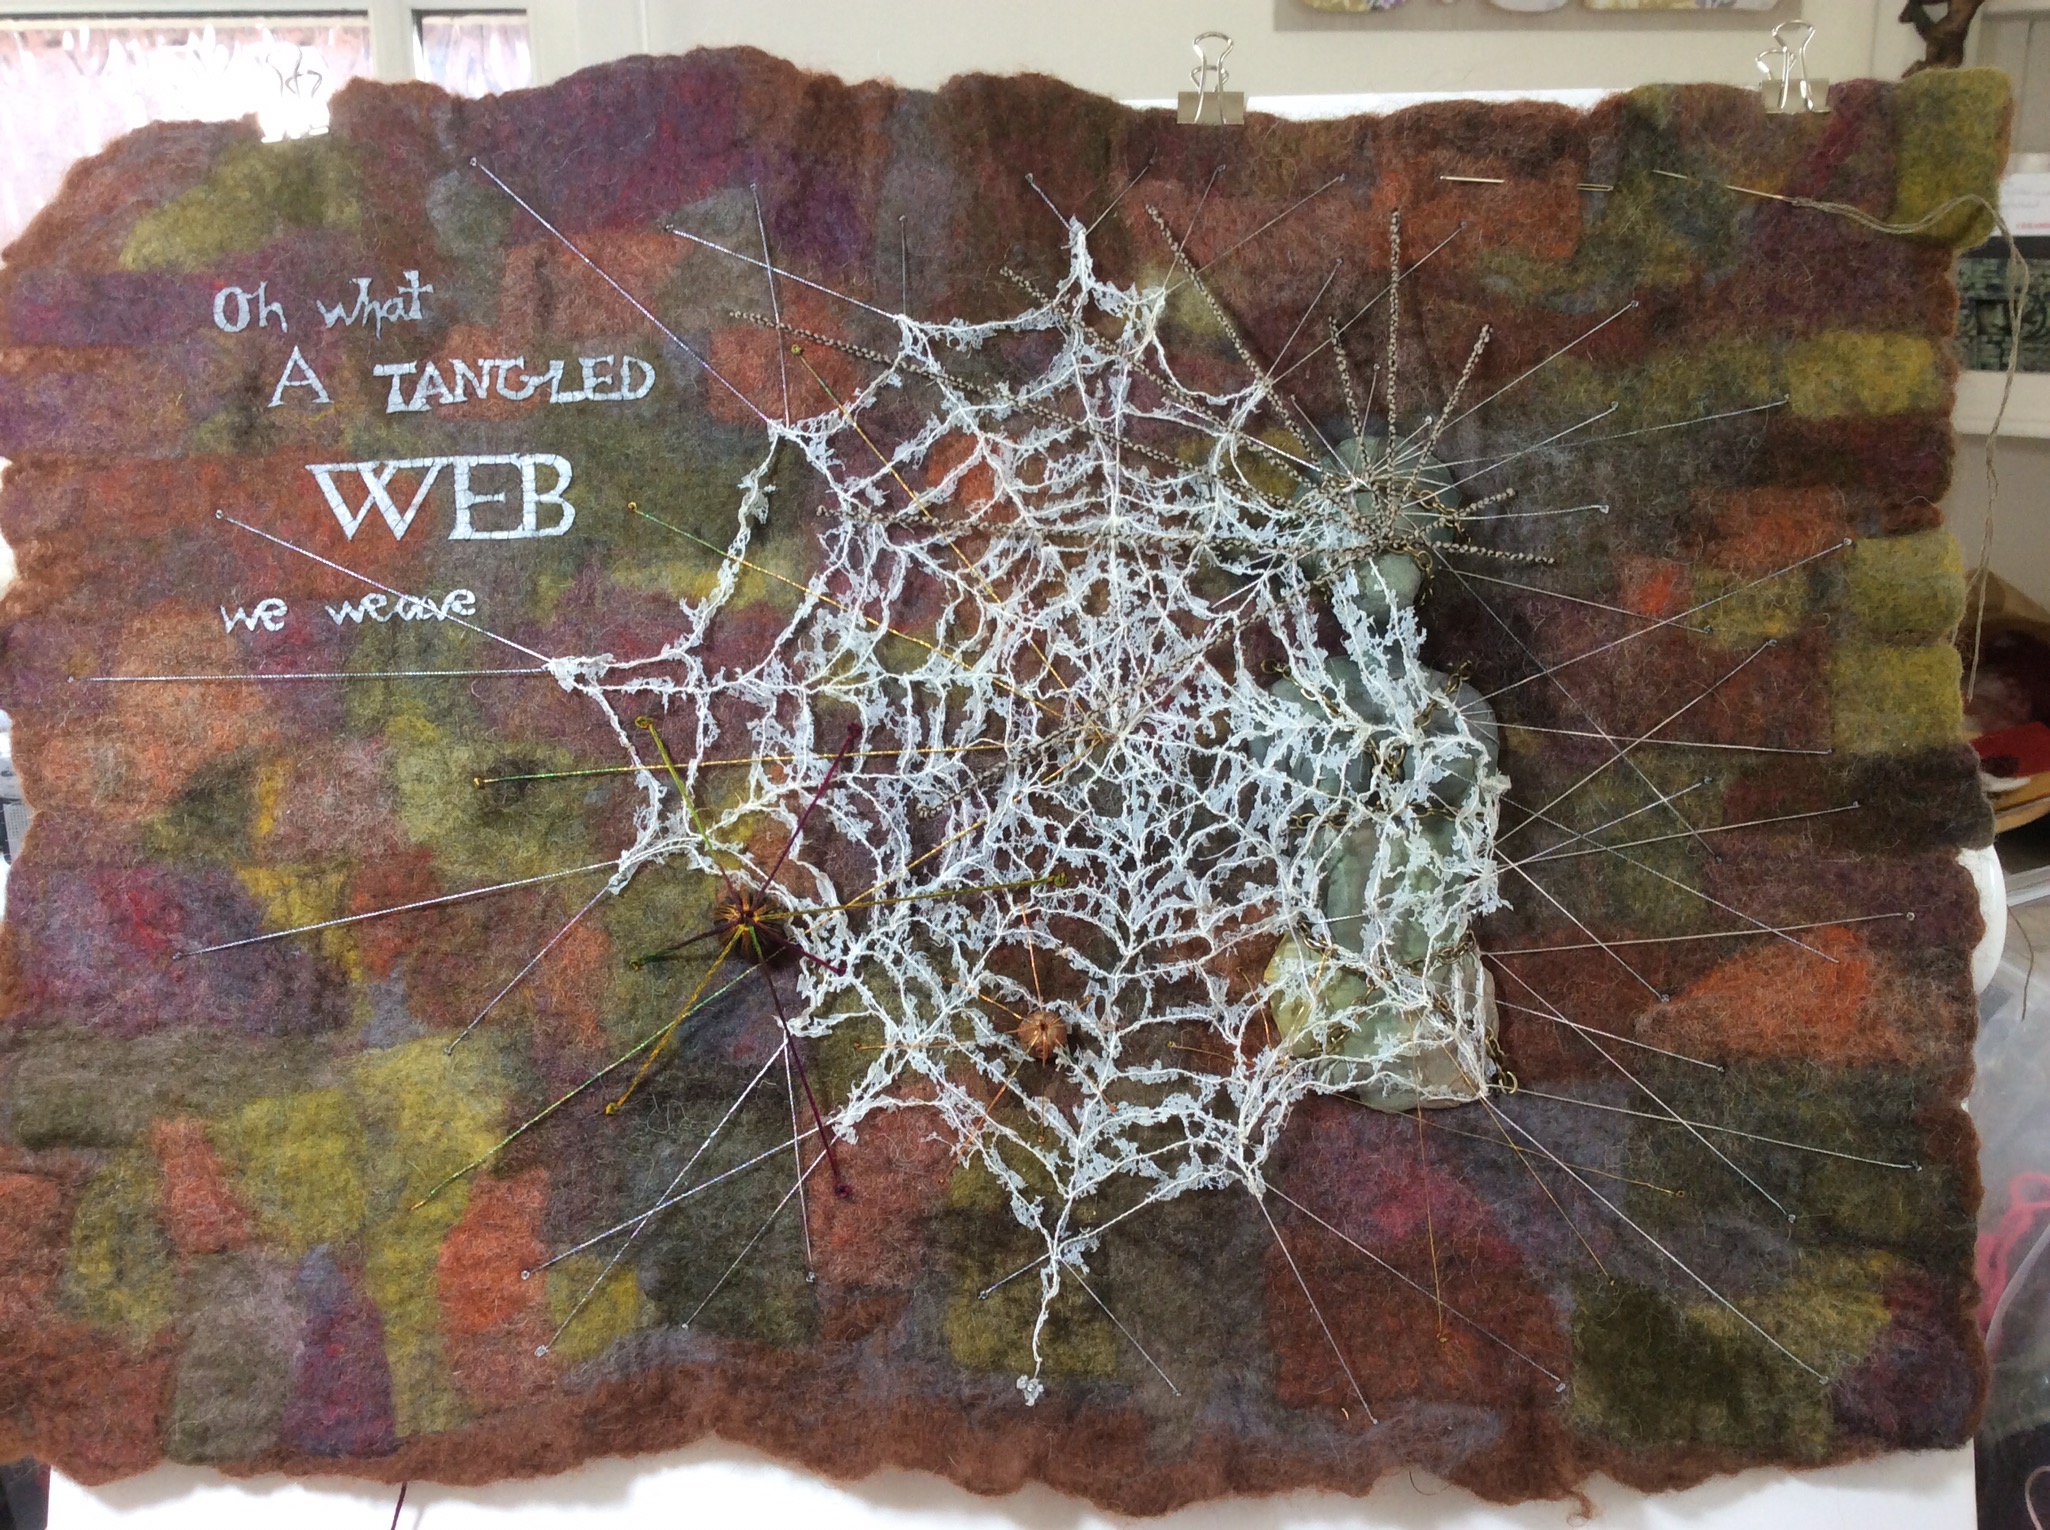
Constance’s head and torso were made from air dry clay and later painted with Inktense. The lettering was cut from Lutradur using a soldering iron and coloured with a permanent marker pen.  The first attempt at making a web was done with free machine embroidery on a soluable fabric and resulted in something that looked more like a fishermans net!   
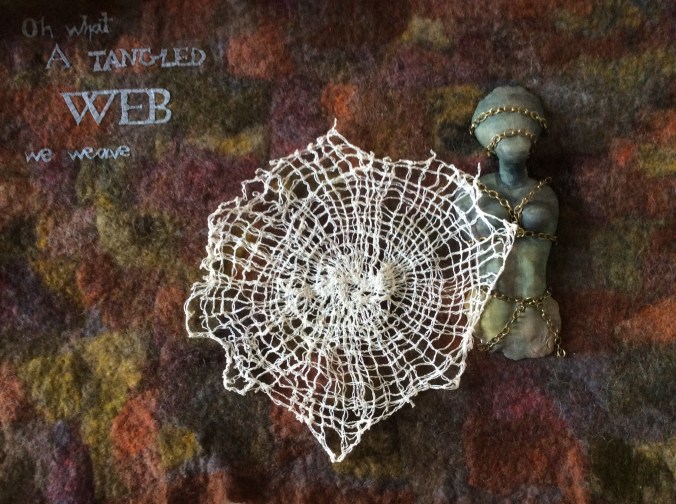
The second attempt was more successful using free machine stitching on Lutradur and burning it away with my heat gun. 
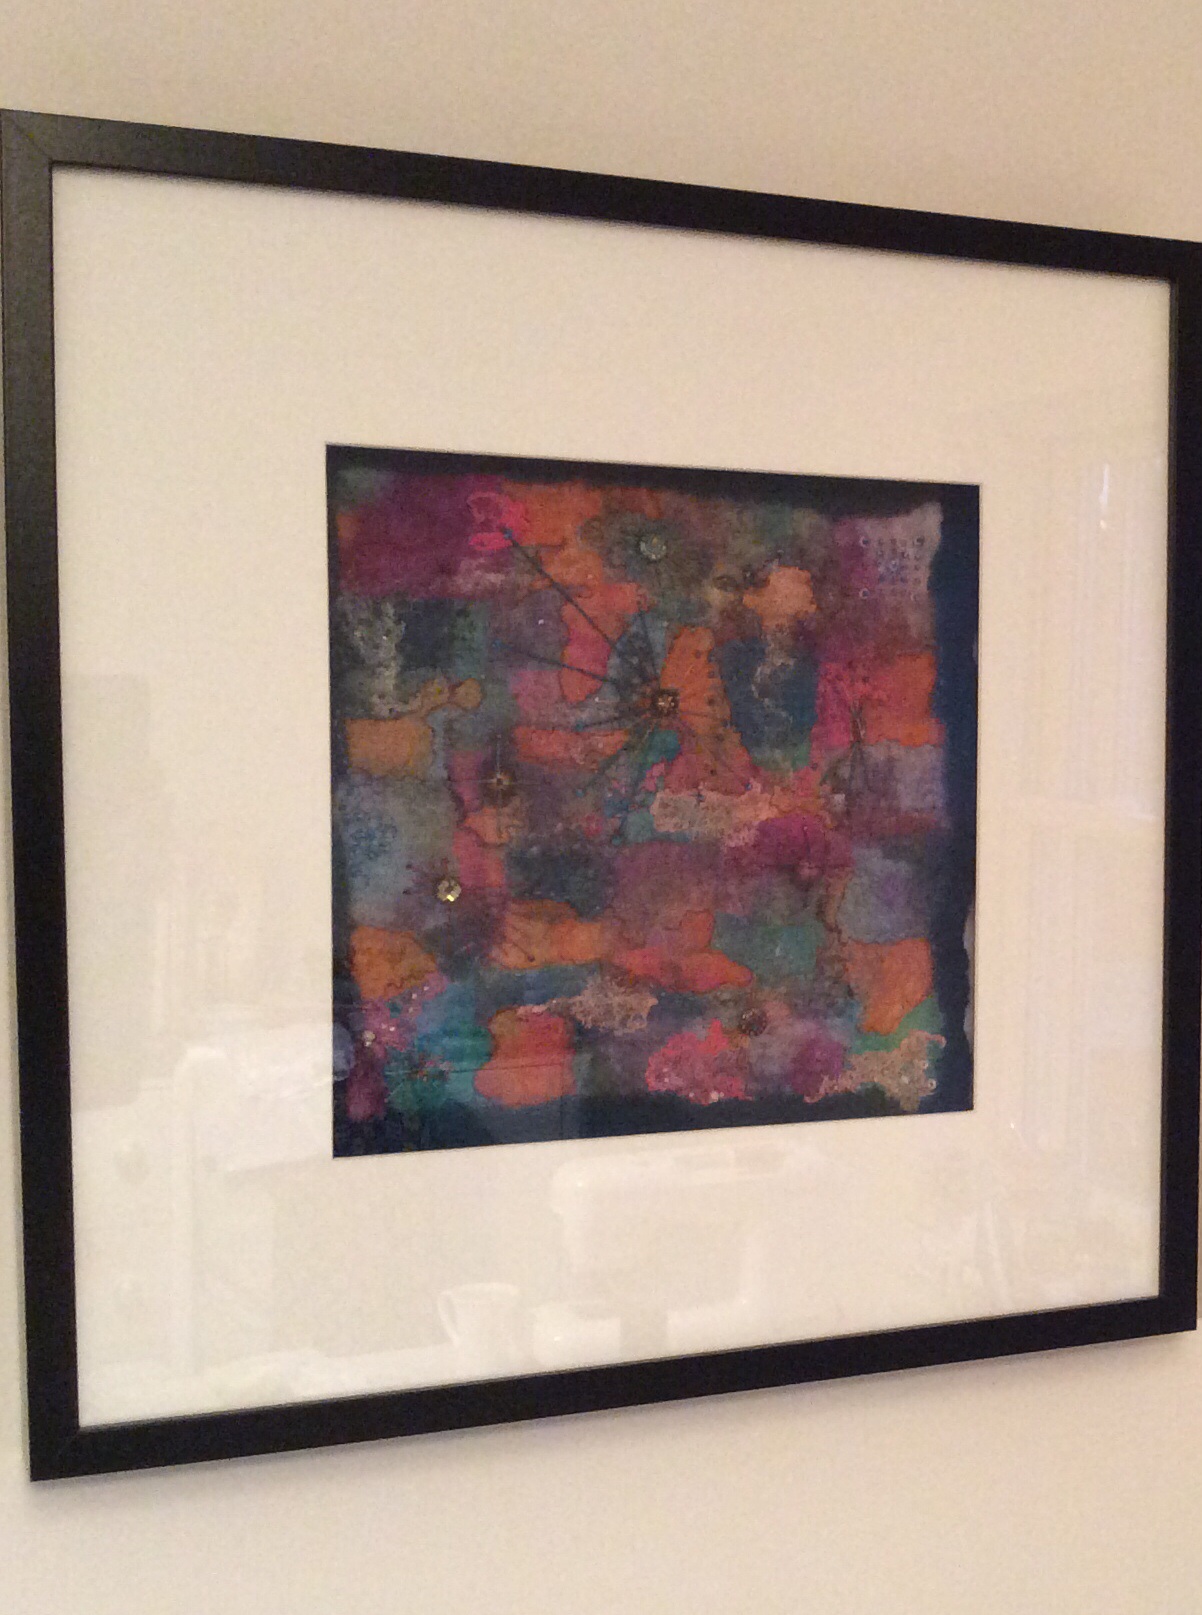
The finished quilt

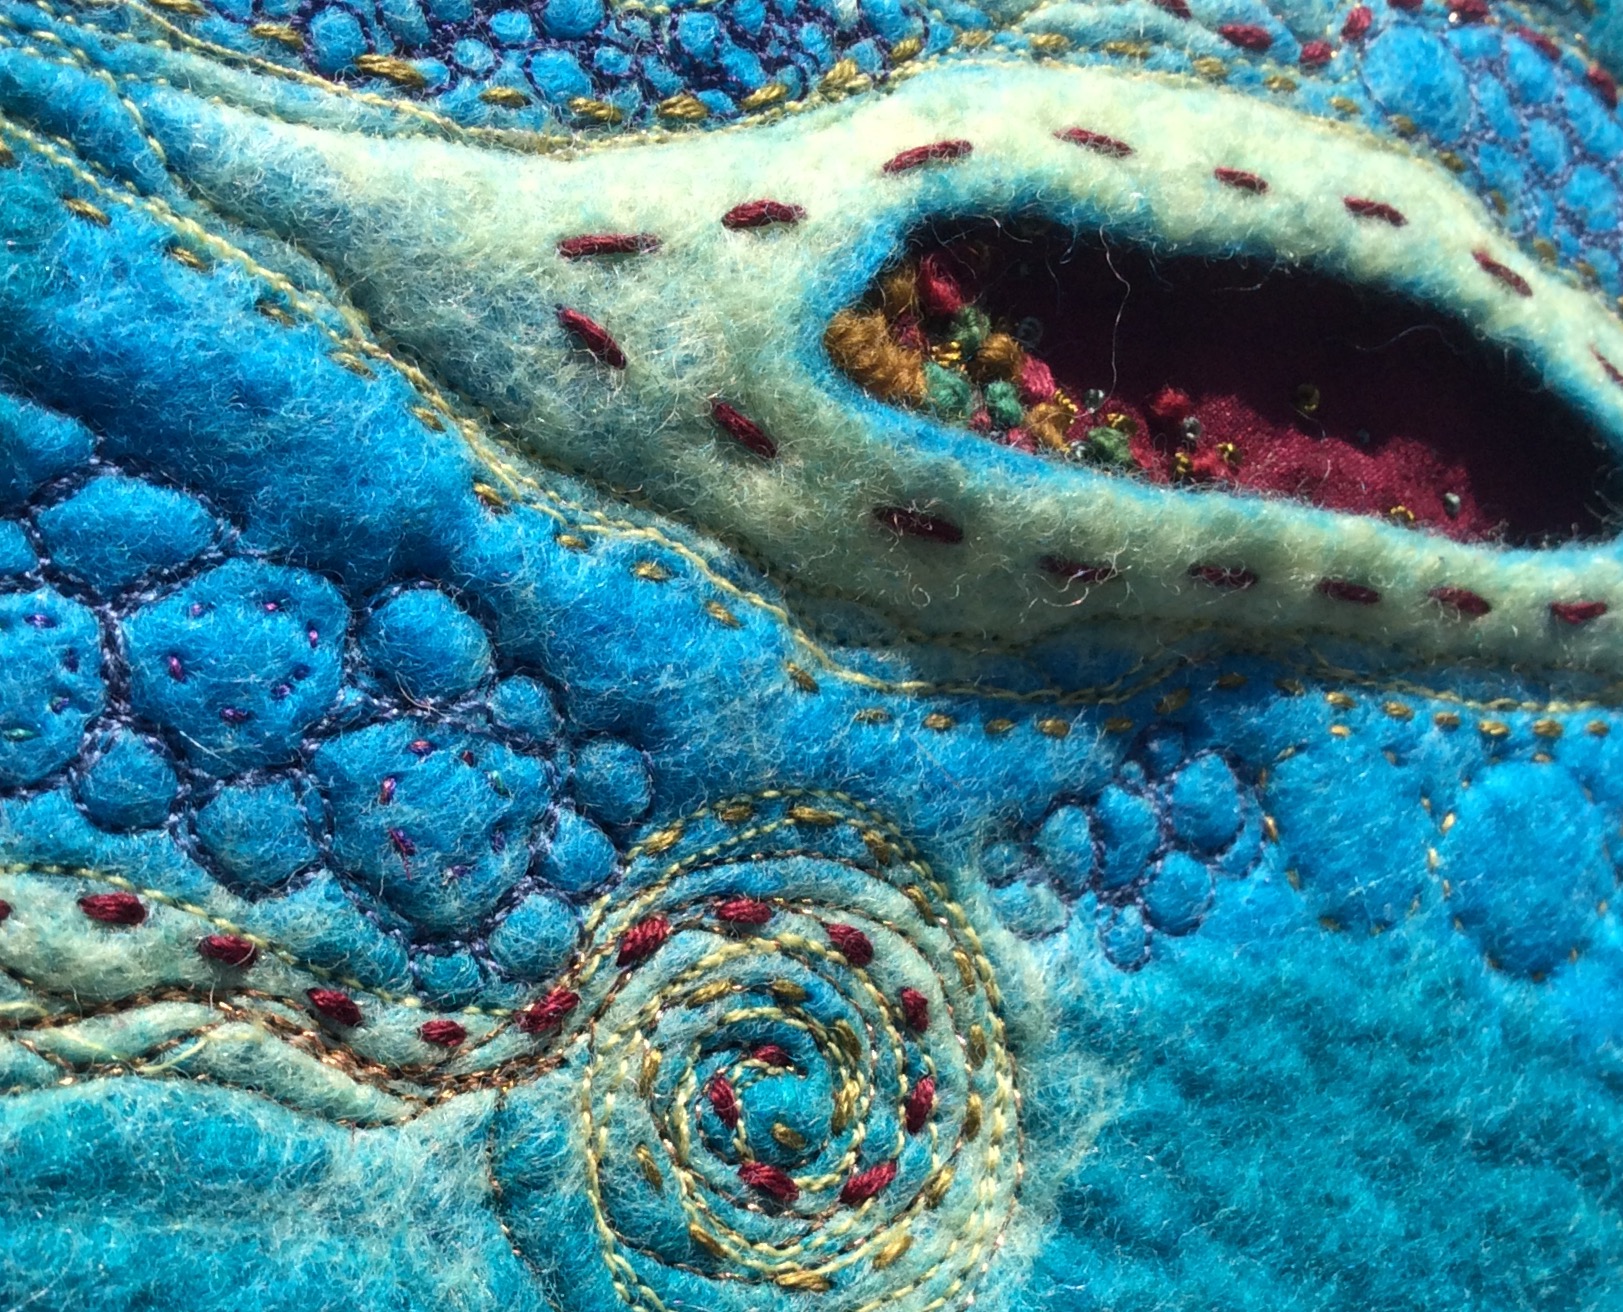
The background has been free machine stitched and hand embroidered with Colonial Knots.

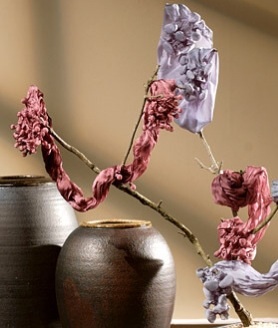
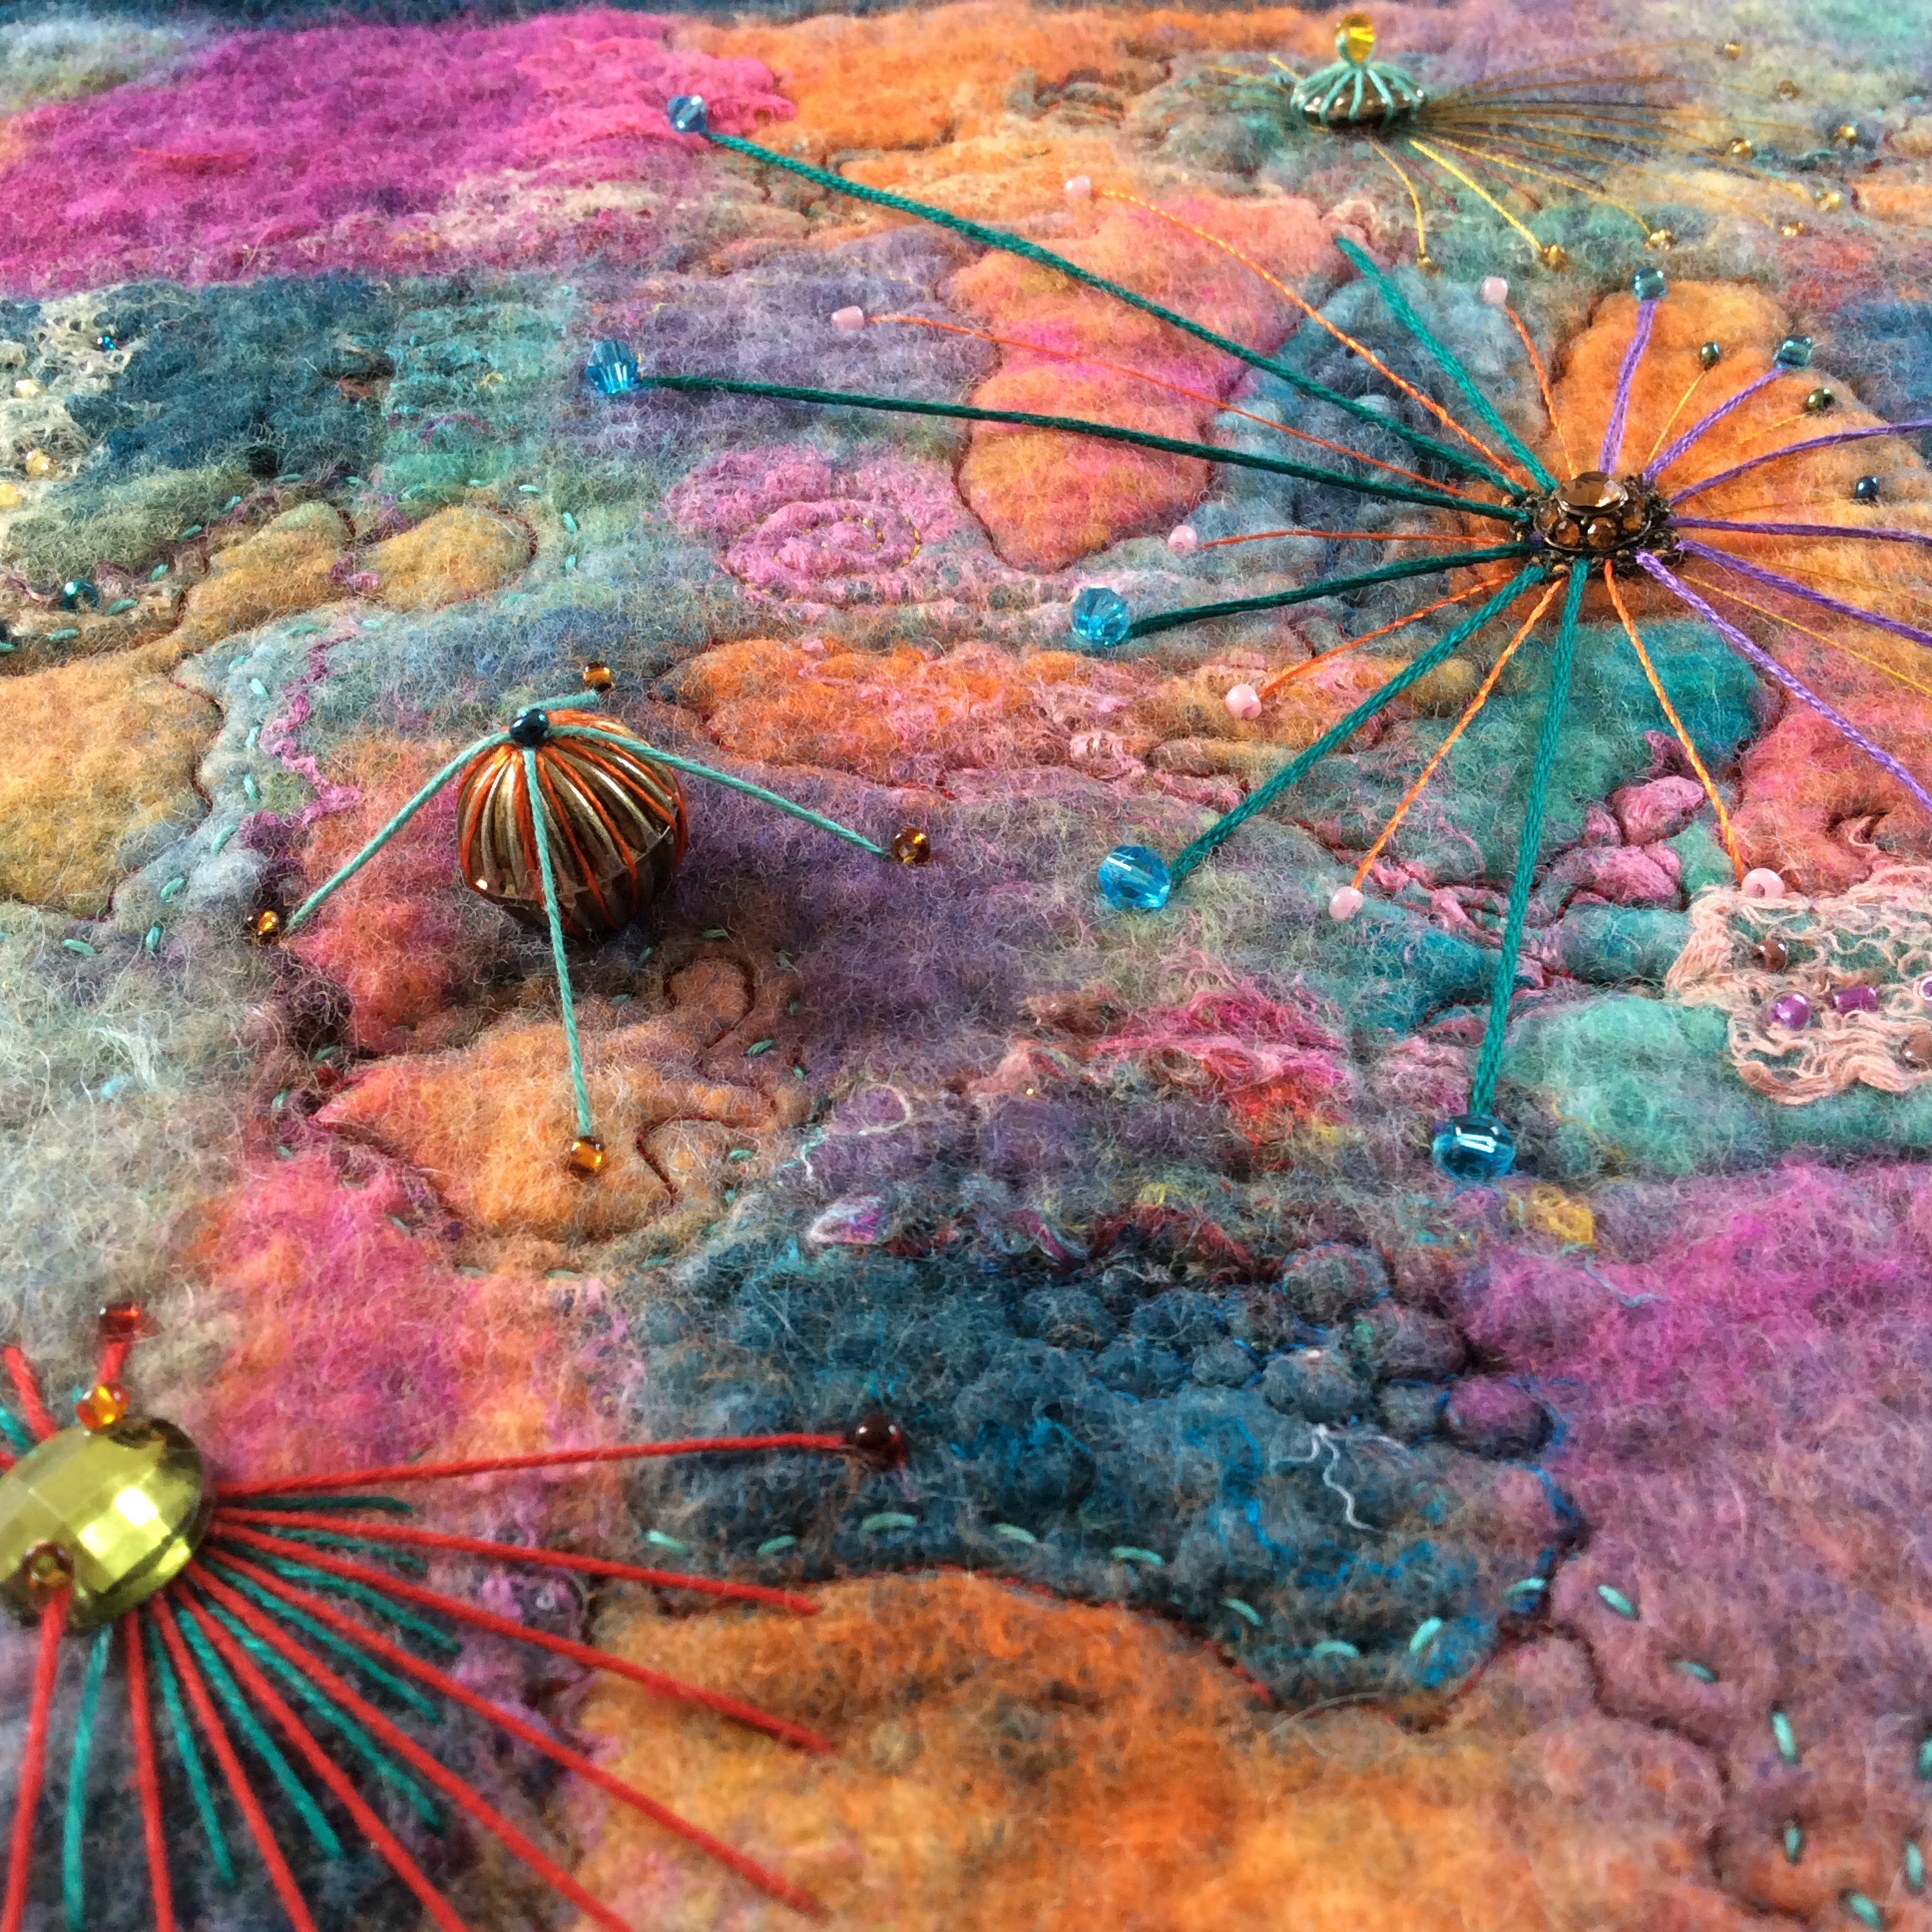
Detail from The Fate of Constance


Avanced Pod Workshop…..

Today I joined 8 other felting enthusiasts at the Village Hall in Hutton Buscle near Scarborough for Jenny Peppers “Avanced Pods” workshop.  I love Jenny’s classes, she’s a great tutor and explains/demonstrates every step very clearly as we work through our creations.

Two examples of Jenny's work displayed with the shells which were her inspiration.

Two examples of Jenny’s work displayed with the shells which were her inspiration.

We all started out with the same size/shape resist and selected our colours from the huge stash of Merino wool on offer.  We began by making a sheet of prefect using three different colours and this would be used to make “craters” in our pods.  Working with our prefelts and resists we started with our inner layer and worked outwards, layering our wool tops before adding the spikes and tails.

The resist is wrapped in white Merino and the spikes attached at either end.

My resist is wrapped in white Merino and the spikes attached at either end.

My top craters and embellishments are added

The top craters and embellishments are added to my piece.

The next stage was to place our outer craters where we wanted them and add silks, wools, snippets of prefelt, etc as embellishment before felting our spikes.

After lots of rubbing the dreaded rolling begins……and Jenny sees to it that her students don’t skint on the rolling!

Rolling, rolling and more rolling.....

Rolling, rolling and more rolling…..

image

Once again the company was great and day past very quickly with Jenny on hand to encourage, inform and see to it that we all manage to complete our work on time.

Two of the ladies had to leave early and unfortunately I didn’t get pictures of their finished work but here are the other seven.

image

image

Detail of my finished pod.

image

image

image

image

image

Shibori….colouring & manipulating fabric to great effect!

Following on from my little experiment with Shibori felting I thought I would share a few of the wonderful items I have found which feature this technique, both felted and otherwise.

Martha Stuart chiffon scarf.

Martha Stuart chiffon scarf.

Martha Stuart has instructions here for making this delicate scarf using small stones tied into chiffon.

Mrs Polly Rogers Bubble Scarf

Mrs Polly Rogers Bubble Scarf

Mrs Polly Rogers has instructions here for making this very chunky, felted bubble Scarf.

The World Shibori Network is a great place to visit to find out more about the techniques used in this ancient craft.  Michelle Griffiths is a professional artist/teacher, living and working in South Wales. She is the World Shibori Network representative for UK/Ireland. Her work is on permanent exhibition in her gallery/studio at Model House Craft & Design Centre, Llantrisant, where she continues to develop the shibori study centre with its shibori workshop programme, textile collection, and reference library.

AntiGravity Necklaces by Michelle Griffiths.

AntiGravity Necklaces by Michelle Griffiths.


Michelle Griffiths Bubble Wrap Fabric.

Michelle Griffiths Bubble Wrap Fabric.

I particularly like the ‘AntiGravity Necklaces’ and ‘Bubble Wrap Fabric’ while ‘Relief 1’ is absolutely stunning!

Relief 1

Relief 1

I also love the detail in the scarf below but unfortunately cannot remember where I found it!

Blue Shibori Scarf

Blue Shibori Scarf

Shibori felt samples….

Shibori is the Japanese technique of manipulating fabric by folding, squeezing, wringing or tying and today I was inspired to make a Shibori felt sample after seeing the one here that Ruth from Feltingandfibrestudio.com has created.  The texture and colour scheme Ruth used was very dramatic and I thought this could be a great technique for me to use in a seascape picture to represent waves.  I used two shades of blue Merino with the darker one on top and added some strands of pale blue knitting wool.  I stitched the folds in place before fulling and once dry removed the stitching and snipped some of the darker shade to reveal the pale blue beneath.  My piece isn’t as dramatic as Ruth’s but I am still pleased with how it worked out and can see it being a good technique to give my seascape a 3D look when I eventually get around to making it.

I made a second piece out of some green/yellow Merino prefelt and this time tied small beads into the felt before fulling.  Although I had a ‘pea pod’ in mind when I started it I wasn’t too sure how it would turn out.  I’m really happy with the result and I think there may be more Shibori experiments to follow shortly.

Felted peas in a pod


Mythical Map…


Abstract wet felted picture.I have recently had fun exploring colour and texture with another abstract wet felted project created with Merino wool.  This piece was started in one of Robyn’s workshops but as always I ran out of time so it was finished off and embellished at home.  Once it had dried I decided to decorate it using machine stitching to define the orange areas.  Once this was done, I randomly added a few old beads (from broken jewellery) and some hand embroidered stitching.  At this stage I thought the orange areas looked like land masses and the piece started to resemble a mythical ‘map’ with strange symbols which might indicate buried treasure or long lost civilisations.  I quite liked this idea so I played on this theme, adding more beads and hand stitching.


Detail of abstract picture

image

Close up detail showing beading and hand stitching on colourful wet felted picture.

Some of the beads I used were quite large so once it was finished the picture needed a deep frame.  Ikea sell RIBA ‘deep’ frames in 2 sizes (or maybe more?) which are perfect for displaying 3 dimensional work.  They are not expensive, available in black or white and come complete with a mount and fixings for hanging on the wall. I particularly like the black as these seem to create a more dramatic effect.

image


If at first you don’t succeed…

Wet felted bowls

Collection of wet felted vessels made at Jenny Peppers “Multiple Resist” Workshop.

Last Saturday I rode back up north to the beautiful little village of Hutton Buscel to take part in another of Jenny Peppers felting workshops. Once again it was a lovely day with good company, excellent tuition from Jenny, and lots of hard work from the “students”, but with great results all round.
This was Jenny’s “Multiple Resist” workshop, in which she demonstrated how to create a bowl with the illusion of two smaller bowls inside it. As with Jenny’s last workshop, we all began with the same size and shape of resist for our vessel but you can see from the photos, the end results were all very unique, which was brilliant.

The first layer is cut away to reveal the colour below.

The piece has been rubbed and rolled and now the first layer is cut away to reveal the colour of the layer below.

One of the bowls taking shape.

One of the bowls taking shape.

I chose to use a subtle colour scheme of greys and yellows and added snippets of yellow knitting wool and cream silks as embellishment.

My bowl was looking more like a beret at this stage.

My bowl was looking more like a beret at this stage.

Some of the other ladies made fabulously colourful bowls and some added extra interest by shaping the openings rather than leaving them circular.

A beautiful bowl with an unusual shaped opening.

A beautiful bowl with an unusual shaped opening.

image
image
The following photos show what a difference the workshops with Robyn from Feltybits and Jenny have made to my work. One of the key things I have learnt about making vessels is the importance of basic rubbing and rolling to strengthen the felt. My first little bowl was so poorly felted it could hardly stand up on its own but I am glad it didn’t put me off. I am a big believer in “if at first you don’t succeed….”

First attempt at a wet felted bowl...it can only get better!

My first bowl…a bit fluffy and floppy and very poorly felted!

Blue Merino Bowl.

Wet felted Merino Bowl – 2nd attempt and feel like I am getting somewhere!

Wet felted bowl made with multiple resists.

My multiple resist bowl – worlds apart from the first, flimsy vessel!

Spiky Vessels Workshop…

Eight of the finished vessels displayed on a window ledge. looking particularly alien-like

A few of the awesome finished vessels!

Several months ago I discovered a website showcasing the fabulous work of a lady called Jenny Pepper.  I was very excited to see that Jenny holds workshops, not a million miles away, and immediately got myself booked onto two of them.  Earlier this month I rode up to Scarborough to attend Jenny’s ‘Spiky Vessels’ Workshop which was being held in the beautiful village of Hutton Buscel, just a few miles outside of Scarborough.

The fibres have been laid for the basic vessels and now the spikes and craters are being added.

Hard at work applying the spikes and craters.

The workshop was fun, informative and very inspiring.  Jenny demonstrated various techniques for creating spikes, holes, craters and frills to add to a 3-D vessel.  The day was very well structured but at the same time the session was quite relaxed and we were encouraged to work at our own pace rather than trying to keep up with each other – great for me as I always seem to be the last to finish!  It  was fascinating to learn how useful ‘pre-felt’ can be and since coming home I have made myself quite a supply of it in various colours ready for future projects.  The pieces we made were really designed to be ‘samples’ but I think we all came to see them as more than this once they were finished….they seem to have an alien quality and every one of them was unique.

Adding the frill to the vessel

My vessel in the making

It was a great day all round and lovely to meet the other felters.  I am looking forward to meeting up with many of them again at Jenny’s ‘Multiple Resist Workshop in July.

My finished 3D vessel complete with spikes, holes and craters

My finished vessel