I’ve been playing with the Tyvek again and this time I had a go at machine stitching the fabric, using the embroidery foot and a metallic thread, onto a metal framework which I made in the shape of a leaf. I tried colouring it with different mediums and discovered that acrylic paint and felt pens seem to work just as well as the fabric paints. I love the lacy effect that can be achieved when heat is applied and, having seen the way the shadow is cast on this photo, I am thinking that using this technique I could make some beautiful votive’s.
Author: Karen Lane
Getting Creative With Tyvek…
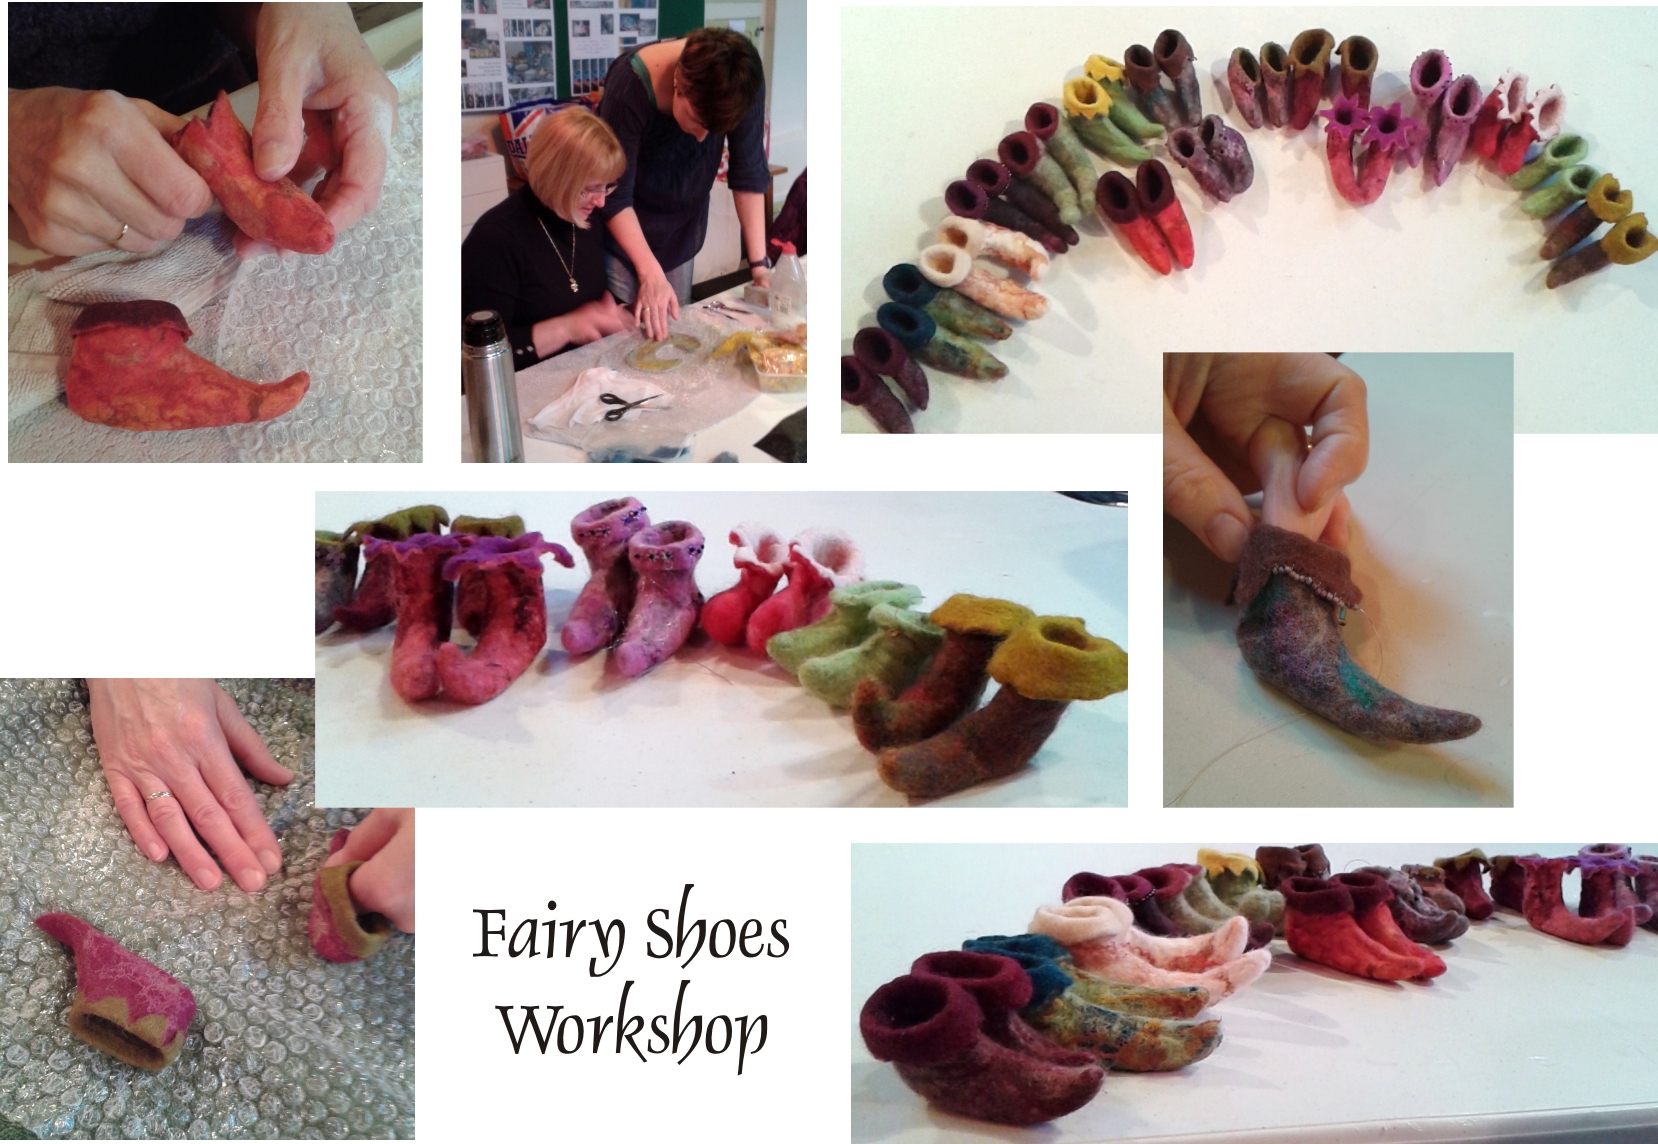
Last week I discovered an exciting new (to me at least!) ‘crafting’ product and, having tried it out yesterday, I thought it worth a mention here. 
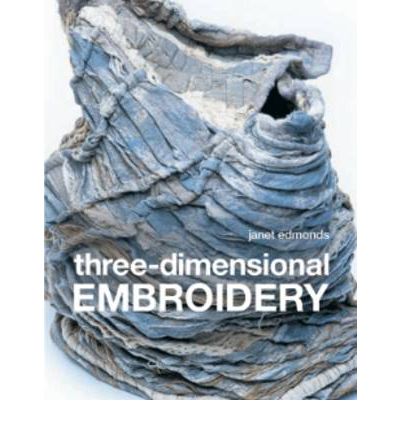
My discovery came about as a result of buying a book from The Book Depository called ‘Three Dimensional Embroidery‘ by Janet Edmonds.
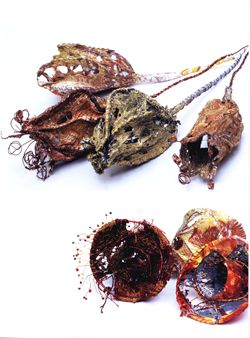
It’s a fabulous book packed with the most inspiring illustrations imaginable and great ideas for creating all manner of things with different types of fabrics. Chapter 5 is all about using ‘manipulated methods’, distorting fabric to create form and texture, and includes a beautiful photograph of what looks like decaying seed pods. The caption says they were made from fine-weight Tyvek but, although I loved what I was seeing, it didn’t mean a thing to me! This changed a couple of days later when I was visiting
Crafty Notions in Newark and, lo and behold, there on a shelf near the felting supplies, I spotted a bag of Tyvek…fate or what? It seems I was meant to try this stuff out!
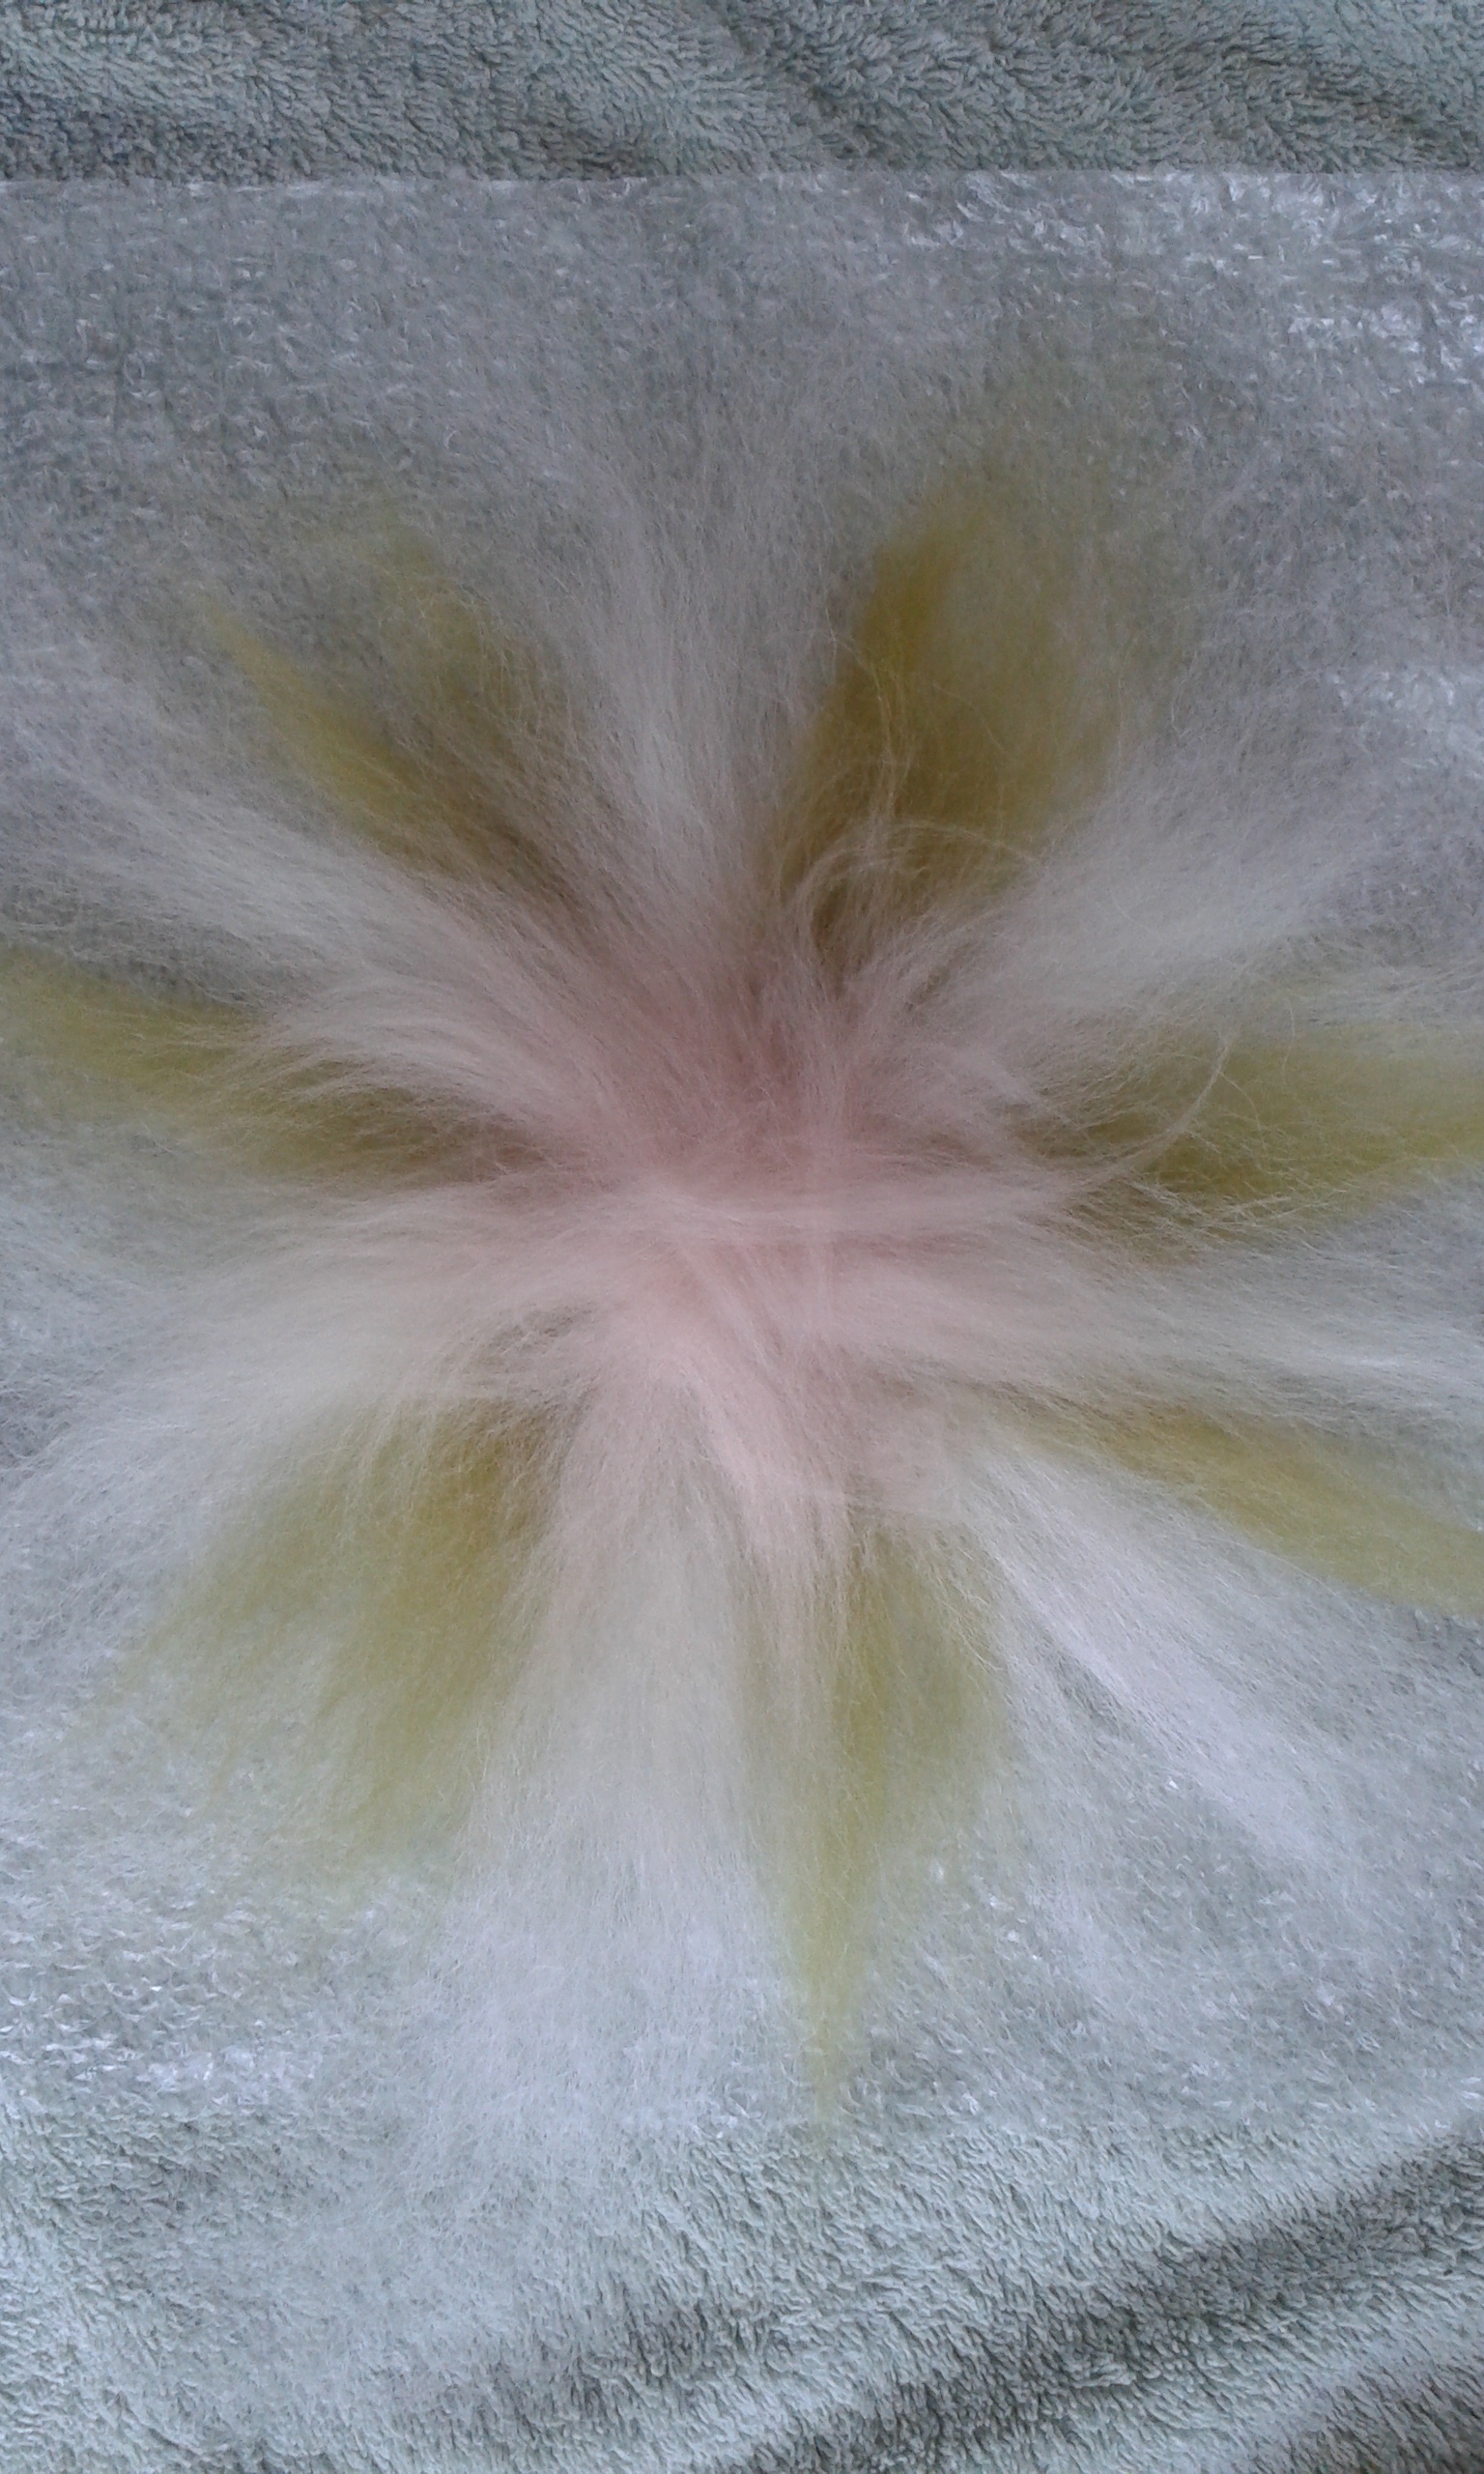
So, for the uninitiated, what is Tyvek? Manufactured by DuPont, it’s an extremely durable, man-made fabric, available in different weights. Being light-weight but very tough, breathable and water-resistant, one of its most popular applications is in the construction industry. Other uses include industrial packaging, signage and protective workwear. Its characteristics make it an ideal choice for crafting as it can be coloured using fabric paints, acrylic paint or felt pens. It can also be die-cut, laminated, embossed, printed onto and stitched, but the real fun begins when you apply heat to it. This will cause the fabric to shrink and bubble and, if you apply sufficient concentrated heat, holes will appear creating a beautiful, lacy effect. I found you can produce some fabulous distressed effects using a heat gun, clothes iron or soldering iron (I didn’t have the latter so I simply held a piece of wire in my pliers and heated it over a gas ring!).
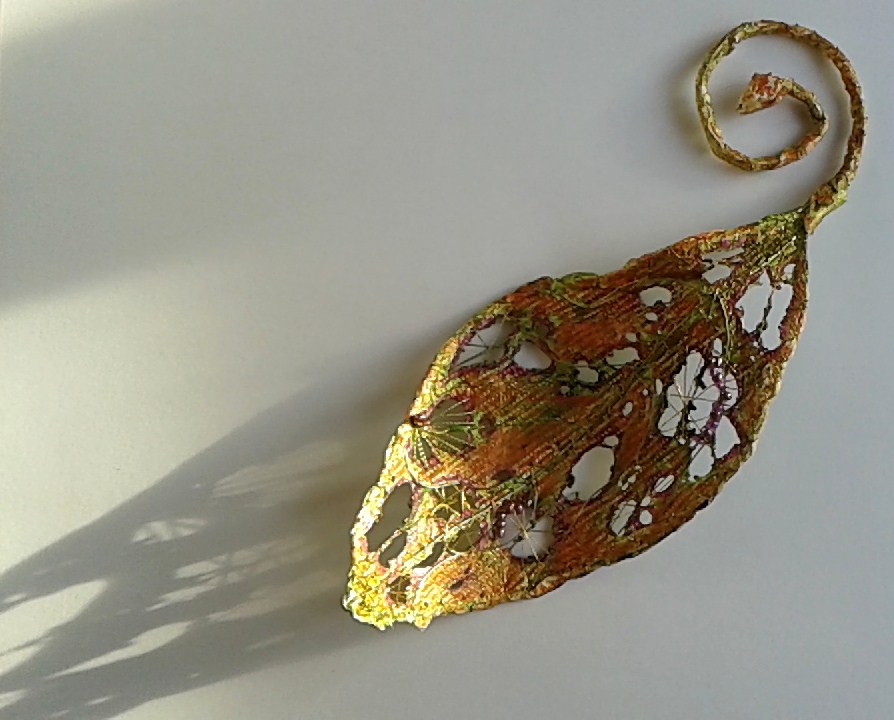
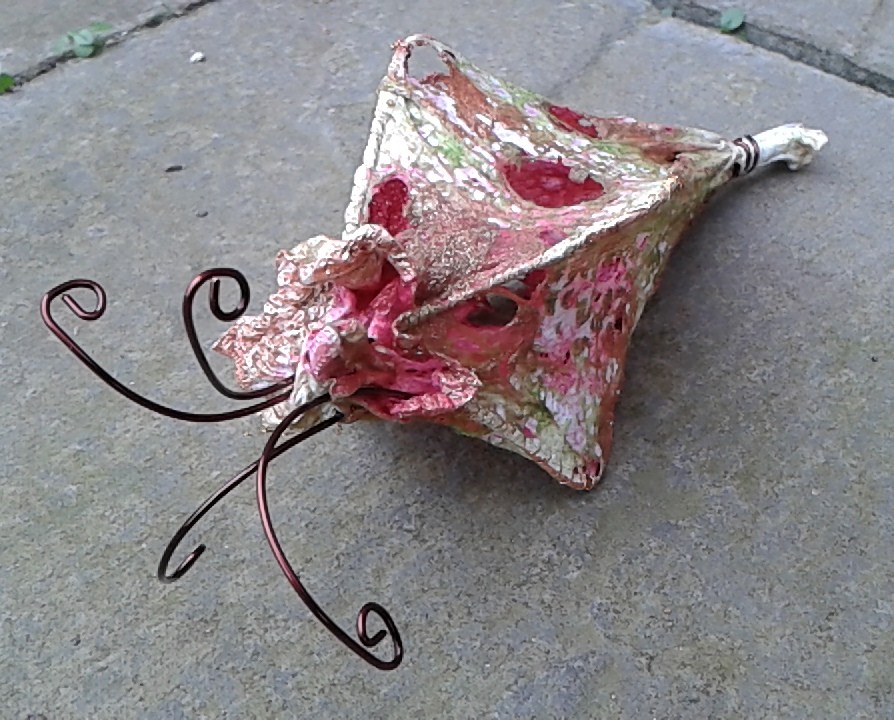
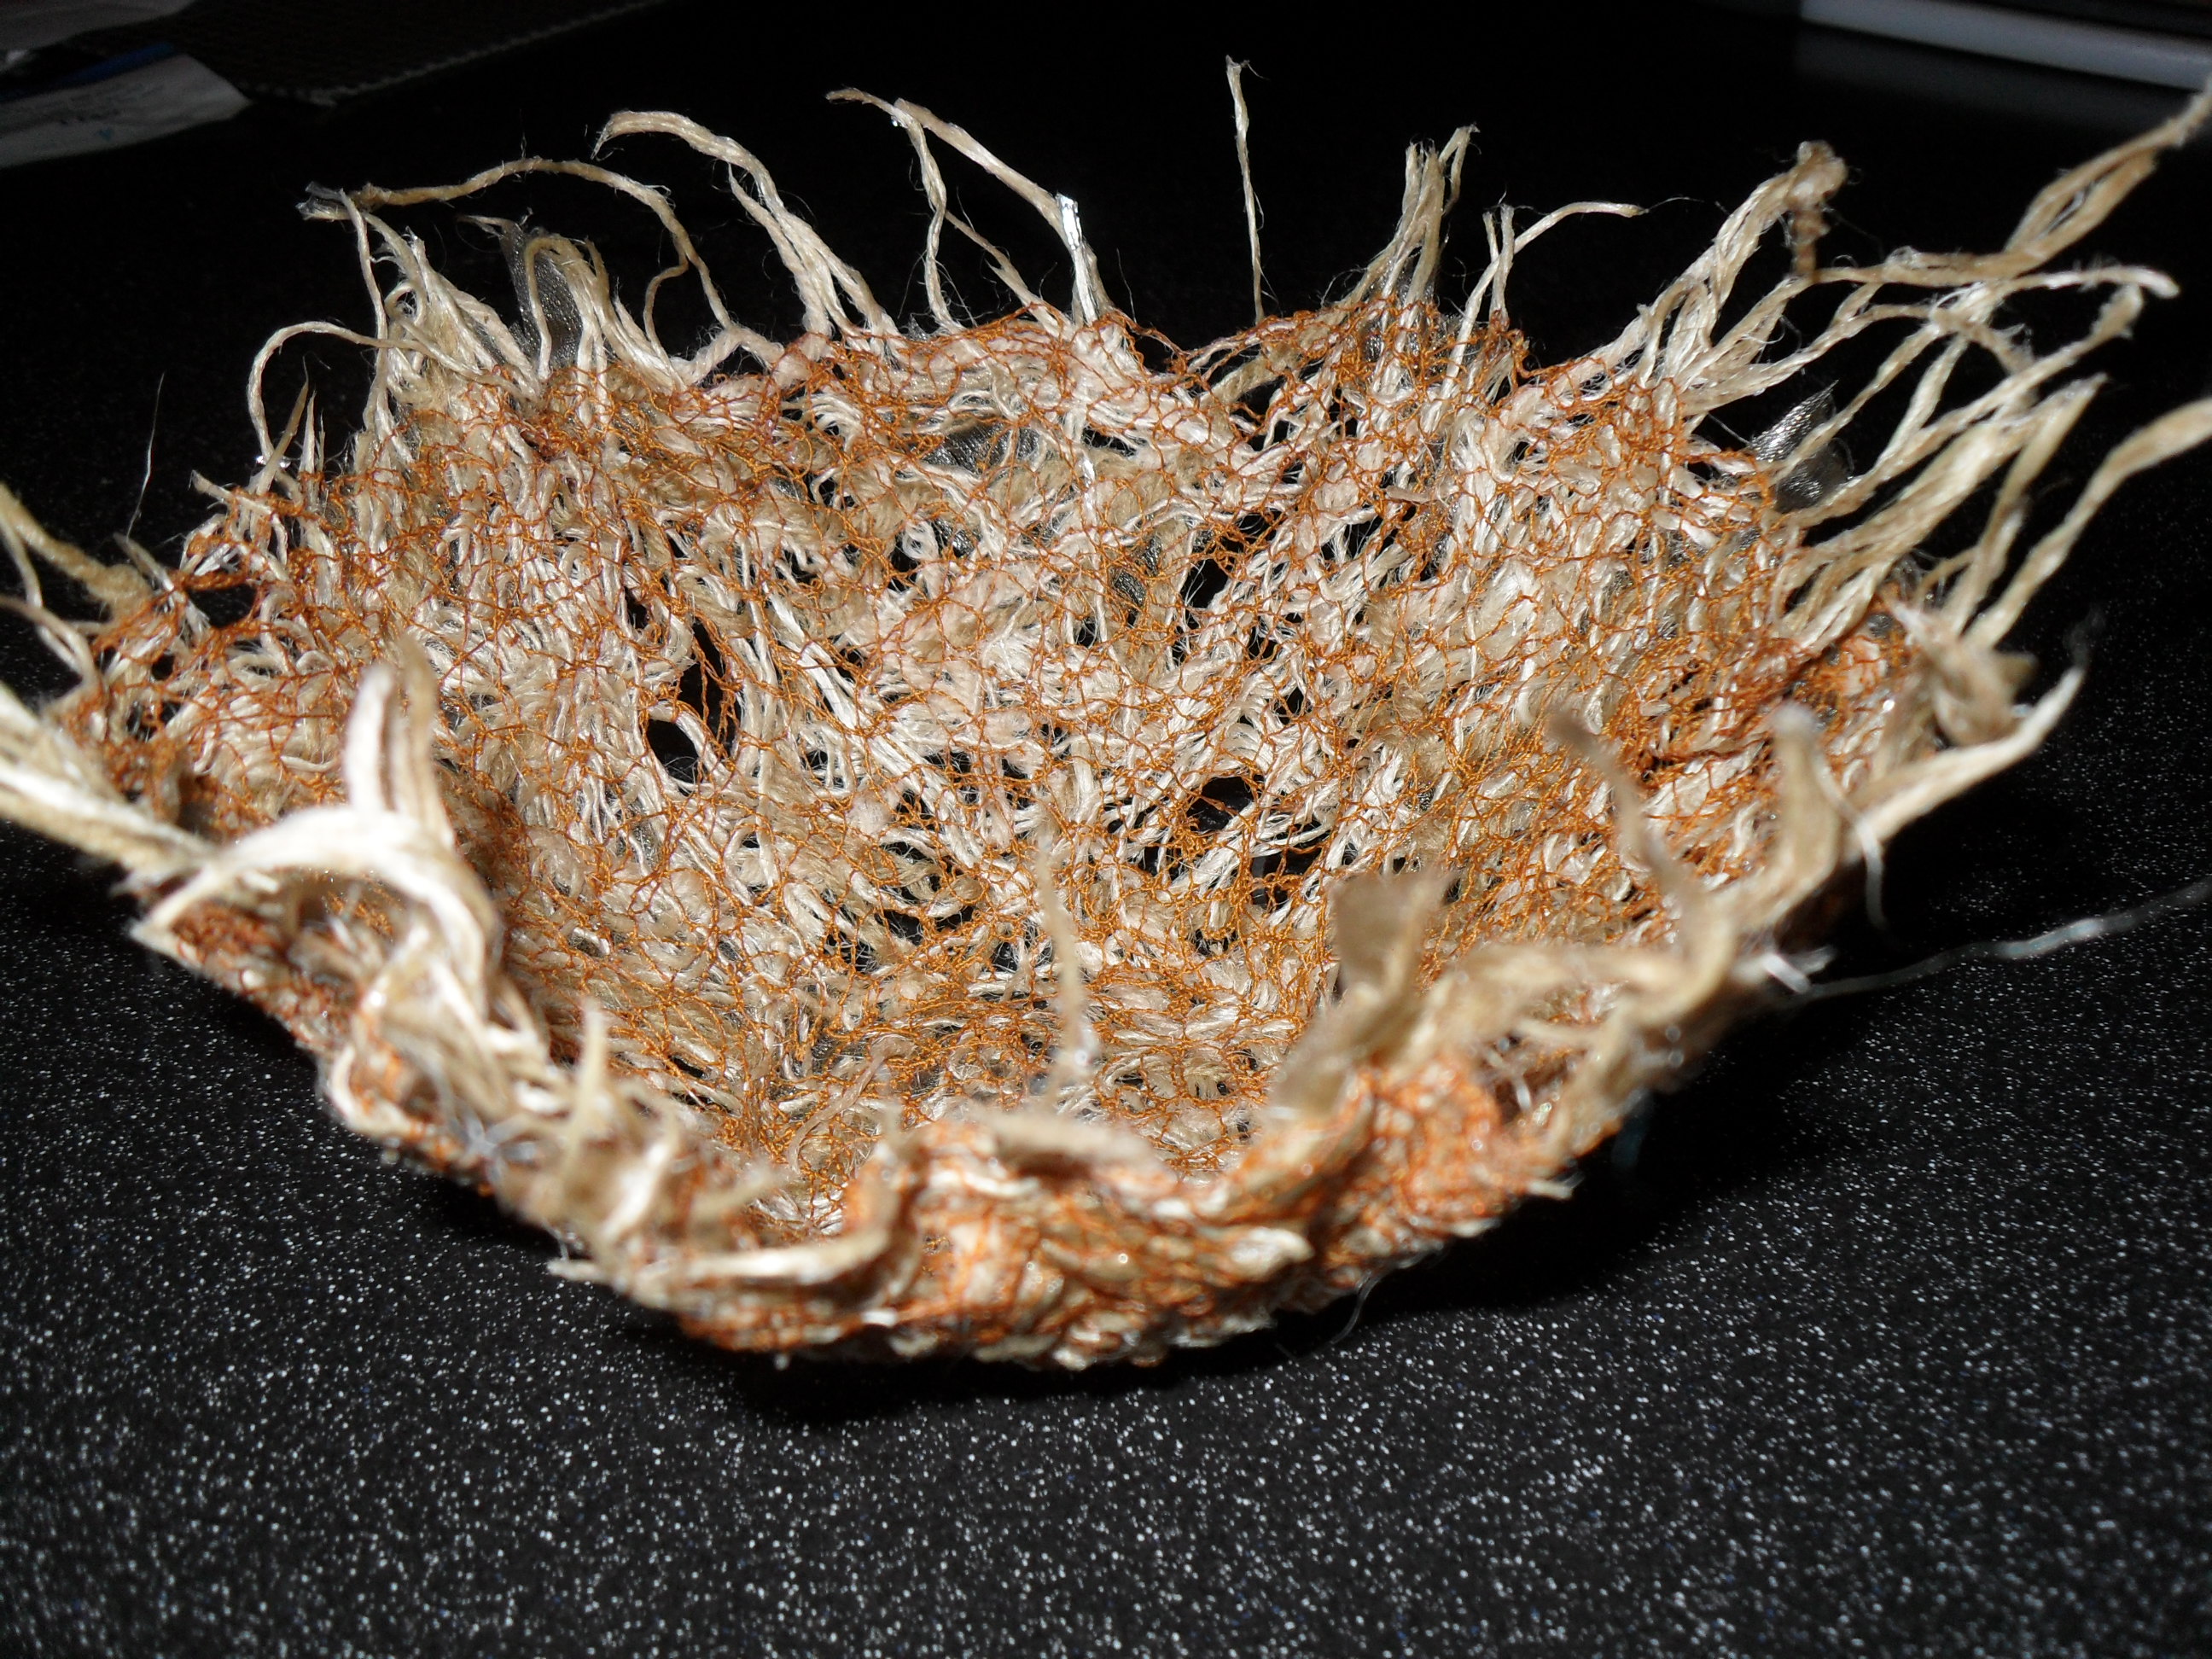
Anyway the result is shown below…my take on the Tyvek seed pods. The first image was taken after holding the pod over a gas ring, supported on a spatter guard. The second photo shows the pods after I used the ‘Papermania’ heat tool on them and then added more holes with my home-made soldering iron (hot wire) and added gold metallic thread across some of the larger openings. My mind is racing with ideas for more ‘manipulated’ projects and I am wondering if I can find a way of combining Tyvek with felting….watch this space!
Fairy Shoes…
I have been meaning to post these photos for several days but where does the time go? Last Saturday I met up with a group of other ladies at the Thomas Garrett Rooms in Heighington to take part in the ‘Fairy Shoes’ felting workshop run by Robyn Smith of Feltybits. Once again it was a great workshop with Robyn offering lots of encouragement and advice regarding wet felting, working with a resist and embellishing. The tiny shoes were created using Merino wool tops and decorated with seed beads. The finished items all turned out different in colour and style and looked particularly cute when lined up for the photos!
Creating Pictures…
When I began felting a few months ago I hadn’t imagined that it was going to turn out to be this much fun and this addictive! At some point in the not too distant future I will have to do some housework, phone some friends and generally catch up with all the stuff I have shelved while I have been enjoying myself! In the meantime I thought I would share the two pictures I have just done. Both of these started out as wet felted backgrounds (Merino tops onto muslin fabric) and then I added detail with needle felting and free motion embroidery. When they were finished I found that I liked the reverse of the pictures as much as the front…they had a real ‘sketchy ‘ quality to them. I sometimes forget to lower the foot before embroidering so I tend to get the ‘birds nest’ effect on the back of my work. If I can get my head around not doing this I will get a neater finish and be able to use the reverse of a picture as the front.
The second picture was inspired (albeit very loosely!) by Ruth’s Jackson Pollack challenge on the Felting and Fibre website. I looked at some of his work and really liked the colour combination of Yellow Grey Black. With this in mind I planned my background using three shades of grey and mixed the lightest of these with a flesh tone to warm it up a bit (remember I did say very loosely inspired!).
So here is the finished article….I realise it was a bit of a cop-out to do flowers (yet again) but you can’t say I am not consistent!
Flower Meadow…
Back in November I mentioned the needle felting workshop I held at the Joseph Banks Centre where we looked at the basics of creating a needle felted picture. Since then Sheila has gone on to finish her ‘Autumn Leaf’ picture and this week I received a photo from another of the ladies showing her finished ‘Flower Meadow’. Eileen chose to mount her work to make a greetings card and the finished effect is beautiful. Watch out for Eileen’s next picture as she rises to the challenge and try’s her hand at wet felting – the background is done and looking fab so can’t wait to see it finished!
Needle felted landscape…
I have recently been helping my friend Sheila with a project she has been working on, a needle felted landscape, using one of my pictures (see banner heading) as her inspiration. It was really nice to work on this together, trying out different materials and bouncing ideas around. The hills are a mixture of merino top, knitting wool, fine netting and free machine quilted fabric. Rather than being 2D, we made the tree 3 dimensional which gives added interest to the piece. The trunk was needle felted as a separate element, and then placed over a sausage shape of wadding before being anchored to the background. Tapestry wool was used for the branches and also to depict vines growing up the tree trunk. I have to say I love Sheila’s version – it’s very colourful and vibrant and looks great in its frame.
The Tooth Fairy Jar…
O.K…I know… they are taking over my life…. I am in danger of becoming ‘Fairy’ obsessed but quite honestly I don’t care, I am in my element! My latest idea is the needle felted Tooth Fairy Jar and I would love to have your feedback on this one. It combines the fairy and the toadstool and results in a unique (as far as I am aware) gift that the Joseph Banks Centre are keen to put in their shop. Fortunately Kate, one of the ladies who helps run the shop, is also a fairy fan so we are currently planning a ‘fairy grotto’ area to spread a bit of magic to the shoppers in Horncastle! Obviously these will not be marketed as toys, and the jar would need to sit on a bedside cabinet rather than being placed under the childs pillow, but I have several friends who are ‘Fairy’ fans so am hoping this is a goer! The plan is to make several toadstools in various different colours of Merino wool, each one will have a tiny ladybird inside which will be made in the same colourway as the toadstool top. I have used two different methods for the wings, one is Angelina Fibres, the other is simply Merino top, I like both but the Angelina is nice as it gives that bit of fairy sparkle so this will be the preffered material.
Kate suggested the jars would also make cute little trinket boxes, they are small but could hold a favourite ring, earings, etc.
Something from nothing…
Today I just had to share my latest ‘crafting’ discovery …. water-soluble fabric stabilizer. You may already be aware of it and have probably used it, but I only stumbled across this product last weekend while browsing youtube. I was looking for fresh ideas to use up scraps of fabric and during my search I came across a lady called Jan Tillet making bowls from left over snippets of fabric and threads. Jan’s work is very beautiful and this struck me as a really exciting way to recycle odd scraps and a great way of making something from nothing! The scraps are sandwiched between two layers of water-soluble fabric stabilizer and then machine sewn all over using a free motion embroidery foot, being sure to cross the stitching over and over again to link it all together. Once the piece has been covered in stitching the stabilizer is all but rinsed away in cold water and the newly created fabric is draped over a bowl and left to dry. The aim is to leave a little residue of stabilizer your work so it will stiffen and retain its shape when dry.
I gathered up various scraps and had a go, experimenting with different textures and colours. Some peices have been put to one side to be worked into future projects while others went on to become bowls. When making the bowls I found my work needed much more stiffening (maybe I didn’t leave enough residue) so I experimented with spray starch and the far cheaper option of PVA . I am a big fan of PVA and always have loads to hand, I found that soaking my work in it, before drying on the lowest heat setting in the oven for 20 mins, gave it a much firmer finish which I was happy with.
So far I have made three bowls, the first was a colourful one using snippets of organza, chiffon and ribbon which looks really pretty and lacy. I put a tea light in it for the photo (above) but I wouldn’t recommend using it this way as it could pose a fire hazard! The other two bowls were both made from hessian, one in its natural state and the other bleached with Milton’s and mixed with strands of tapestry wool. I particularly like the bleached effect and, as this is the largest bowl, it has made a great bread basket.
There are endless possibilities for using this technique and the great thing is that every piece will be unique.
- Bread Basket
Away with the Fairies….
It seems ages since my last post but its been a busy time craft-wise so now I’ve made the time to sit still I have plenty to ramble about!
I attended another of Eve Marshall’s fabulous felting workshops just before Christmas and this one, following on from the Elf on a Toadstool with Robyn, was perfectly timed to feed on my reawakened childhood love of all things magical/mystical. The basic process for making the body of the wet felted Fairy was very similar to that of making a flower i.e. laying the tufts of fibres overlapping in a ‘starburst’ formation. One thing to remember before commencing the felting is that the centre of the ‘flower’ will become the Fairies head and therefore the fibre laid here should be your chosen ‘flesh’ colour.
The head is simply a felted ball, but getting the size right was a bit hit and miss to begin with! The ball is positioned in the centre on the wrong side of the skirt. The skirt is then pulled tight over the ball and tied in place with thread. I have discovered that the best thing to use for this is dental floss as its very strong and can be pulled tight without fear of breaking. At the same time I attached a second length of floss through the top of the head which can be used, if required, to suspend the Fairy. The figures are not given a face, these are left blank in the Waldorf tradition.
Although I was pleased with my first attempt, she now looks pretty crude compared with the ones I made over Christmas! The black hair on this first Fairy was made from wool top and attached by needle felting….I prefer the hair on the more recent examples which I made using a textured knitting wool and decorated with a headband of tiny beads.
The delicate, translucent wings are formed using ‘Blaze’ heat bondable Angelina Fibres – I hadn’t heard of these of these before but I can see them being useful for all sorts of future projects! To make the wings the Angelina Fibres are simply laid between two sheets of paper and ironed using a medium heat setting for a couple of seconds.
When I made the ‘Gothic’ Fairy I couldn’t find a suitable wool for her hair so I simply used a permanent marker on the orange wool and the result looked fab! This one is my favourite so far…she worked out smaller than the others and looks so cute….which is your favourite?
Show & Tell…
Every other Monday a group of local ladies, myself included, meet at the Community Centre in Horncastle. Our one common bond is that we all enjoy doing crafts of one sort or another, whether its knitting & crochet, patchwork & quilting, felting, rag rug, lace making, cross stitch…..the list is endless! For a couple of hours we chat and work on our individual projects, sharing a mutual enthusiasm for all things handmade. Today was ‘show and tell’ which involved everyone bringing something they had created and showing it off to the group. There is such a lot of talent around, and so much of this creative work would otherwise be hidden away, that I thought I would put together a collage of some of the pieces to share with you, I hope you enjoy them.


