Making Waves II…..

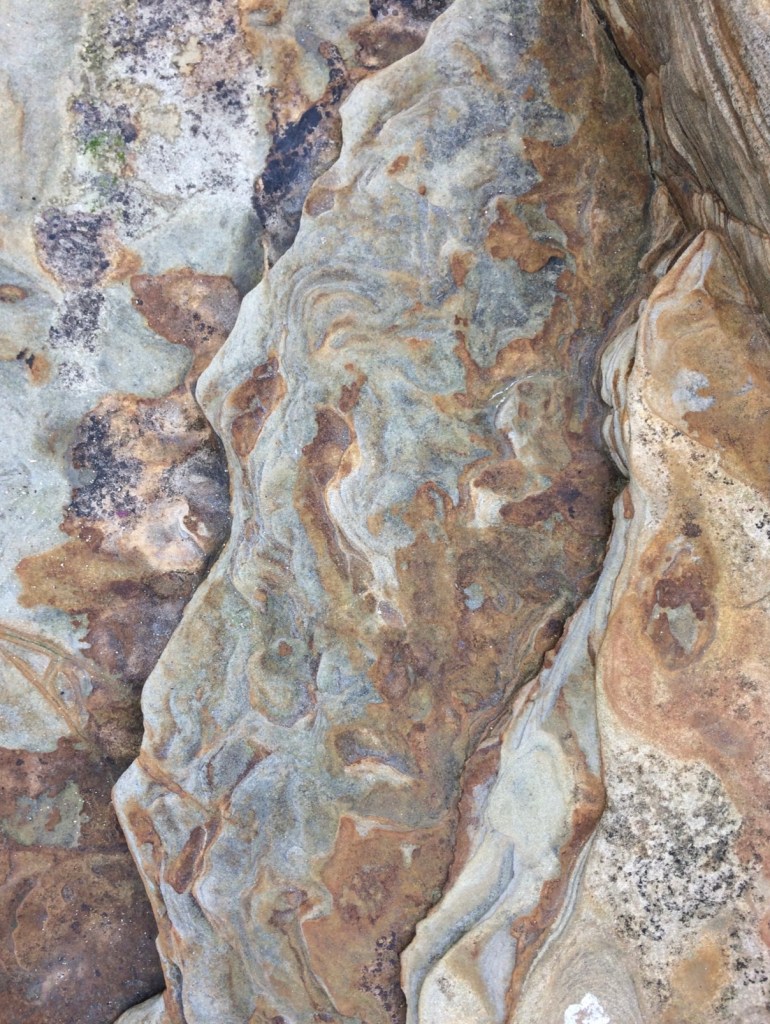
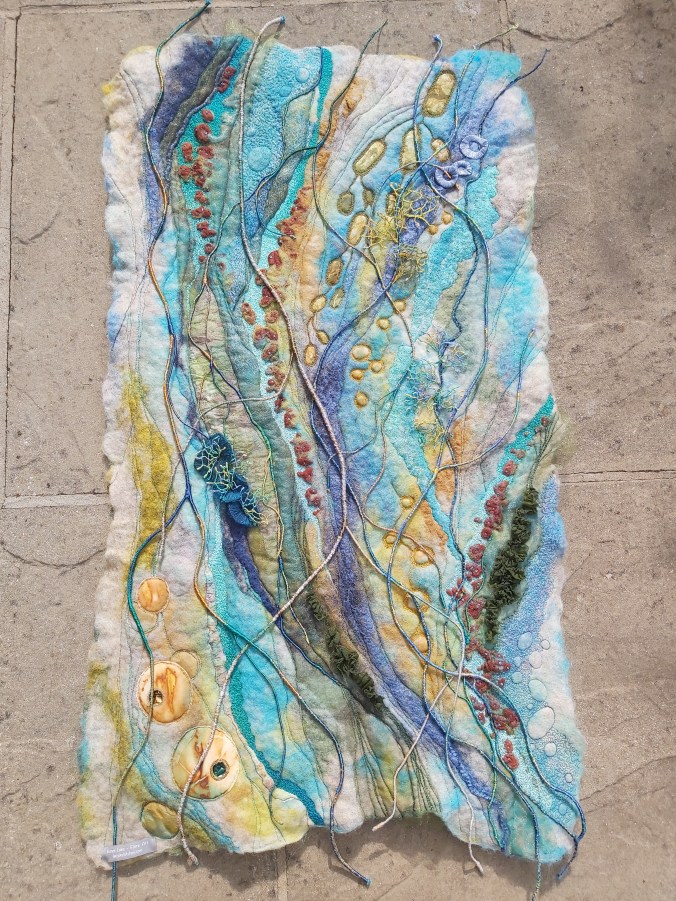
As part of the Waltham Windmill “Making Waves” challenge all members will have a metre wide wall space at next years exhibition to use as they wish. It’s too early to know for sure what I’m going to be putting up in my space (no shortage of ideas though!) but one possible piece could be this wet felted wallhanging I’ve called “Going with the Flow”. The inspiration for this came from the wonderful, wavy markings on the large stone slabs on Seahouses beach in Northumberland. This is one of my favourite spots in the UK and I took these photos a couple of years ago knowing that one day they would inspire a piece of work.

For the background I pulled out my box of oddments, short lengths of fibre left over from various projects, not enough to put back in their pack but too much to throw away…..not that I ever throw any fibre away! I recently bought myself a drum carder from Richard Britton and had fun carding all those oddments before laying them out.

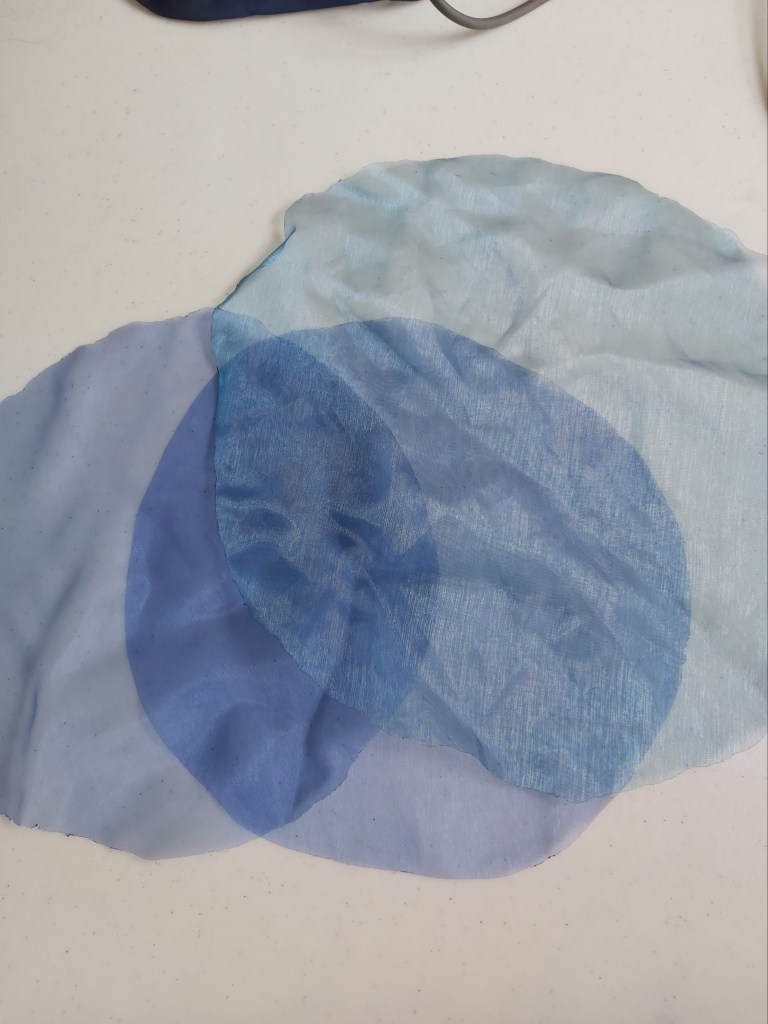
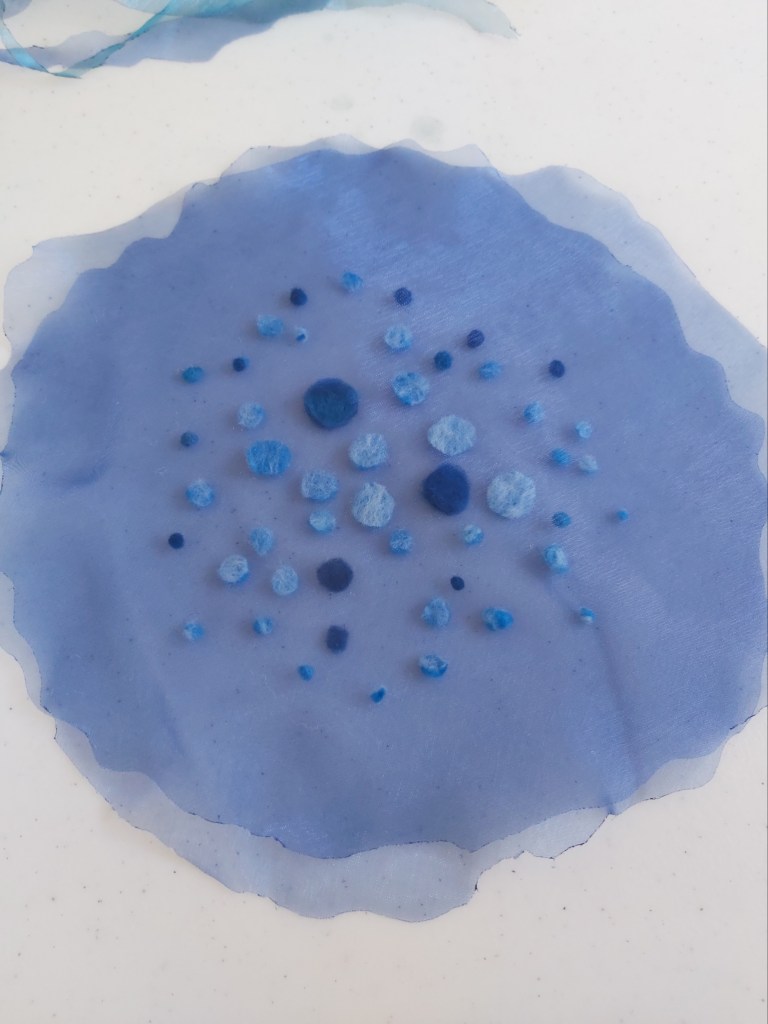
This is how it looked after felting with silk fabrics, silk fibres, knitting yarn and nepps. I liked the silk circles bottom left but wanted them more 3D so they were removed and replaced with hand dyed fabric discs, recycled from another project.
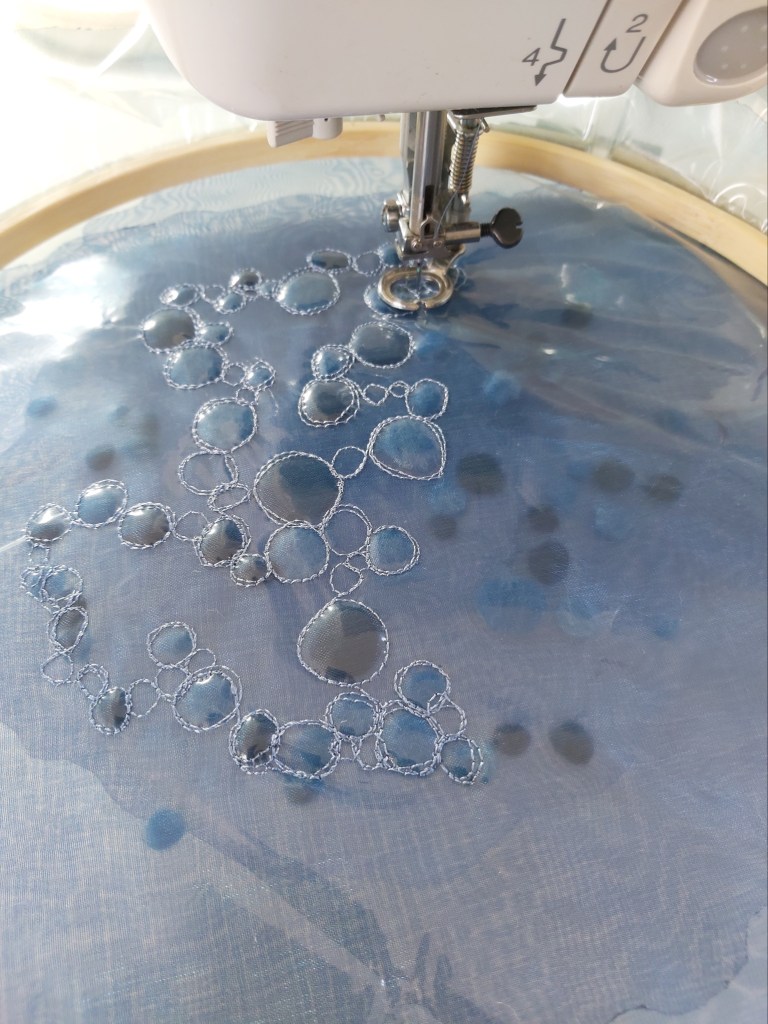
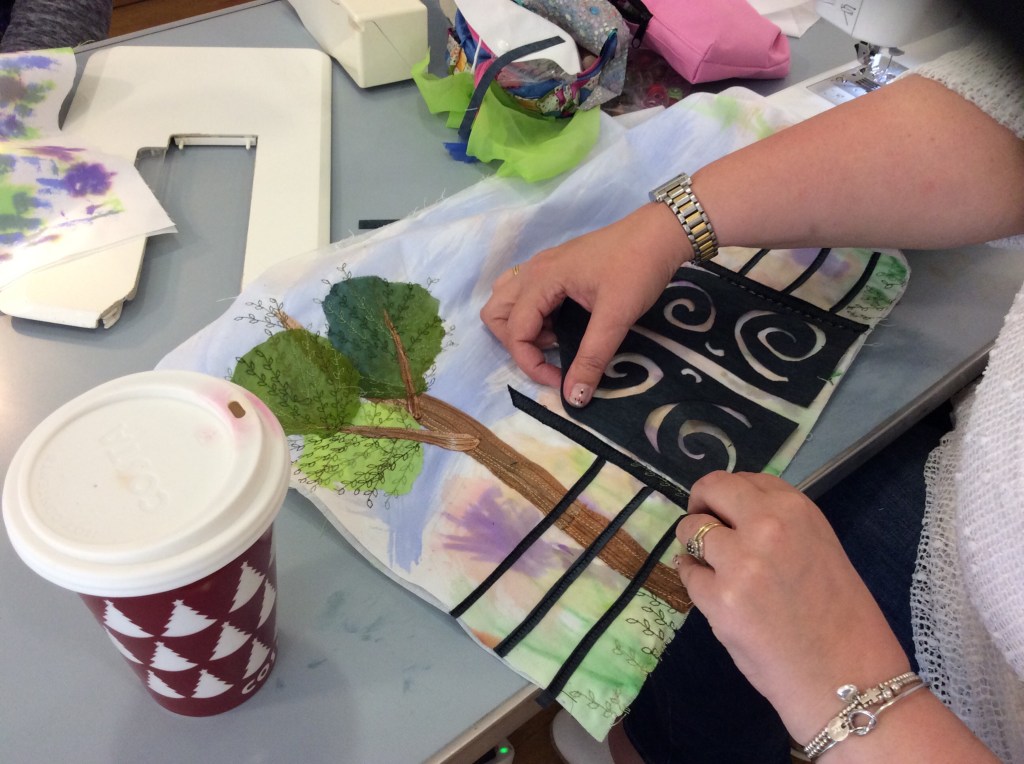
I didn’t have a sketch, or a plan, for where I was going but I like to work this way, I tend to make a start with a few lines of free motion stitch and see where it takes me. It would be far quicker to have a plan as it would avoid all of the attaching and removing and repositioning until it looks right, but I really do enjoy that process!

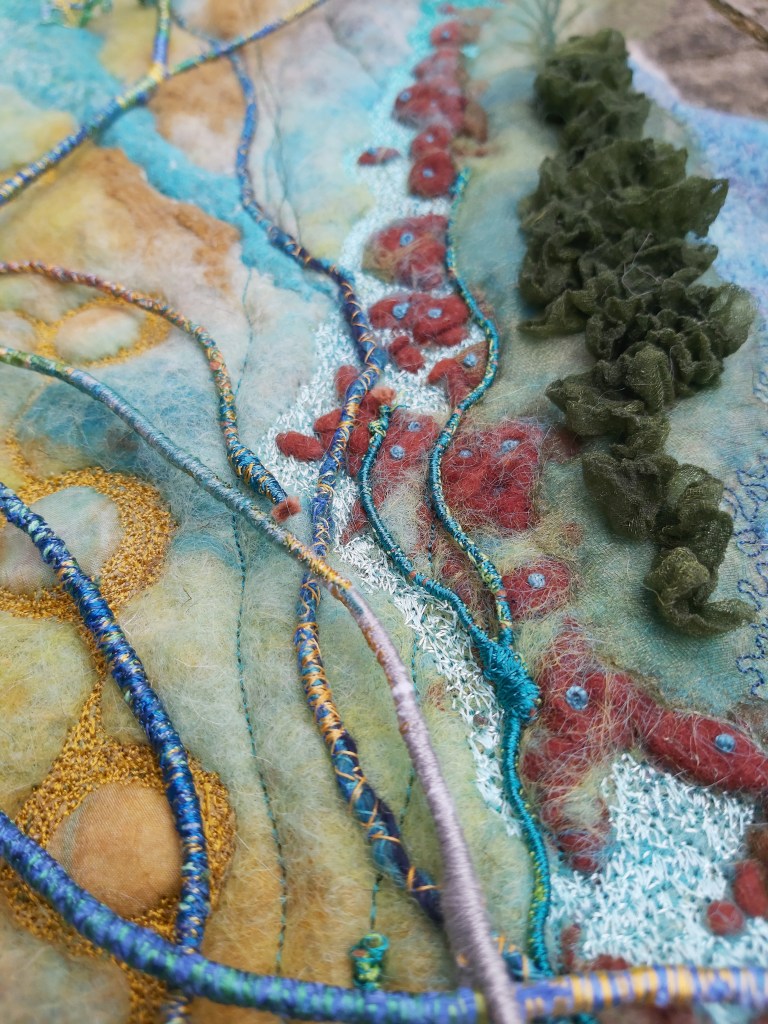
Its been several months in the making but I’ve thoroughly enjoyed working on it using a combination of free motion stitch, hand embroidery, recycled fabrics and coffee capsules, sheer fabrics, hand painted silk fabrics and machine wrapped cords.
Another of the specific items we’ve been challenged with for the Making Waves exhibition is a fish. I immediately decided I was going to wet felt mine which lead to us having a in-house felted fish workshop and the creation of TroutPout! She’s made from carded Corriedale and is approximately 33cm x 36cm excluding the fins.

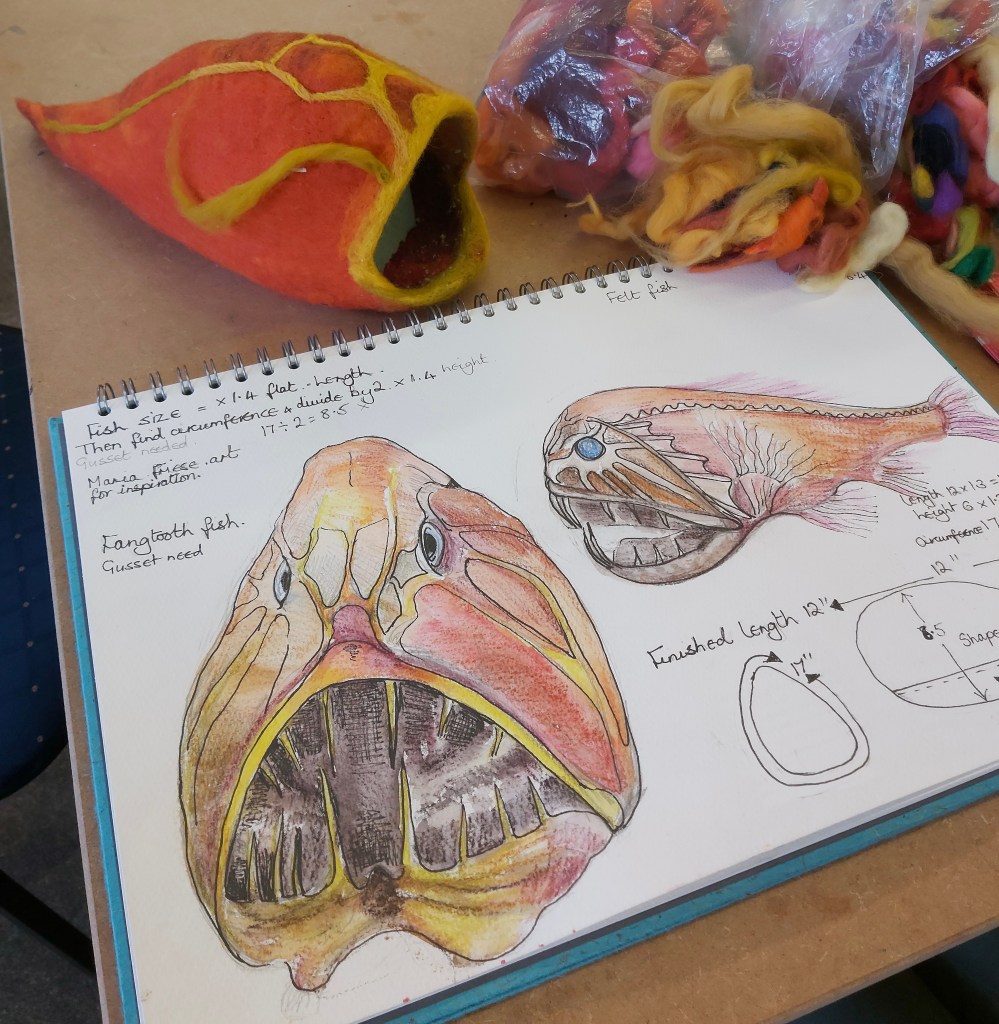
These are some of the other fabulous fish that members have made so far, this one is Barbara’s scary Fangtooth…..

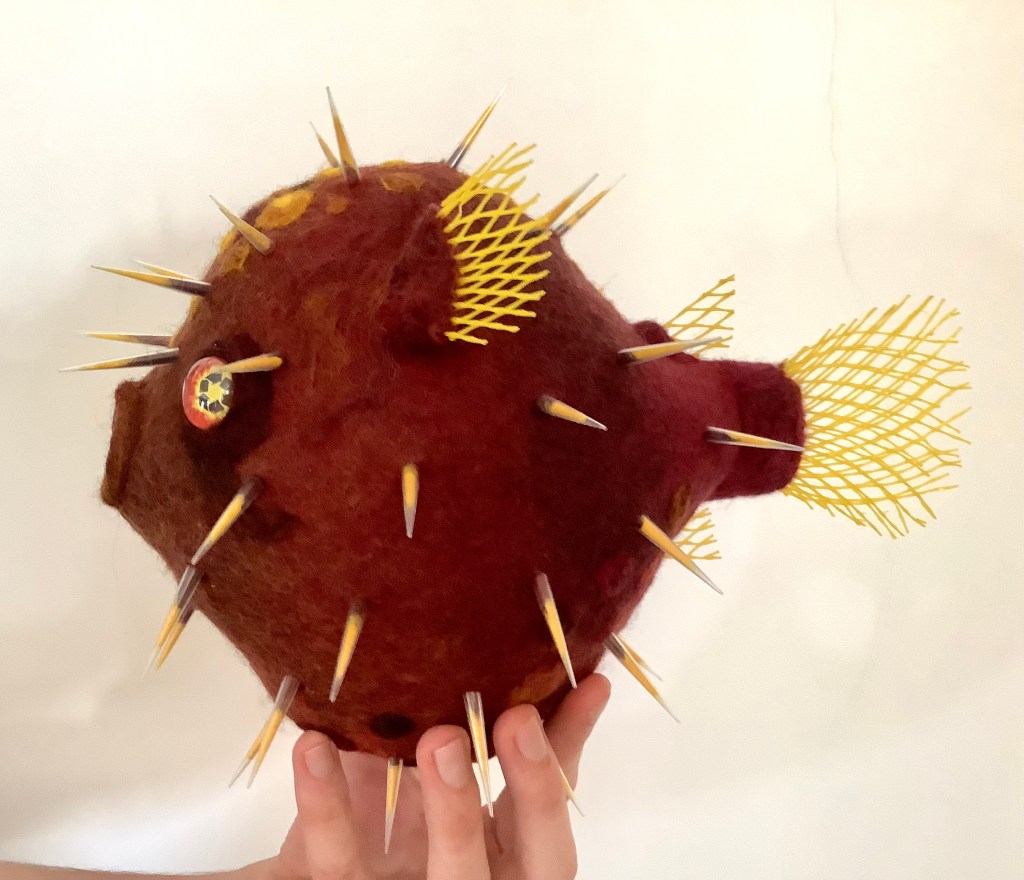
Lucy made a wonderful wet felted Puffer Fish adding recycled plastics, including pipette tips, wine bottle netting and glass beads with recycling symbols underneath, to highlight the plight of our oceans. 

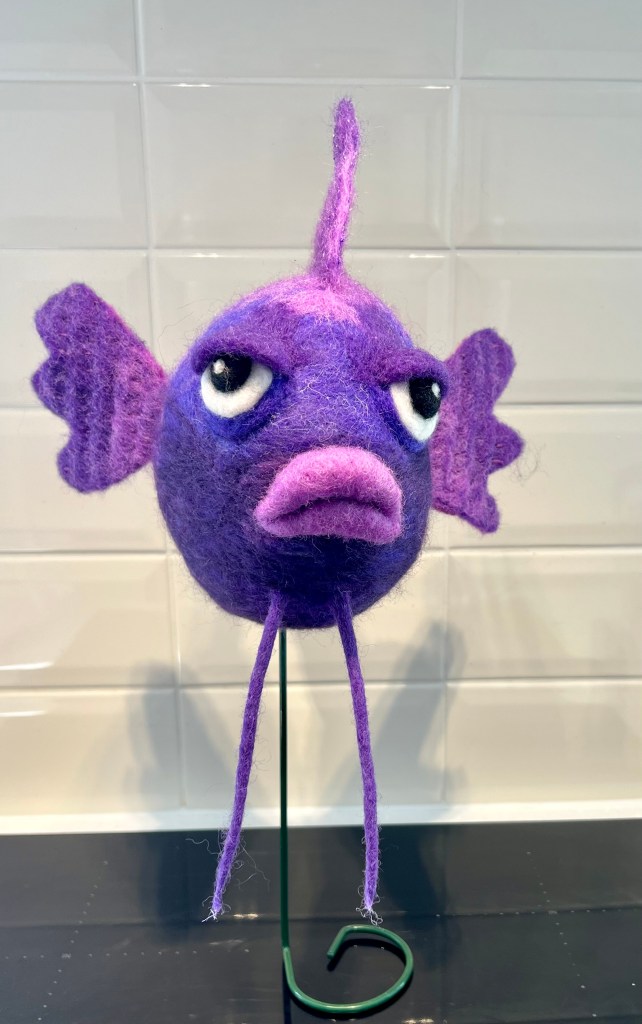
Sue is new to wet felting but she’s taken to it like a fish to water (couldn’t resist!) and has made “Angry Fish”. I think he looks more sulky than angry but he’s terrific!

And there are several others that are work in progress….

I’ve been teaching 3D Seed Pod workshops recently using wire wrapped with Tyvek fabric and decided I’d also like to make an Anglerfish from wire rather than fibre.  It was only when I’d got the 60cm x 33cm framework made that I sat back and realised I’d gone past the stage where I had meant to start adding my fabric! Time for plan B…..maybe I could use wire mesh to give it “body”? 

I looked for some online but hesitated as I wasn’t sure how flexible or suitable the mesh would be. Having put the fish to one side, a few days later I joined the Lincolnshire Textile group and at my first meeting I was offered a piece of silver coloured Sinamay. Sinamay is one of the most popular hat-making foundations. It’s woven from the processed stalks of the abaca tree, a type of banana native to the Philippines. I couldn’t believe my luck……..being silver coloured this off cut looked like wire mesh but wasn’t and if I sprayed it lightly with water I could shape it to fit and stitch it with aluminium wire to my framework. So this is Wanda, also known as “Gone Fishing!” made with a combination of galvanised, aluminium and beading wire and Sinamay. She wasn’t easy to photograph as I didn’t have large enough sheets of black card but hopefully enough detail is showing.

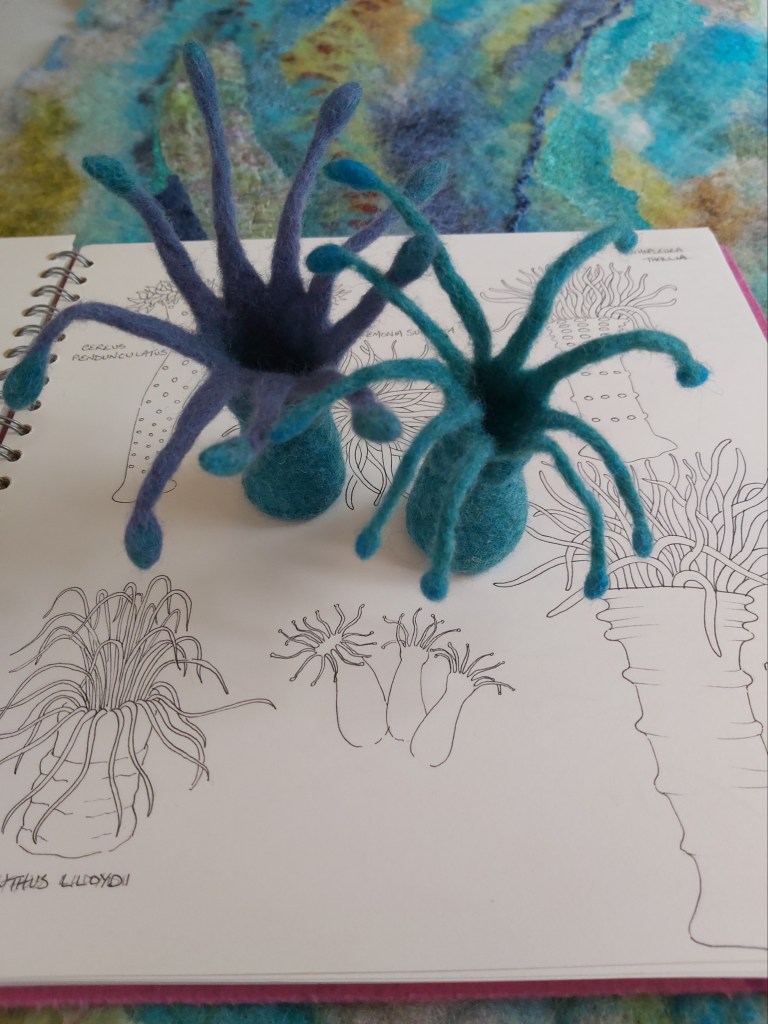
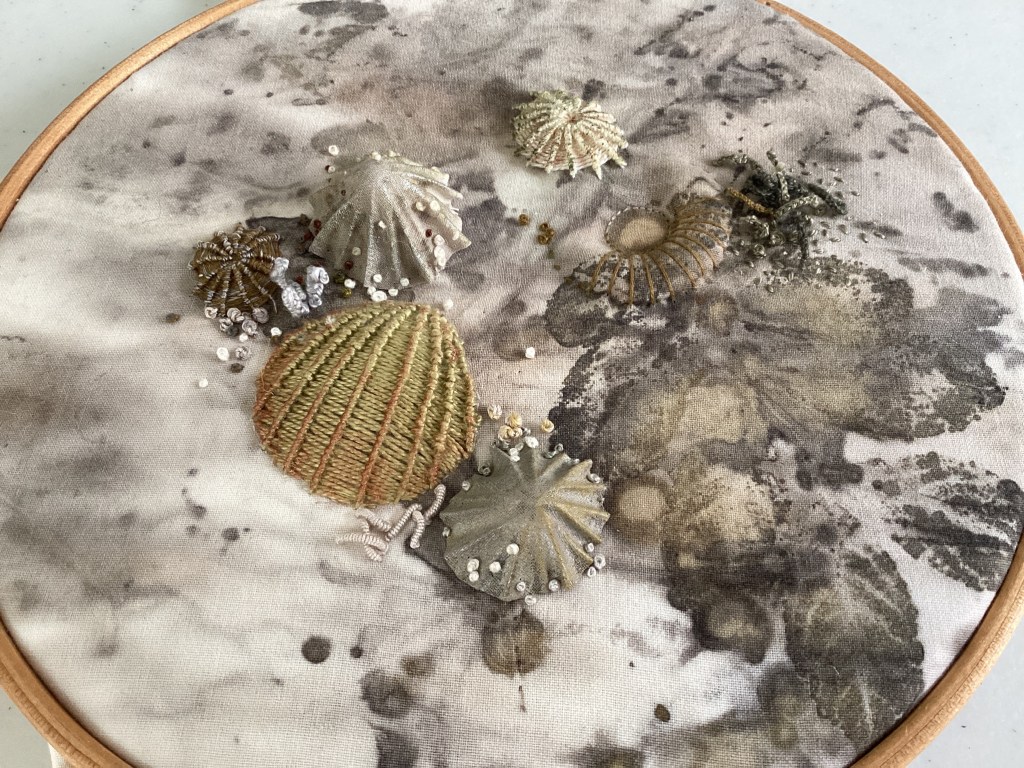
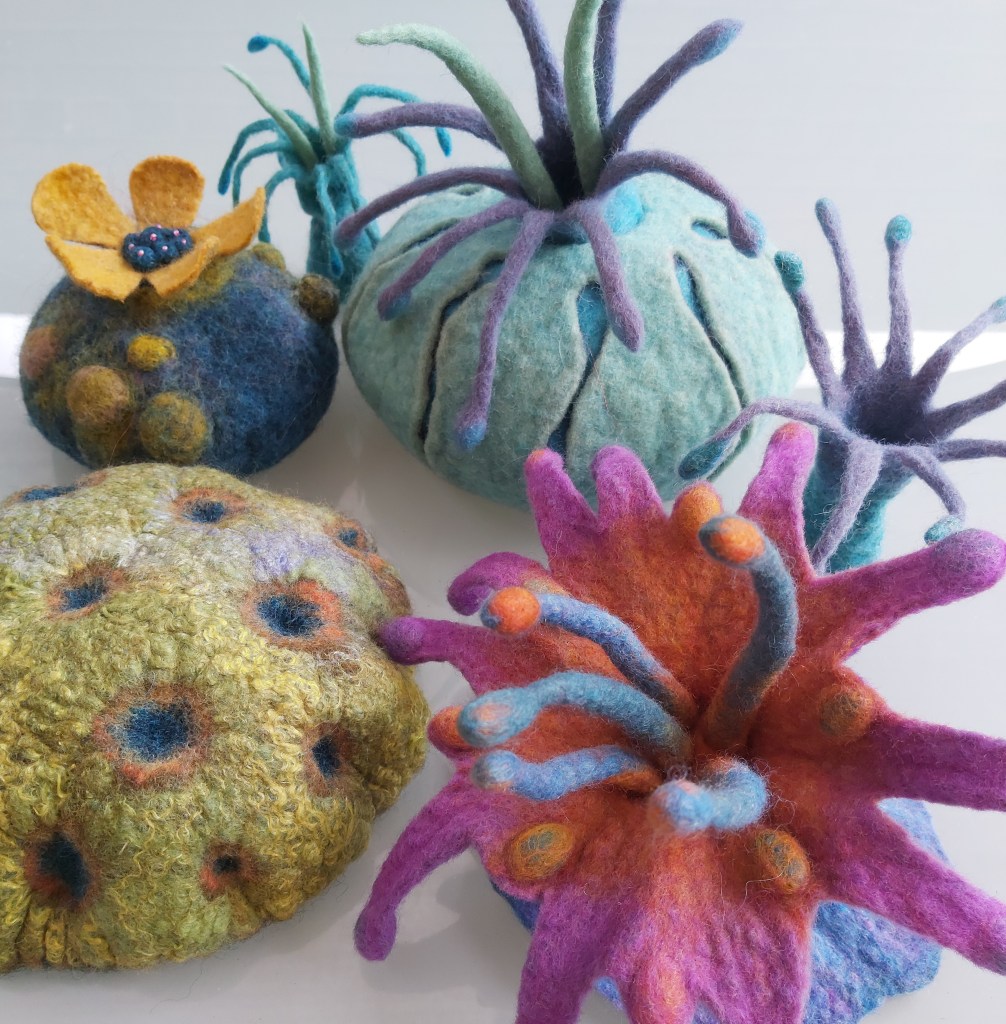
Another feature of our exhibition will be the Octopus’s Garden so we will be needing a few Octopus and a variety of coral decorate it…..my collection is steadily growing!

I mentioned having joined the Lincolnshire Textile Group and, as luck would have it, their current theme, and next years exhibition, is “Water” so sits nicely with the Waltham theme. It’s good to know I can carry on creating ocean inspired work for at least the next 12 months!

Making Waves I…..

The Waltham Windmill textile group, of which I’m a member, have a theme which runs for two years culminating in an exhibition of work. The current theme is Making Waves and the exhibition for this one will be held sometime in the first half of 2024.

Within the groups theme we have free rein to make whatever we want plus we’ve agreed a number of specific items we will each make. One of the items is a jelly fish. Having done a bit of research into the many and varied species of jelly fish I came across the spotted Blue Jellyfish which is native to UK waters. My first thought was to create a “wet look” using Merino fibre covered with lots of viscose which would create a sheen and then I would free motion stitch the spots. That was quickly replaced with the idea of making my jellyfish from sheer fabrics…..I seem to have accumulated lots of sheers and only ever use tiny amounts so this would be a perfect opportunity to use up some of my stash. After rummaging through a huge sack of fabrics, almost losing hope of ever finding the colour I needed, I came across a small piece of blue and another of turquoise, just enough to do the job…..so much for stash busting!!

Blue Jellyfish (Cyanea lamarkii), feeding on small plankton, England – source www.wildlifetrusts.org

The remnants of fabric, and the size of my embroidery hoop, determined the size of my jelly fish. I’d got some of the wash away stabiliser left over from a project I did a few years ago so that would be useful for stiffening and shaping the jelly fish.

I had enough blue fabric to cut out two circles plus one slightly larger from the turquoise. I also added a small white circle of fabric underneath thinking it would highlight the spotty area. Next I cut up some scraps of felt for the spots and arranged them on the blue discs before covering with the turquoise sheer. This sandwich was then put in the hoop and I machine stitched around the spots…..or at least that was my intention! Unfortunately I struggled to see where some of the felt was so it’s a bit hit and miss but it was near enough!

After removing it from the hoop I washed out some of the stabiliser retaining a good bit of the glue on the fabric to enable me to shape it over a plastic bowl. I didn’t think to photograph the drying stage so the next image shows it dry with the unattached tentacles cut from tulle and sheers.

The final step was to wet felt a blue “inner”, with additional thin felt tentacles, sew the fabric tentacles inside it and insert into its casing.

The finished spotted blue jelly fish.

I’m quite pleased with the finished result and this particular area of the exhibition should be interesting as we’ve used lots of different styles and techniques between us.

Another idea I’ve been playing with is barnacles. I’ve always had a fascination for barnacles and can’t resist collecting them when I find them on stones and shells. These marine crustaceans are related to the crab and lobster and tend to live in shallow and tidal waters, typically in erosive settings.

There are around 1,000 different species and, as adults, typical barnacles are covered with calcareous plates and are cemented, head down, to rocks, shells, pilings, ships’ hulls, driftwood, or seaweed, or to the bodies of larger sea creatures, from clams to whales.

They feed by reaching into the water column with eight pairs of thoracic limbs called cirri which are long and feathery. The cirri extend to filter food, such as plankton, from the water and move it towards the mouth as you can see in this video. (Follow the link and scroll down to Ecology)

Barnacles on rusty metal

I’ve always liked this photo of barnacles on a rusty piece of metal which was taken on a visit to Ullapool harbour so I’m experimenting with different fabrics, including cotton and Tyvek, to make a barnacle inspired wall hanging. So far I’m leaning towards the Tyvek fabric.

Tyvek fabric barnacles

Something else I think will lend itself to the theme is dendritic printing. I love the vein like patterns, very reminiscent of coral, which can be created by pressing acrylic paint between two sheets of glass or plastic and then printing with it. I’ve been trying this out on different surfaces including paper, Lutradur, chiffon and cotton.

The most surprising result was a the print on felt, I was amazed at the clarity of it and I can see this being developed further with added stitching.

Working on ideas for felted sea anemones

There are so many possibilities within this theme that my mind is working overtime and I’ve a few other projects on the go right now. One of them is this small 20cm dia embroidery being worked on an eco print cotton fabric.


Another is a wallhanging approximately 95cm x 45cm. It started out as a wet felted background made from various remnants of fibre which I ran through the drum carder. It’s had a lot of embellishment since this picture was taken, incorporating machine stitch, hand stitch, cord making, recycled coffee capsules, burnt sheer fabrics and hand painted silk fabrics. It’s almost finished now so I will feature that in my next post.

EYE’s Residential Weekend…..

It’s been a long time coming but last weekend I taught my first face to face workshop of 2021 at Cober Hill near Scarborough. Originally booked for summer 2020, this residential workshop for the East Yorkshire Embroiderers had to be carried over to this year due to the Covid lockdown restrictions.

I did wonder if it was too soon for some and if numbers would be depleted but it turned out the ladies were very keen to get back to normal! Nineteen of the twenty ladies booked for the weekend retreat turned up, sixteen came to do the workshop and three came simply to chill.

Cober Hill was built in 1890 and was purchased by Arnold Rowntree, former Liberal Member of Parliament for York, and nephew of the chocolate manufacturer Joseph Rowntree, in March 1920. Rowntree had a vision for it “to be a place of joy and beauty, …a centre of refreshment and inspiration for many of those engaged in difficult public services… I hope experiments in Weekend Schools, Winter and Summer Schools of various kinds and of longer or shorter duration may also be tried there…” The venue, with its gardens, tennis court, croquet lawn, theatre and numerous other communal spaces, offers an annual programme of craft workshops as well as hosting private groups, businesses and schools.

The theme for our weekend was “trees” and the aim was for the students to combine layers of fabric and paint with machine and hand stitching. The finished work could then either be backed as a quilt or mounted in a frame.

After dinner on the Friday evening the group were shown examples of my “tree themed” work and I talked through the techniques I had used to create them. The ladies then started to plan their designs based on images they had brought for inspiration. Not everyone wanted to do trees, one lady chose to use the techniques discussed to do a moon gazing hare while another went completely “off piste” with her abstract take on an owl!

Maggie went her own way with an Owl
Melanie painting her background layer.
Dorothy and Debra painting their backgrounds.
Ann laying down the background for her trees.
Rachel’s background is painted and now she’s working on her foreground layers.
Sandra adding detail to her foreground trees.

With the bulk of the painting completed and dried on Friday evening the ladies could concentrate on layering and stitching their fabrics on the Saturday.

Hilary’s background has been painted and now she is layering up her sheer fabrics to create depth to her forest.
The moon gazing Hare is starting to take shape.
Dorothy’s forest is pinned and ready for stitching.
Evelyn’s work in progress.

I think the surprise of the weekend was Melanie who only came to Cober Hill to keep Ann, her grandma, company. This young lady doesn’t have the use of a sewing machine and had never done any free motion stitching before…..she borrowed Ann’s machine and took to it like a duck to water!

Melanie’s lone tree is starting to take form.
Rachel adding her gate and railings.
Ruth is beginning to add hand stitched detail to her tree.
Debra used lots of free motion stitch on her version of a tree canopy.
Using the same image as Debra for inspiration, Carol created a tree canopy in autumn colours.
Judy took her inspiration from my Walk in the Forest.
Hilary made good use of zig zig free motion stitch for her background trees.
Margaret did her take on my Three Tall Trees.
Dorothy added hand embroidery for her foreground grasses and flowers.
Melanie’s finished work…..fantastic to think this was her first attempt at machine sewing and hand embroidery!
Rhona’s moon gazing Hare….what this image doesn’t show clearly is the addition of black beads which adds texture and sparkle when you see it close up.
Close up of Sandra’s finished trees.

What I hadn’t realised at the outset was that none of these lady’s had done anything like this before, so for some it had been a steep learning curve! It was great to see everyone throwing themselves into the task of painting, layering and stitching and the results speak for themselves! By the time we left Cober Hill on the Sunday there had been some terrific work created. I hope some of my students will continue to develop these techniques alongside their more traditional skills. At least one of them has since bought herself a soldering iron for doing more of this kind of work which was music to my ears!

I just want to say a huge thank you to the EYE’s group for inviting me back to teach their 2021 residential and for being such willing students and wonderful company. I shall look forward to working with you again at some point in the future.

The EYE’s class of 2021