Memories of a Greek Holiday…

I can’t believe its been 2 months since my last post…holidays and family commitments have kept me away from the PC for a while but things are getting back to normal now so its time to catch up on what’s been happening ‘craft’ wise.

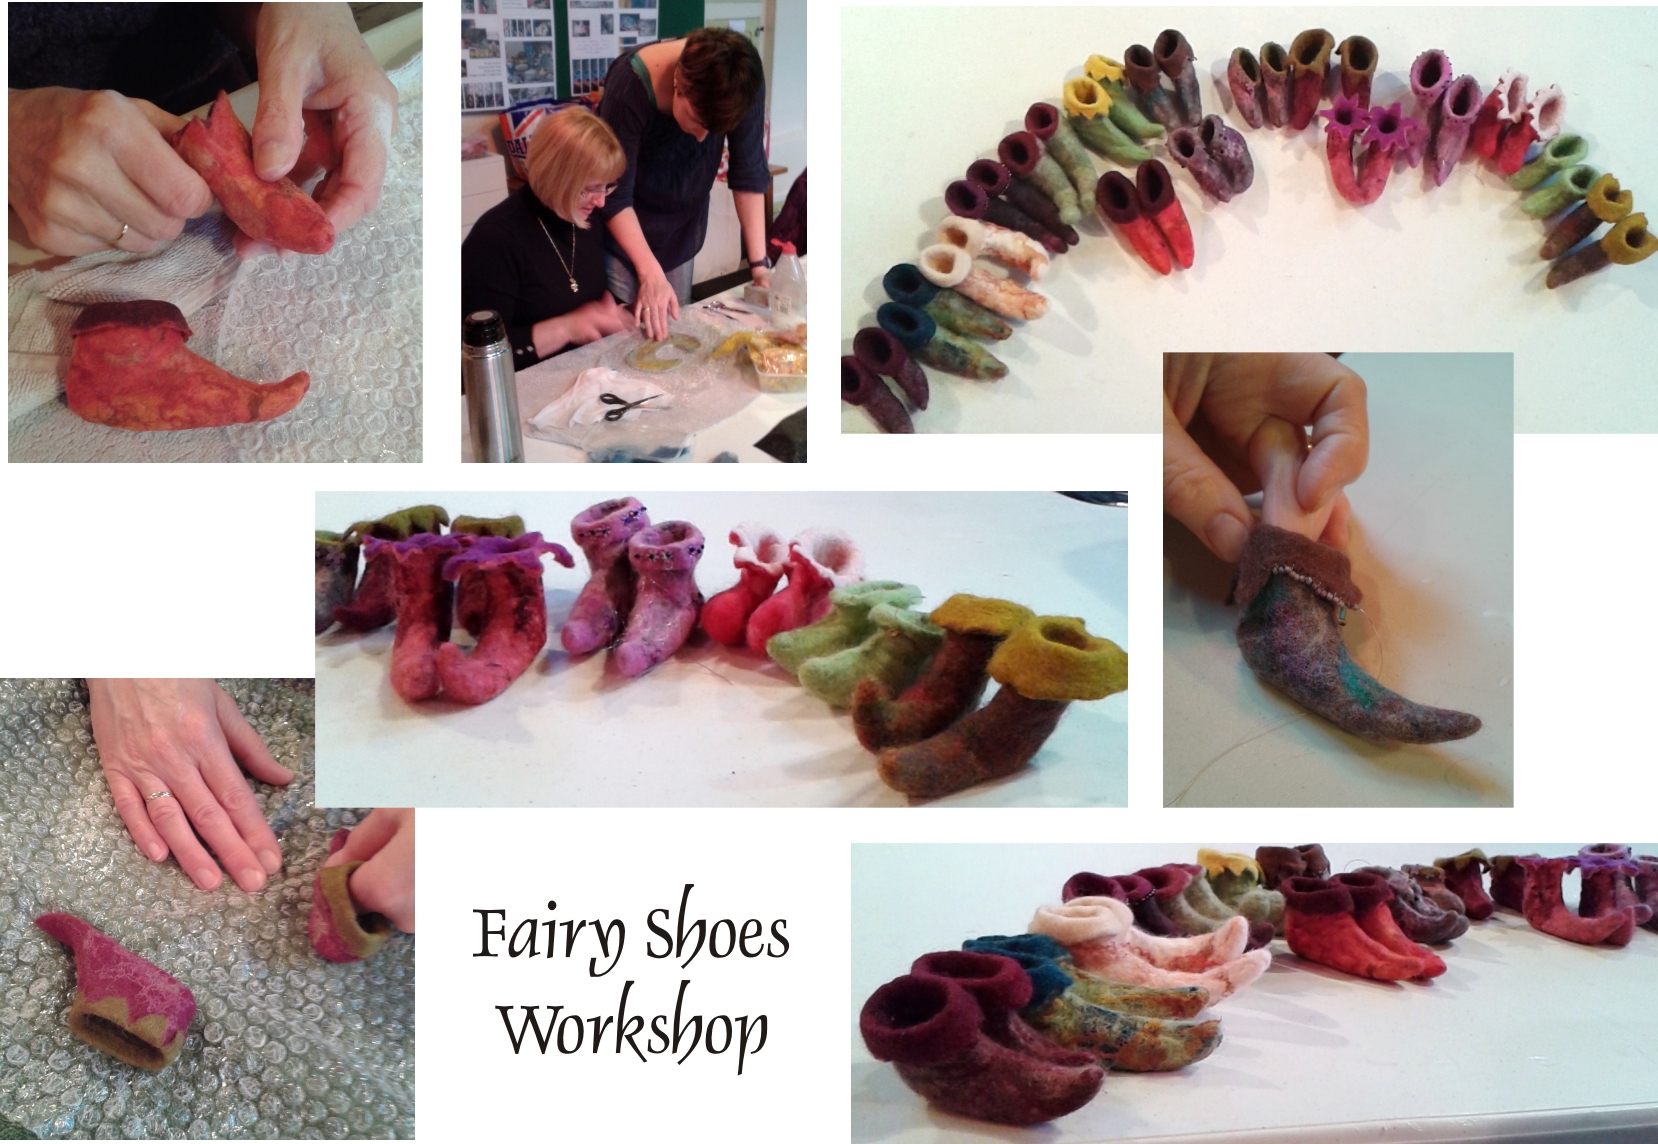
At the end of April (the day before we were due to fly out to Greece for a 2 week flotilla holidayRobyn was due to hold another felting workshop.  Although I knew I really ought to stay at home and do the packing I managed to somehow escape to Robyn’s studio for the day and had a great time (as always) with the other ladies as we all got creative with bits of fluff!

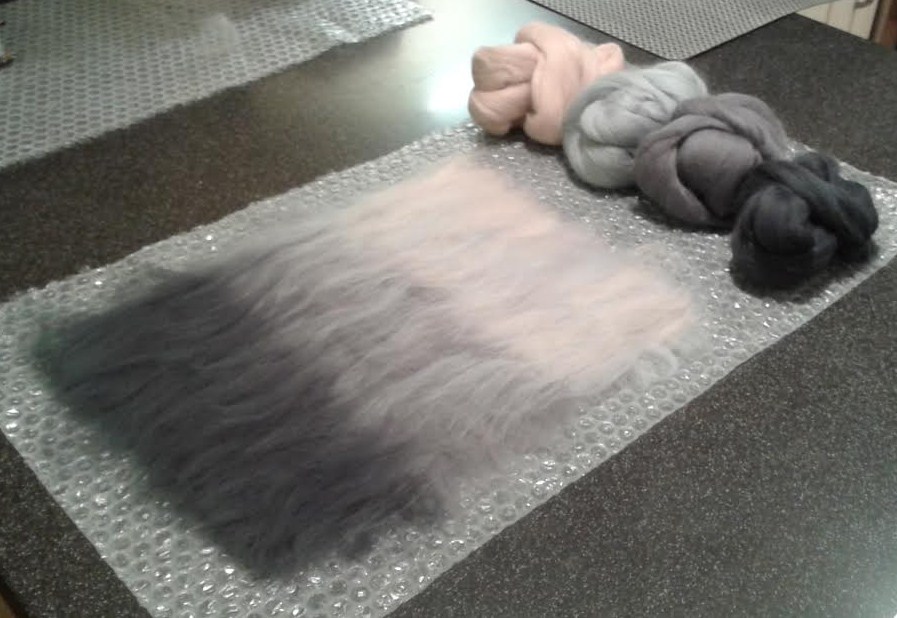
I wanted to do something different and create an abstract picture in this session but wasn’t sure how to approach it.  Robyn suggested a great method which began with creating small piles of ‘carded’ Merino, combining different colours/shades.  When I had sufficient piles of wool these were laid out and used to create a large sheet of multicoloured ‘pre-felt‘.

Pre-felt stage of abstract picture

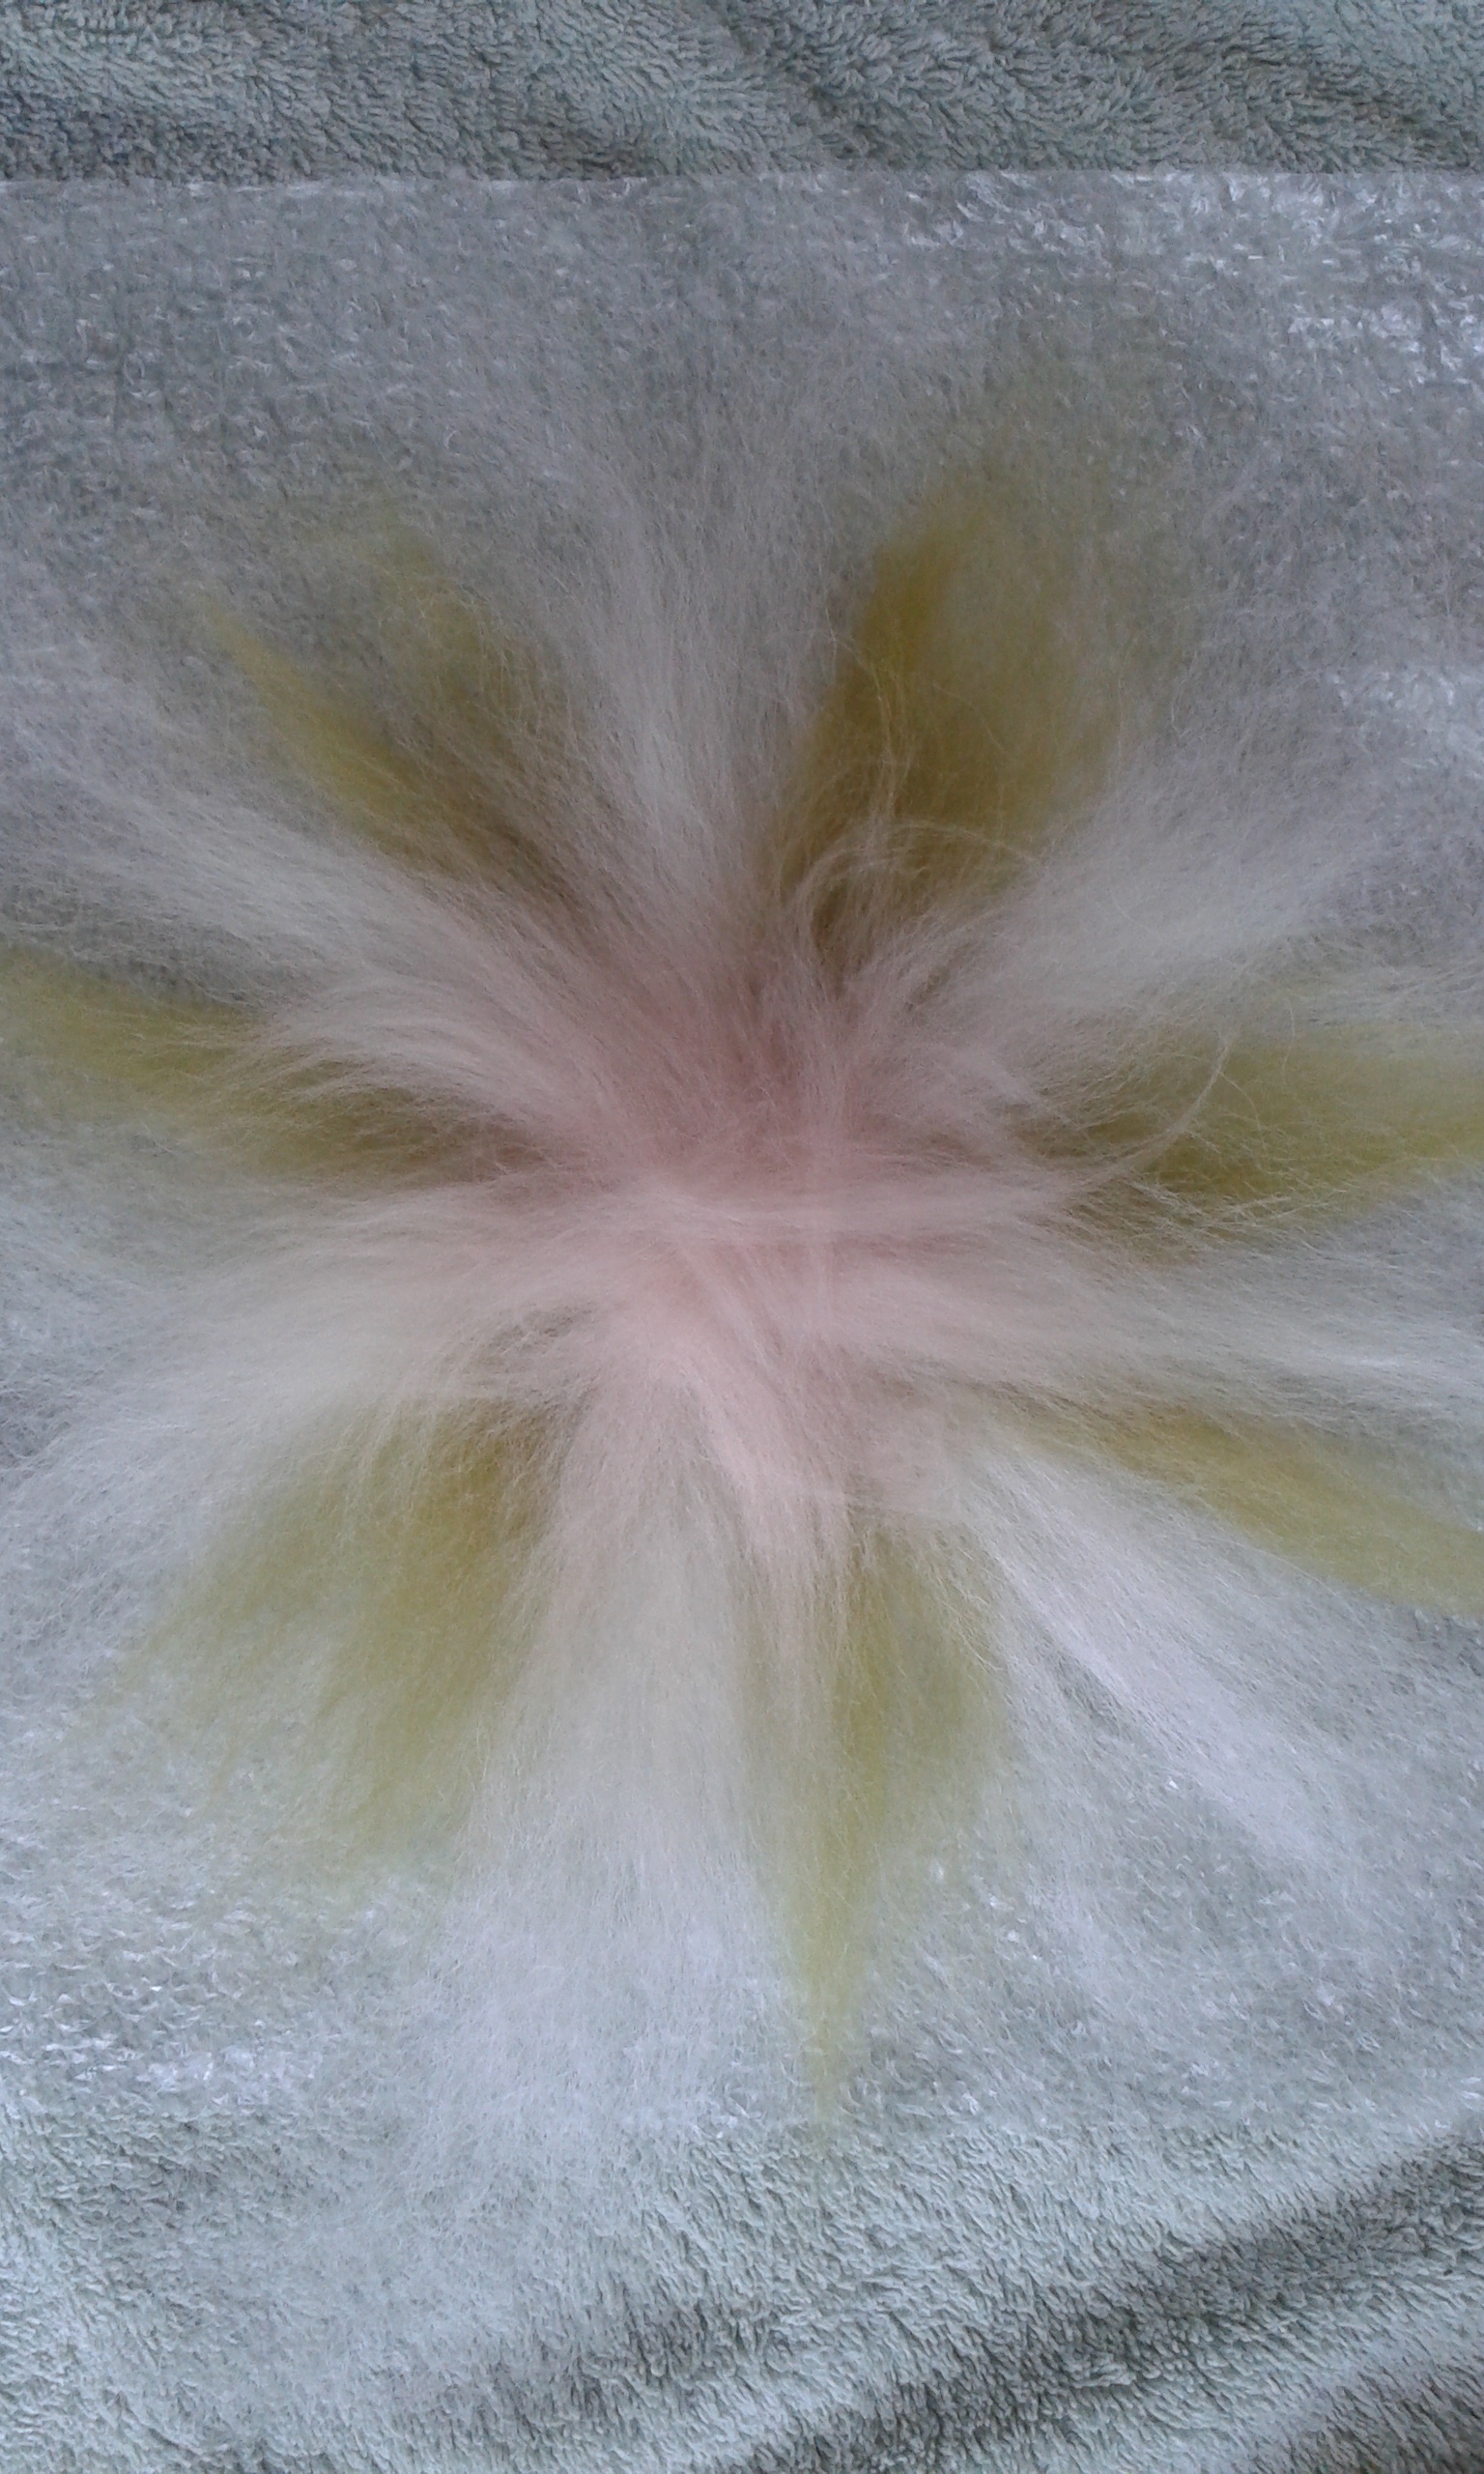
The pre-felt has been cut up and rearranged.

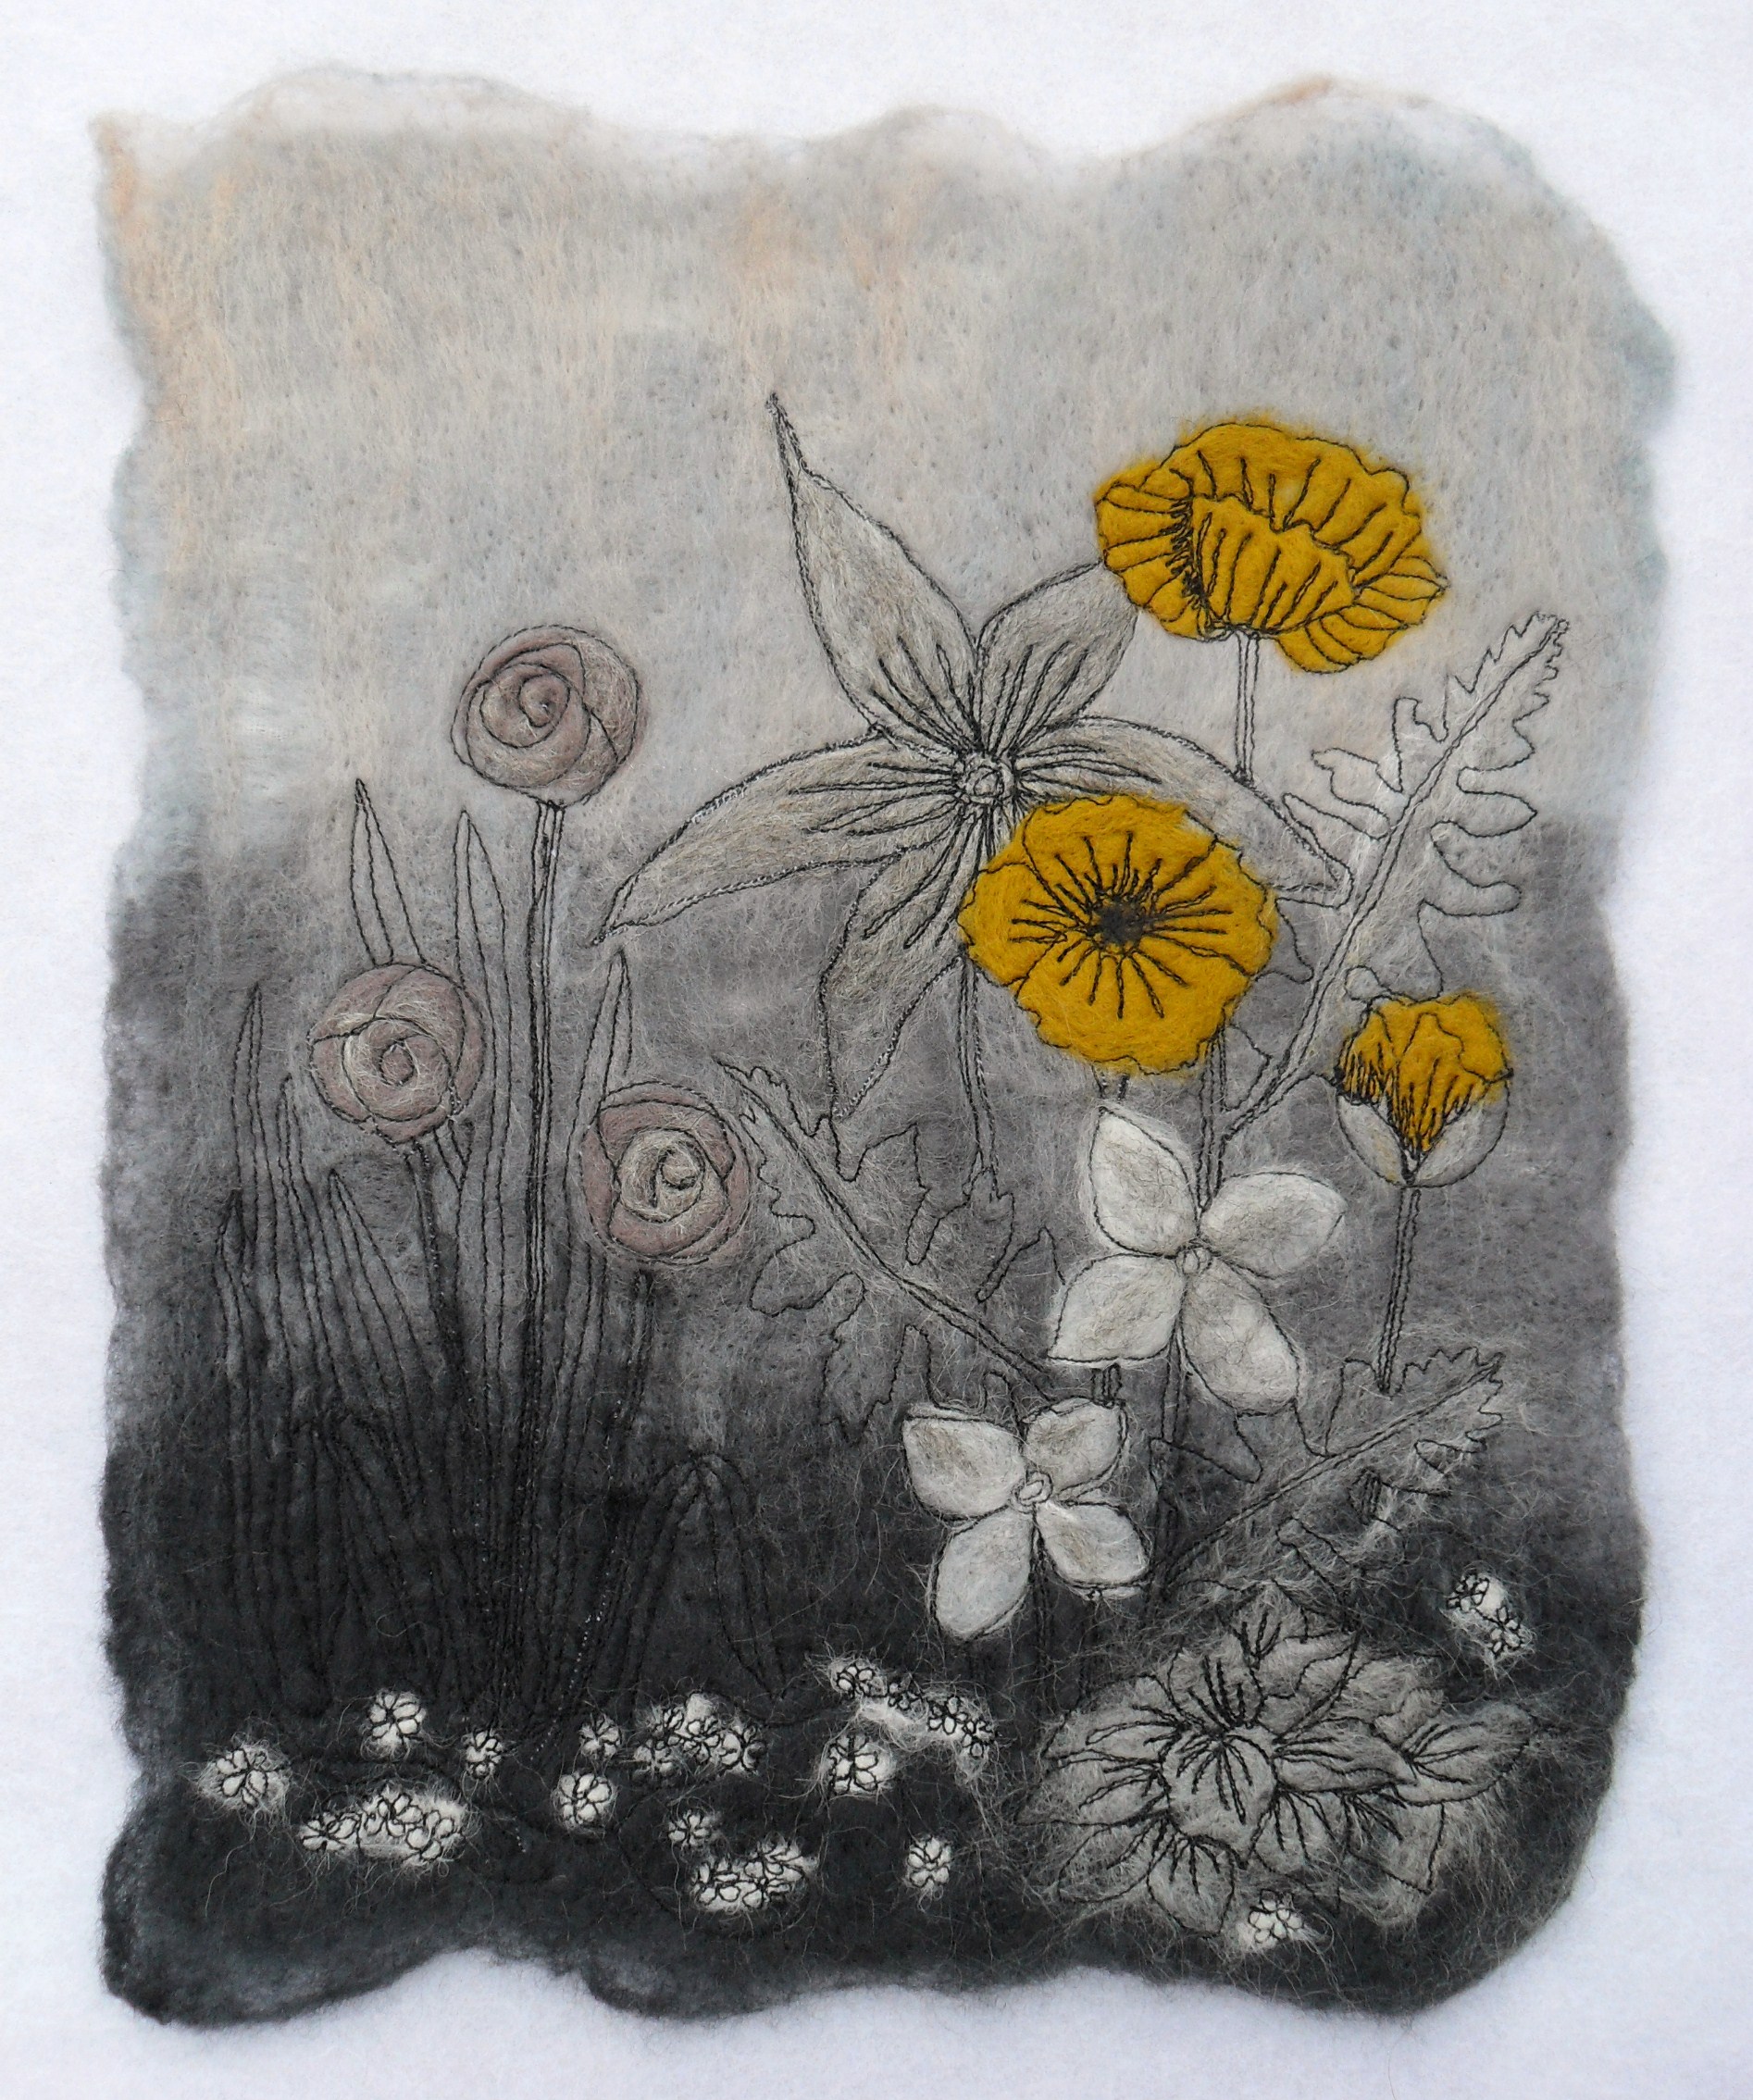
The next stage was to cut the pre-felt into squares and rearrange it, in a different order, onto a plain background, adding bits of scrim, nepps and silks and completing the felting process.   There was so much pre-felt I ended up making two pictures, one square and one rectangular.  I enjoyed the process and was really pleased with how the pictures turned out.

Detail of abstract wet felted picture

Close up of the first picture showing the embellishment

Once we got back from holiday I picked up the pieces again and added some sari silks, a few seed beads and some machine embroidery.  I feel like the pictures have taken on a bit of a ‘sea-side’ feel and, with having the two week holiday sandwiched between starting and finishing them, they now remind me of happy times island hopping in the Ionian.

A wet felted abstract picture.

First of two abstract, wet felted pictures created with the guidance of Robyn at Feltybits.


Rectangular wet felted abstract picture

Second of the abstract pictures made at Robyn’s workshop

Fairy Shoes…

I have been meaning to post these photos for several days but where does the time go?  Last Saturday I met up with a group of other ladies at the Thomas Garrett Rooms in Heighington to take part in the ‘Fairy Shoes’ felting workshop run by Robyn Smith of Feltybits.  Once again it was a great workshop with Robyn offering lots of encouragement and advice regarding wet felting, working with a resist and embellishing.  The tiny shoes were created using Merino wool tops and decorated with seed beads.  The finished items all turned out different in colour and style and looked particularly cute when lined up for the photos!

Fairy Shoes

Creating Pictures…

When I began felting a few months ago I hadn’t imagined that it was going to turn out to be this much fun and this addictive!  At some point in the not too distant future I will have to do some housework, phone some friends and generally catch up with all the stuff I have shelved while I have been enjoying myself!   In the meantime I thought I would share the two pictures I have just done.  Both of these started out as wet felted backgrounds (Merino tops onto muslin fabric) and then I added detail with needle felting and free motion embroidery.   When they were finished I found that I liked the reverse of the pictures as much as the front…they had a real ‘sketchy ‘ quality to them.  I sometimes forget to lower the foot before embroidering so I tend to get the ‘birds nest’ effect on the back of my work.  If I can get my head around not doing this I will get a neater finish and be able to use the reverse of a picture as the front.

My version of the Flower Meadow using wet and dry felting and machine stitching.

Floral picture using wet and dry felting and machine stitching.

The second picture was inspired (albeit very loosely!) by Ruth’s Jackson Pollack challenge on the Felting and Fibre website.  I looked at some of his work and really liked the colour combination of Yellow Grey Black.  With this in mind I planned my background using three shades of grey and mixed the lightest of these with a flesh tone to warm it up a bit (remember I did say very loosely inspired!).

Fibres laid out ready for felting - three shades of grey and a flesh tone to add a little warmth.

Fibres laid out ready for felting – three shades of grey and a flesh tone to add a little warmth.

So here is the finished article….I realise it was a bit of a cop-out to do flowers (yet again) but you can’t say I am not consistent!

Yellow Poppies.

Yellow Poppies.

Reverse side of Yellow Poppies.

Reverse side of Yellow Poppies.

Away with the Fairies….

Away with the Fairies...

Away with the Fairies…

It seems ages since my last post but its been a busy time craft-wise so now I’ve made the time to sit still I have plenty to ramble about!

I attended another of Eve Marshall’s fabulous felting workshops just before Christmas and this one, following on from the Elf on a Toadstool with Robyn, was perfectly timed to feed on my reawakened childhood love of all things magical/mystical.  The basic process for making the body of the wet felted Fairy was very similar to that of making a flower i.e. laying the tufts of fibres overlapping in a ‘starburst’ formation.   One thing to remember before commencing the felting is that the centre of the ‘flower’ will become the Fairies head and therefore the fibre laid here should be your chosen ‘flesh’ colour.

Laying the fibres for the 'Spring time' fairy

Laying the fibres for the ‘Spring time’ fairy

The head is simply a felted ball, but getting the size right was a bit hit and miss to begin with!  The ball is positioned in the centre on the wrong side of the skirt.  The skirt is then pulled tight over the ball and tied in place with thread.  I have discovered that the best thing to use for this is dental floss as its very strong and can be pulled tight without fear of breaking.  At the same time I attached a second length of floss through the top of the head which can be used, if required,  to suspend the Fairy.  The figures are not given a face, these are left blank in the Waldorf tradition.

The head is formed and thread attached for suspending.

The head is formed and thread attached for suspending.

Wet felted fairy.

My first attempt at a wet felted Fairy.

Although I was pleased with my first attempt, she now looks pretty crude compared with the ones I made over Christmas!   The black hair on this first Fairy was made from wool top and attached by needle felting….I prefer the hair on the more recent examples which I made using a textured knitting wool and decorated with a headband of tiny beads.

Each Flower Fairy is decorated with a beaded headband and carries a posy.

Each Flower Fairy is decorated with a beaded headband and carries a posy.

Springtime Fairy

Springtime Fairy

The delicate, translucent wings are formed using ‘Blaze’ heat bondable Angelina Fibres – I hadn’t heard of these of these before but I can see them being useful for all sorts of future projects!  To make the wings the Angelina Fibres are simply laid between two sheets of paper and ironed using a medium heat setting for a couple of seconds.

Gothic Flower Fairy

Gothic Flower Fairy

When I made the ‘Gothic’ Fairy I couldn’t find a suitable wool for her hair so I simply used a permanent marker on the orange wool and the result looked fab!  This one is my favourite so far…she worked out smaller than the others and looks so cute….which is your favourite?


Breaking news….

More exciting news on the felting front….my brooches and key rings are going on sale at the Sir Joseph Banks Centre in Horncastle from tomorrow.  There will be a mixture of large wet felted brooches and smaller dry felted gifts to choose from.  The Sir Joseph Banks Centre is the home of the Sir Joseph Banks Society where visitors will find information on the life and the amazing work of one of our most famous and respected explorers.   The Society is very proud to have Sir David Attenborough as its president and the building it occupies houses a growing reference library and is working towards establishing a research centre.

The building also boasts a thriving gift shop, run by volunteers, and crammed with all sorts of beautiful gifts.  There are a mixture of “bought in” and hand crafted items, with a lot of the stock being created on the doorstep by talented, local artists/crafters.  From pictures, jewelry, ornaments, clothing, accessories, etc., you name it and they probably have it!  So if you are in the Horncastle area and looking for unique gift ideas be sure to give this shop visit!

A selection of my handmade wet and dry felted brooches and keyrings.

A selection of my handmade wet and dry felted brooches and keyrings.

Beautiful gifts for the home on sale at the Joseph Banks shop.

Beautiful gifts for the home on sale at the Joseph Banks shop.

The shop is crammed with great gift ideas for Christmas!

The shop is crammed with great gift ideas for Christmas!


Wet felted bowl

OK so I had a go at making the wet felted bowl this afternoon…..not an absolute disaster but it could have worked out better!  I used Merino wool from Adelaide Walkers ‘Brights’ collection laid onto a flat circular resist.  All seemed to be going well until it came to taking the resist out.  What started out as a small hole in the top of the bowl got stretched and became a huge gaping hole!  I think my problem lay in not making the bowl thick or sturdy enough to withstand having the disc pulled out through the small opening.  If only I had made this a bit bigger it would have come in useful turned upside down and worn as a funcky ‘dog-walking’ hat!

My first attempt at wet felted flowers

This morning I thought I would have a go at wet felting.  Depending on which tutorial you look at on youtube you can be mistaken for thinking that wet felting takes forever is a very messy and laborious task.  Fortunately, having attended a workshop with Eve Marshall last week, I have discovered that it can be fun and very rewarding!  Here are my first attempts at wet felting flowers…I was very hapy with the results and plan to make them into brooches.  I am thinking of trying my hand at  wet felting a round bowl later today – not too sure how that will turn out!  Good or bad, watch this space for photos.