Avanced Pod Workshop…..

Today I joined 8 other felting enthusiasts at the Village Hall in Hutton Buscle near Scarborough for Jenny Peppers “Avanced Pods” workshop.  I love Jenny’s classes, she’s a great tutor and explains/demonstrates every step very clearly as we work through our creations.

Two examples of Jenny's work displayed with the shells which were her inspiration.

Two examples of Jenny’s work displayed with the shells which were her inspiration.

We all started out with the same size/shape resist and selected our colours from the huge stash of Merino wool on offer.  We began by making a sheet of prefect using three different colours and this would be used to make “craters” in our pods.  Working with our prefelts and resists we started with our inner layer and worked outwards, layering our wool tops before adding the spikes and tails.

The resist is wrapped in white Merino and the spikes attached at either end.

My resist is wrapped in white Merino and the spikes attached at either end.

My top craters and embellishments are added

The top craters and embellishments are added to my piece.

The next stage was to place our outer craters where we wanted them and add silks, wools, snippets of prefelt, etc as embellishment before felting our spikes.

After lots of rubbing the dreaded rolling begins……and Jenny sees to it that her students don’t skint on the rolling!

Rolling, rolling and more rolling.....

Rolling, rolling and more rolling…..

image

Once again the company was great and day past very quickly with Jenny on hand to encourage, inform and see to it that we all manage to complete our work on time.

Two of the ladies had to leave early and unfortunately I didn’t get pictures of their finished work but here are the other seven.

image

image

Detail of my finished pod.

image

image

image

image

image

Artvango & The Finished Vessel…..

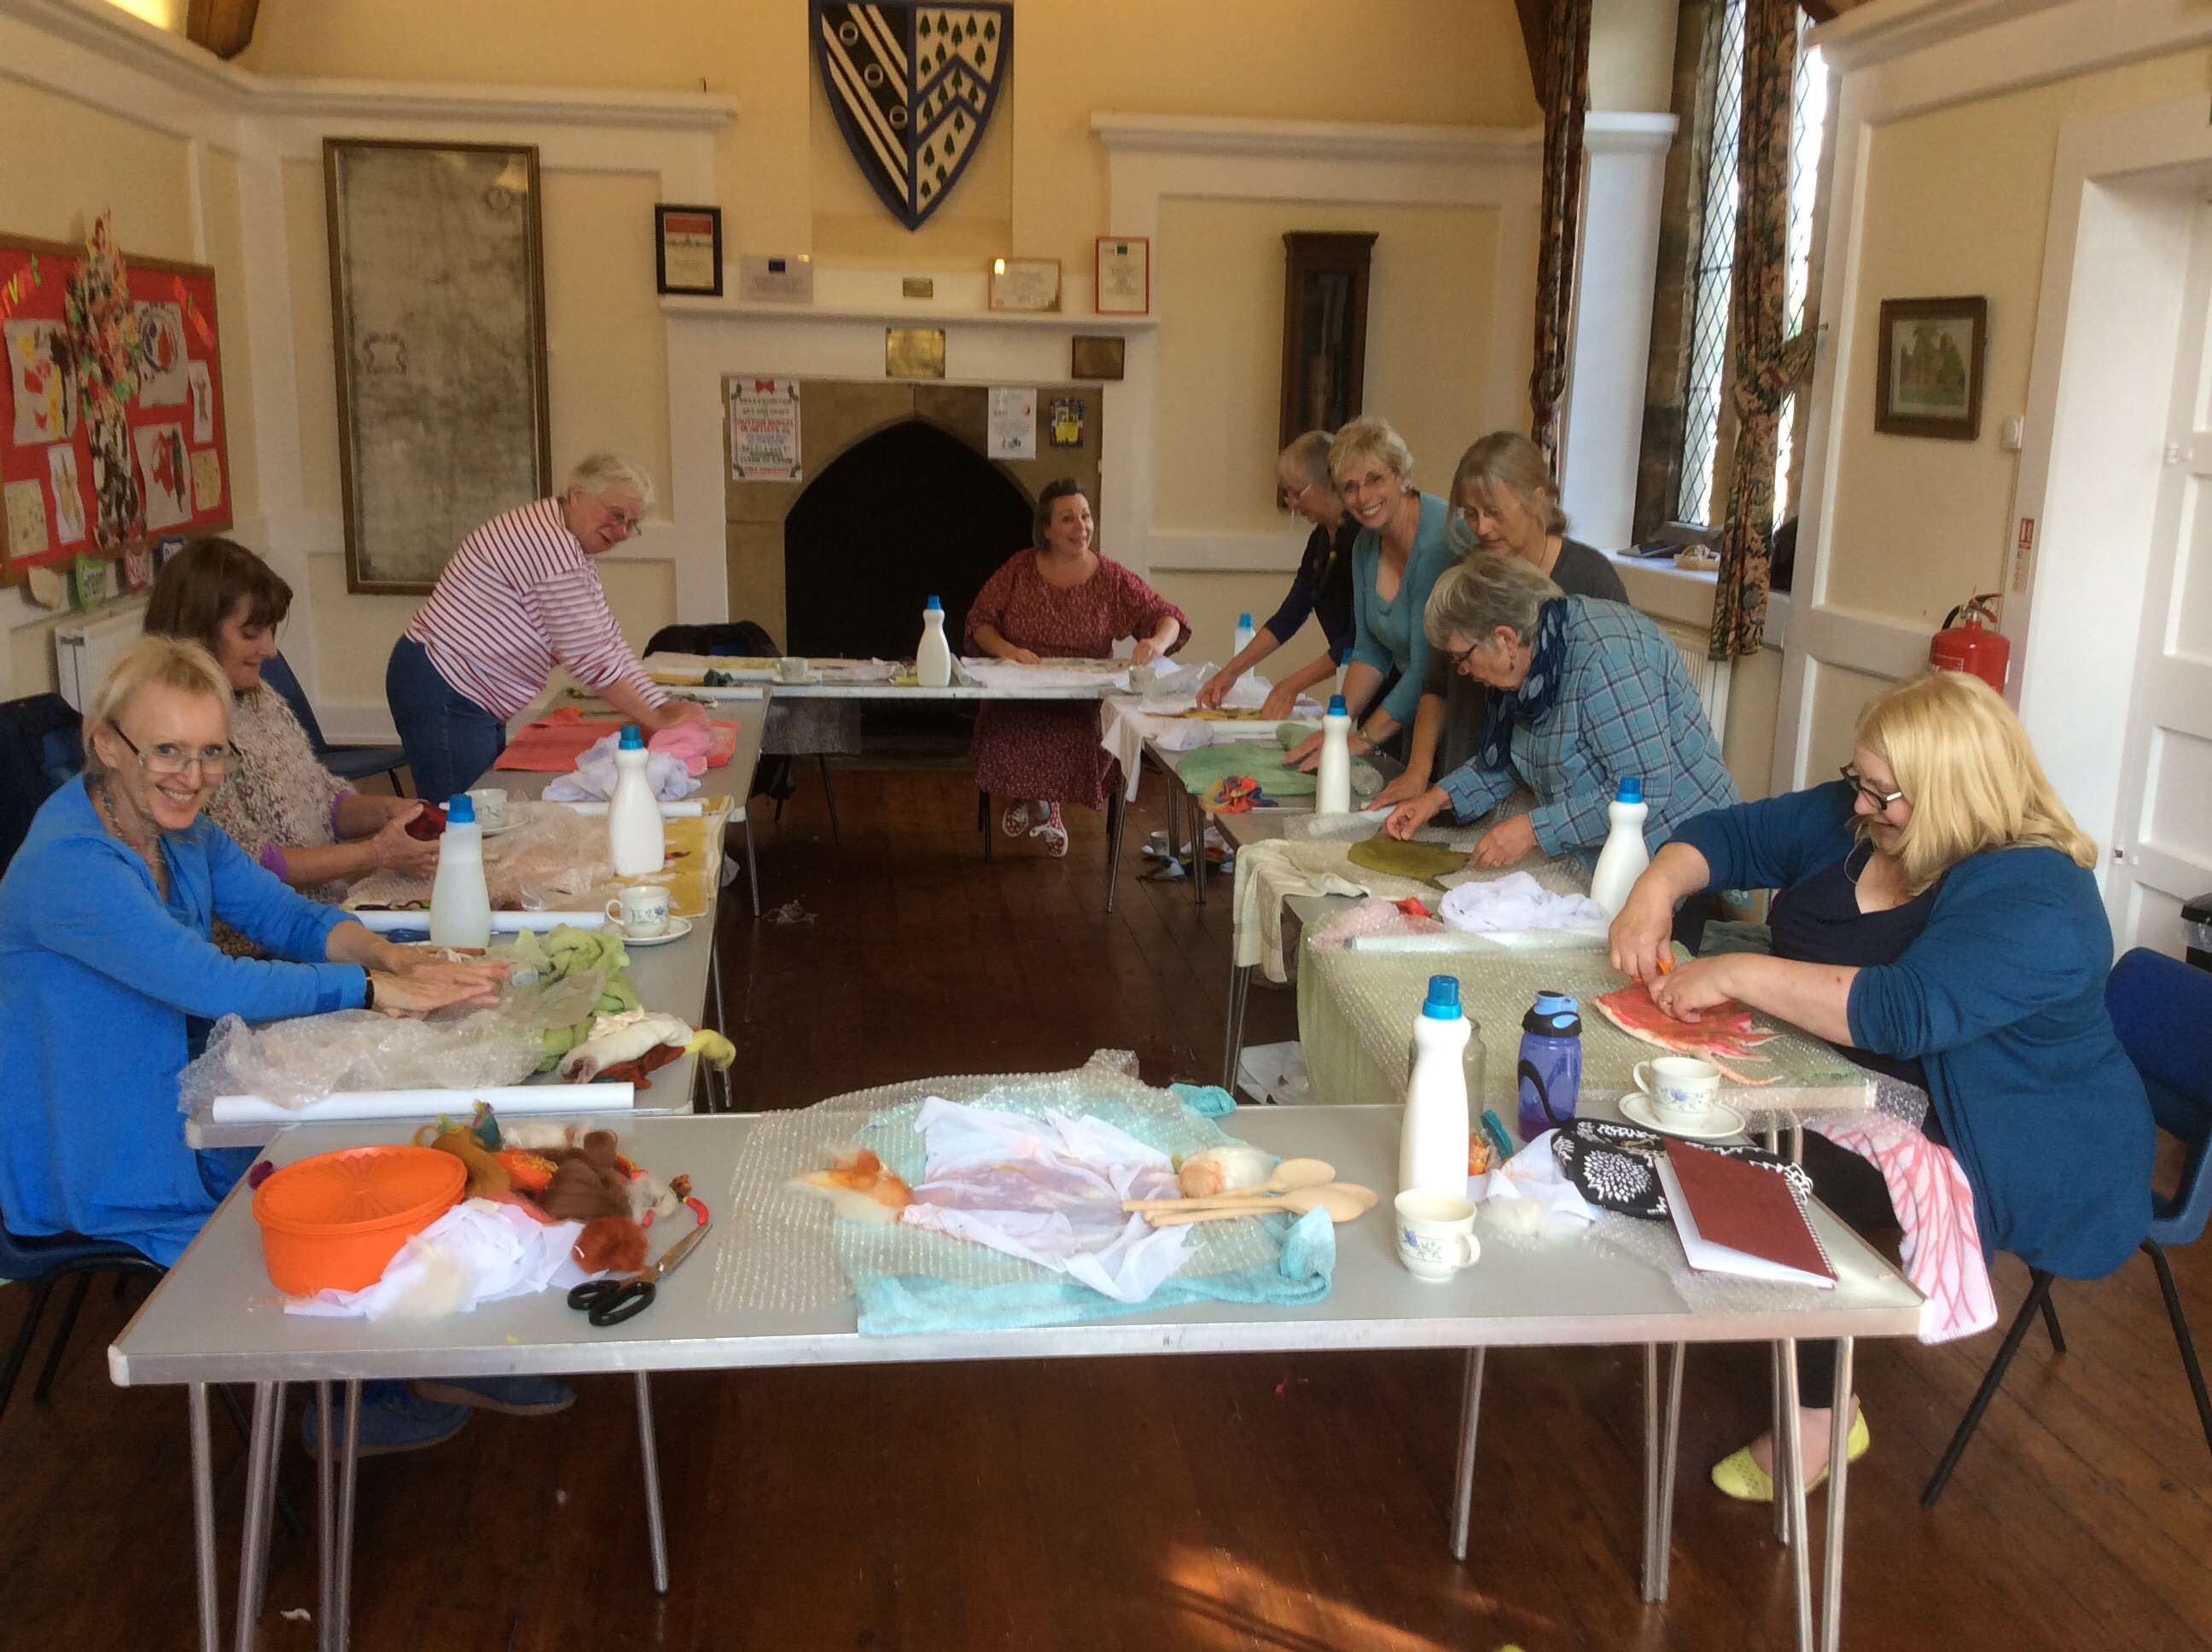
Last weekend a friend and I drove down to Knebworth to see the “Artists in Residence” at Artvango.  It was my first visit and turned out to be a really worthwhile day.  The three textile artists demonstrating their skills were Clare Bullock (Feltmaker), Sharon Osbourne (Mixed Media) and Lynda Monk (Thermofax).  Not only was it interesting to watch these artists at work but it was wonderful how they were so enthusiastic to share their advice and tips so freely.

While I was there I had my grey/lemon vessel in mind and within the first two minutes of arriving Clare had given me the answer to a problem I was having using synthetic organza with Merino tops.  I wanted to include the organza as a another texture but I’d found that my fibres were not migrating through the fabric enough to bond the two together.  Clare explained that using a very thin layer of fibres and rubbing, not rolling, was the best way to approach it, and it worked.  Thanks for that Clare.

In another part of the studio Lynda Monk was demonstrating her use of Thermofax screens and expanding foam on leaf and hexagon shapes cut from Lutradur.  What I found interesting was the fact that the wire she was using to give the leaves their shape wasn’t silver or copper coloured like I had in my workroom, Lynda’s wire was covered with white cotton.  She explained that she uses this so it can be died to match whatever she is making.  Call me sad but I hadn’t seen this stuff before and I was so excited I had to buy some!  That was vessel problem two sorted.  How to hide the wire?  Colour it grey and lemon.

Opposite Lynda was Sharon Osbourne with the most wonderful collection of mixed media work on dispay.  Sharon was demonstrating the use of wax crayons with rubbing plates to create patterns on fabric, the crayon is then sealed with a medium.  I was standing next to another lady who, like me, works with LD students and we both agreed that having spoken to Sharon we were coming away with several ideas that we could use in future workshops.  A couple of days later I tried the wax crayon technique at one of the care homes where I do craft sessions with LD adults and they loved it!

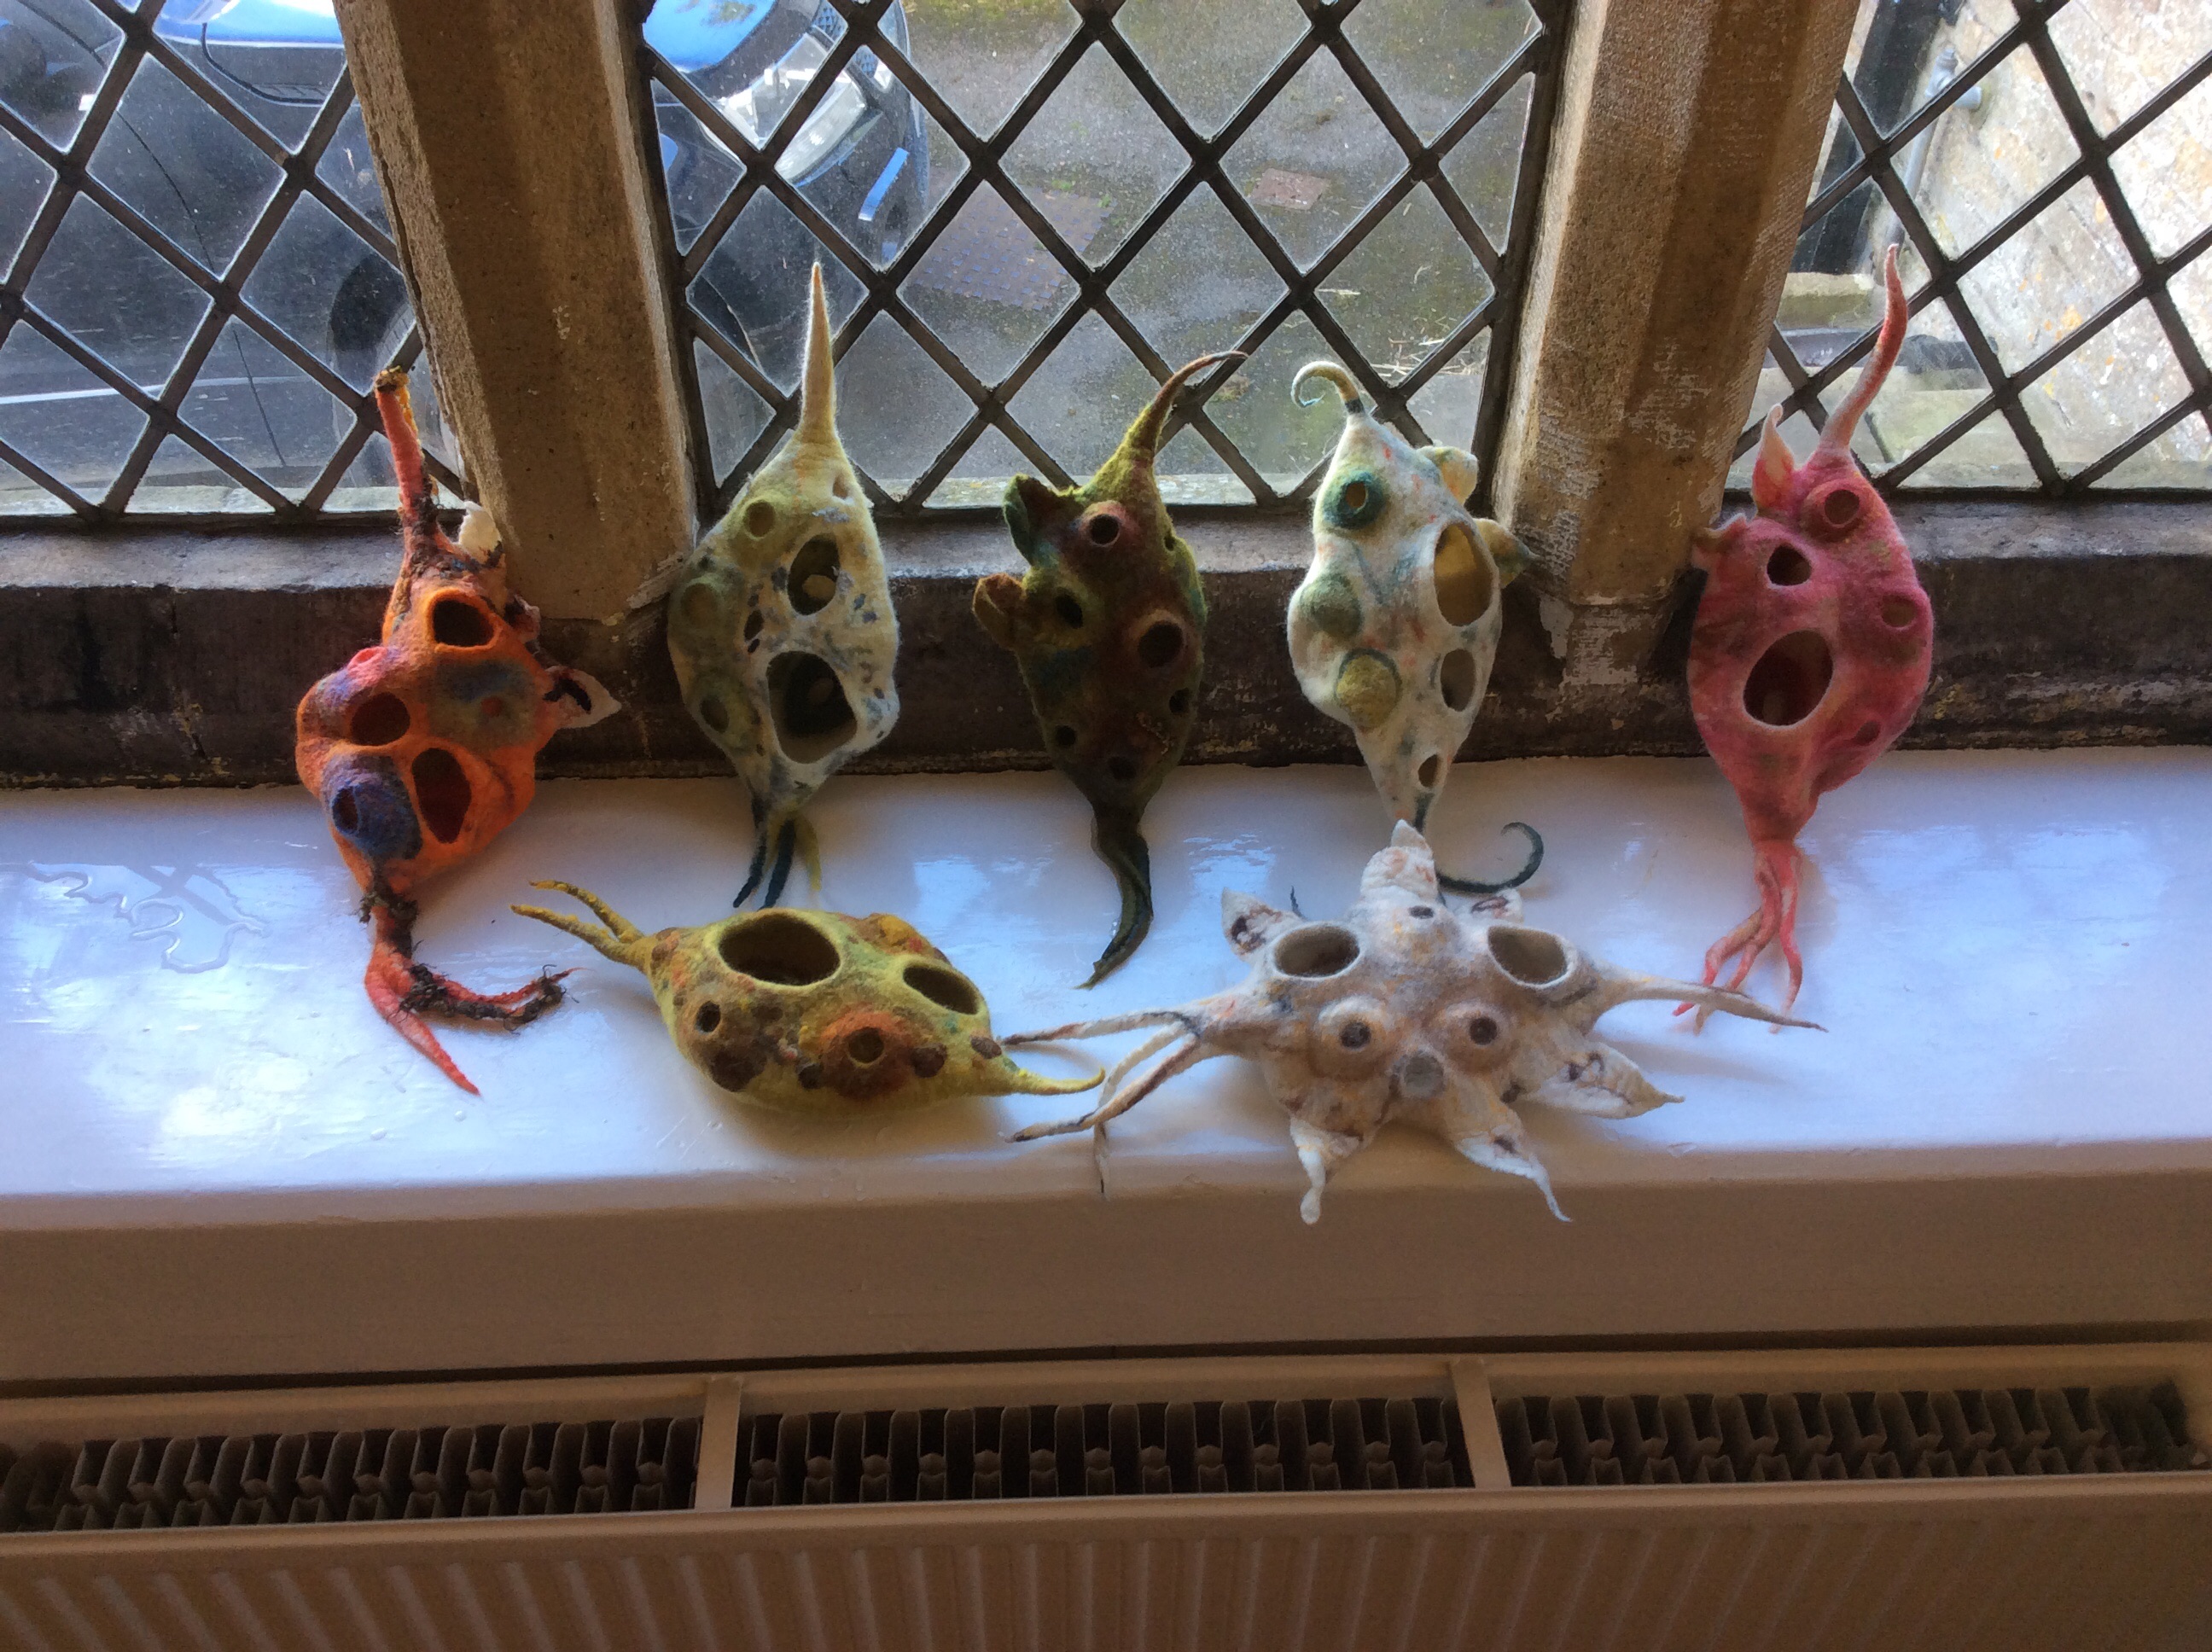
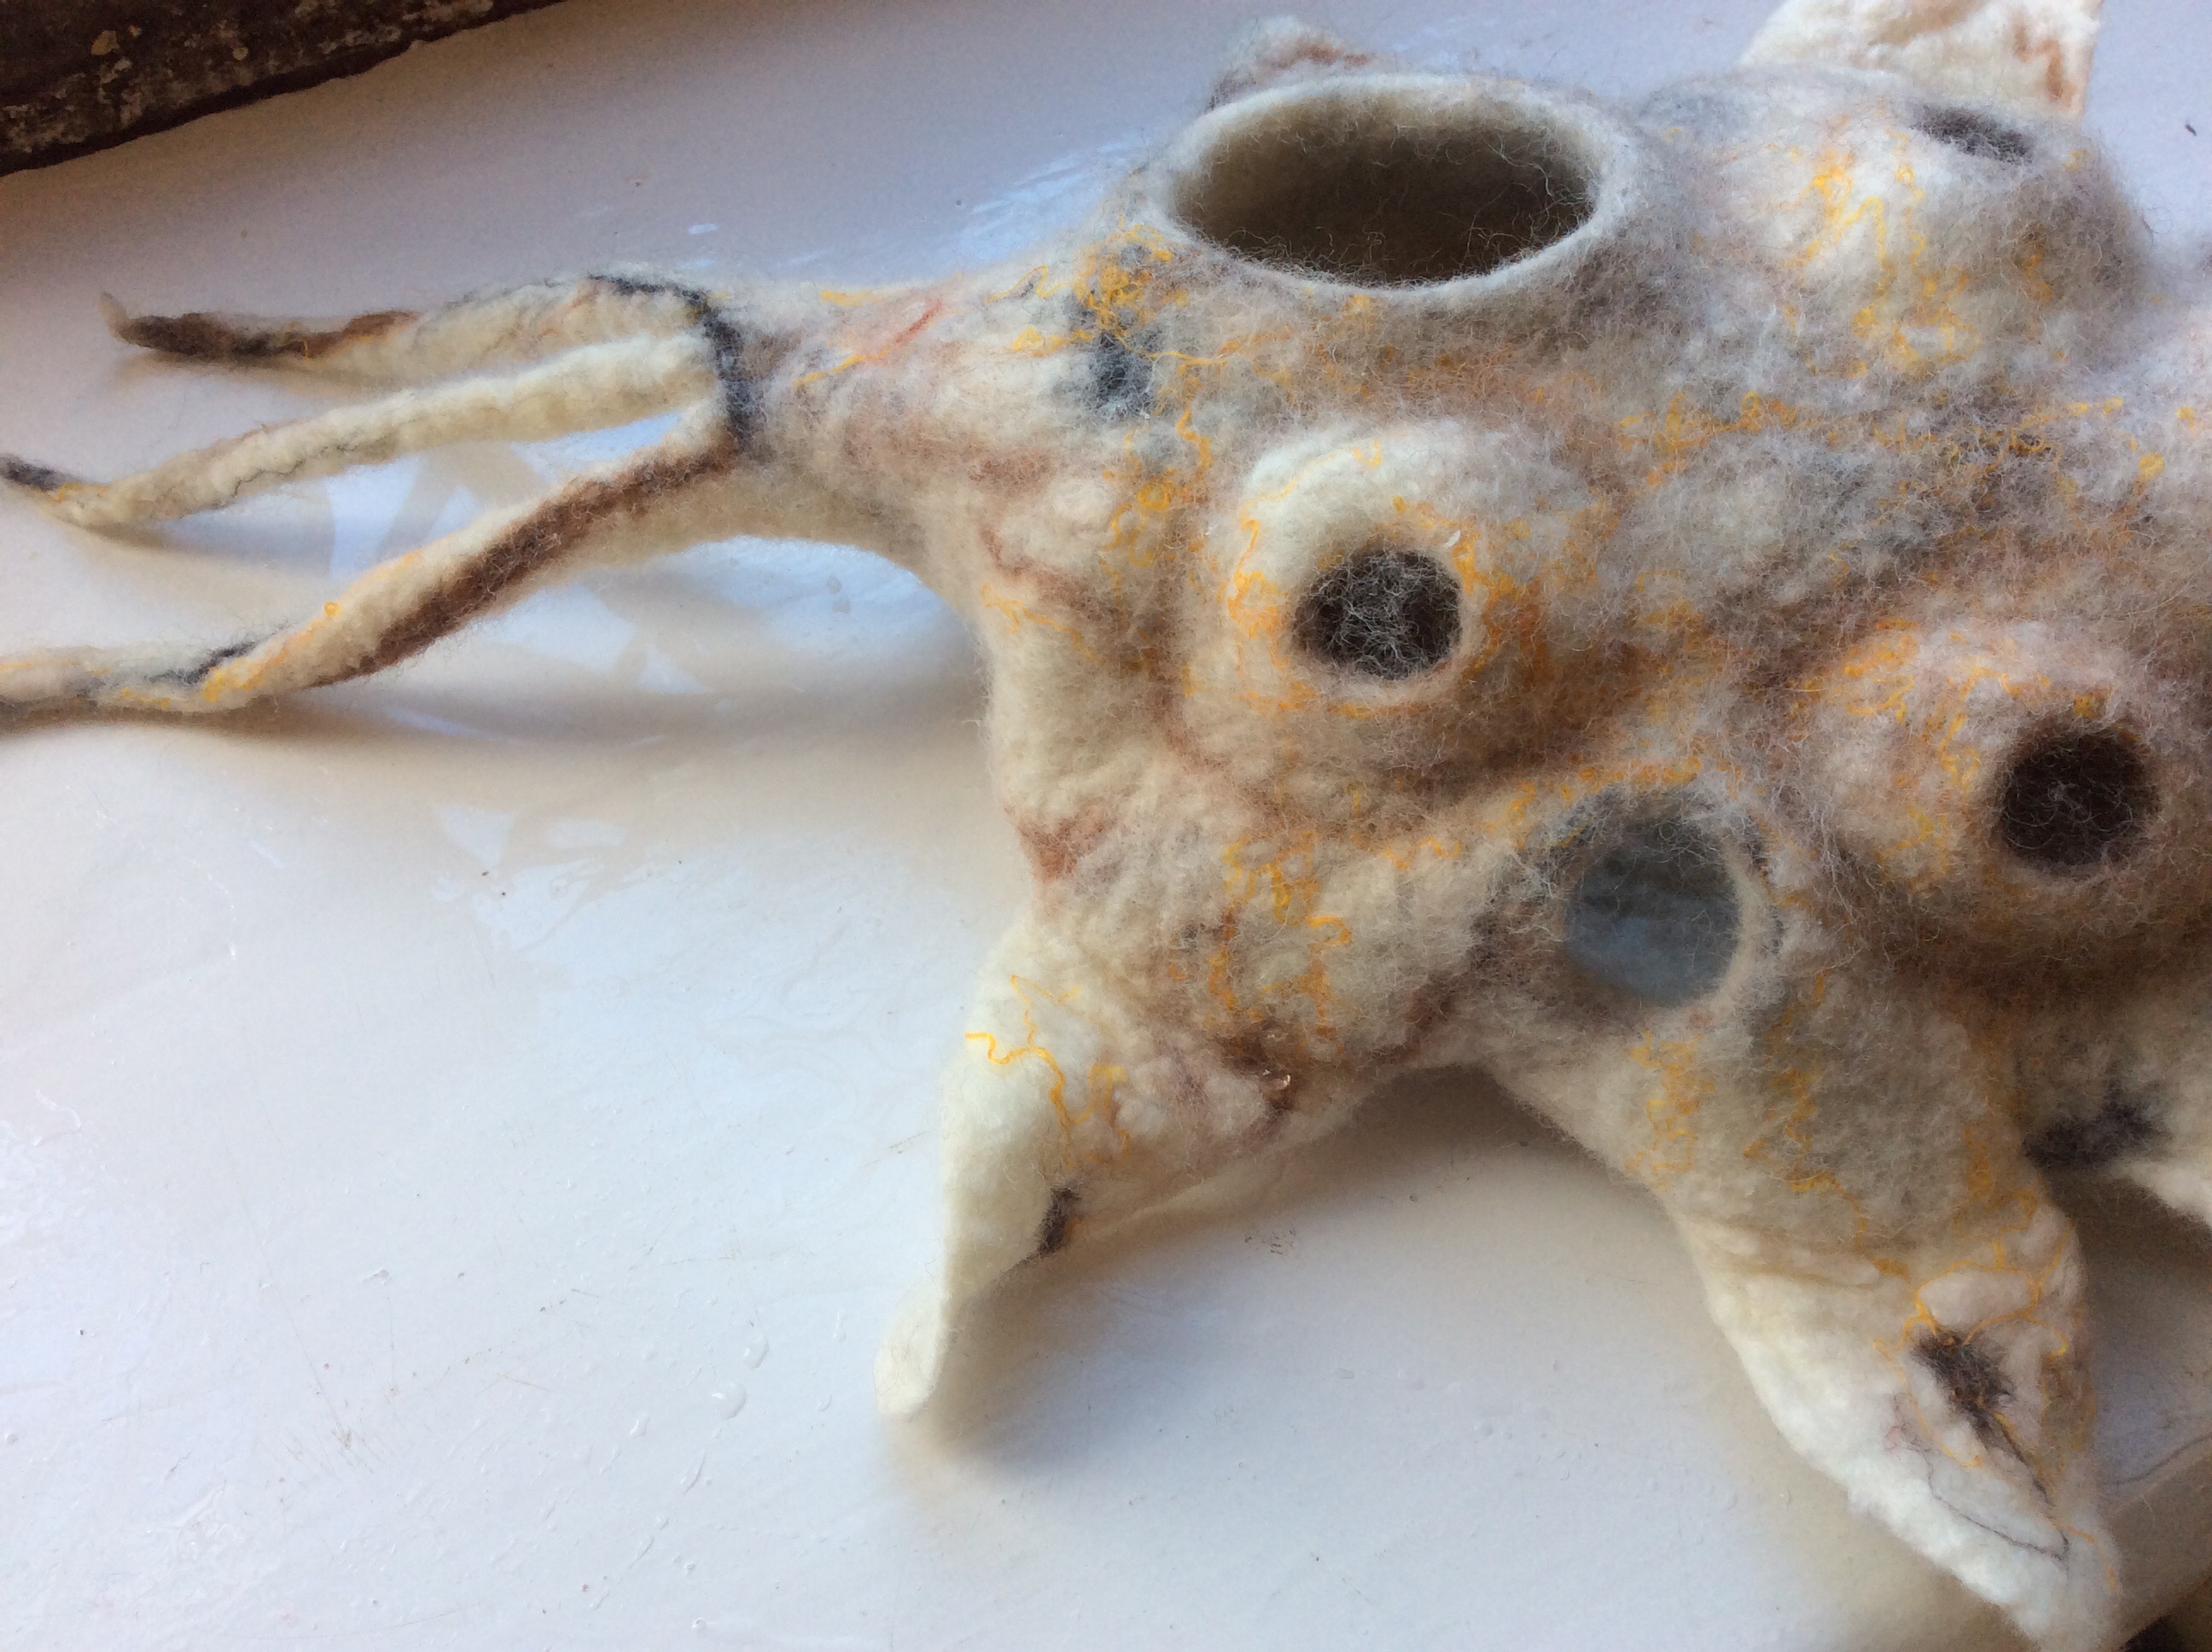
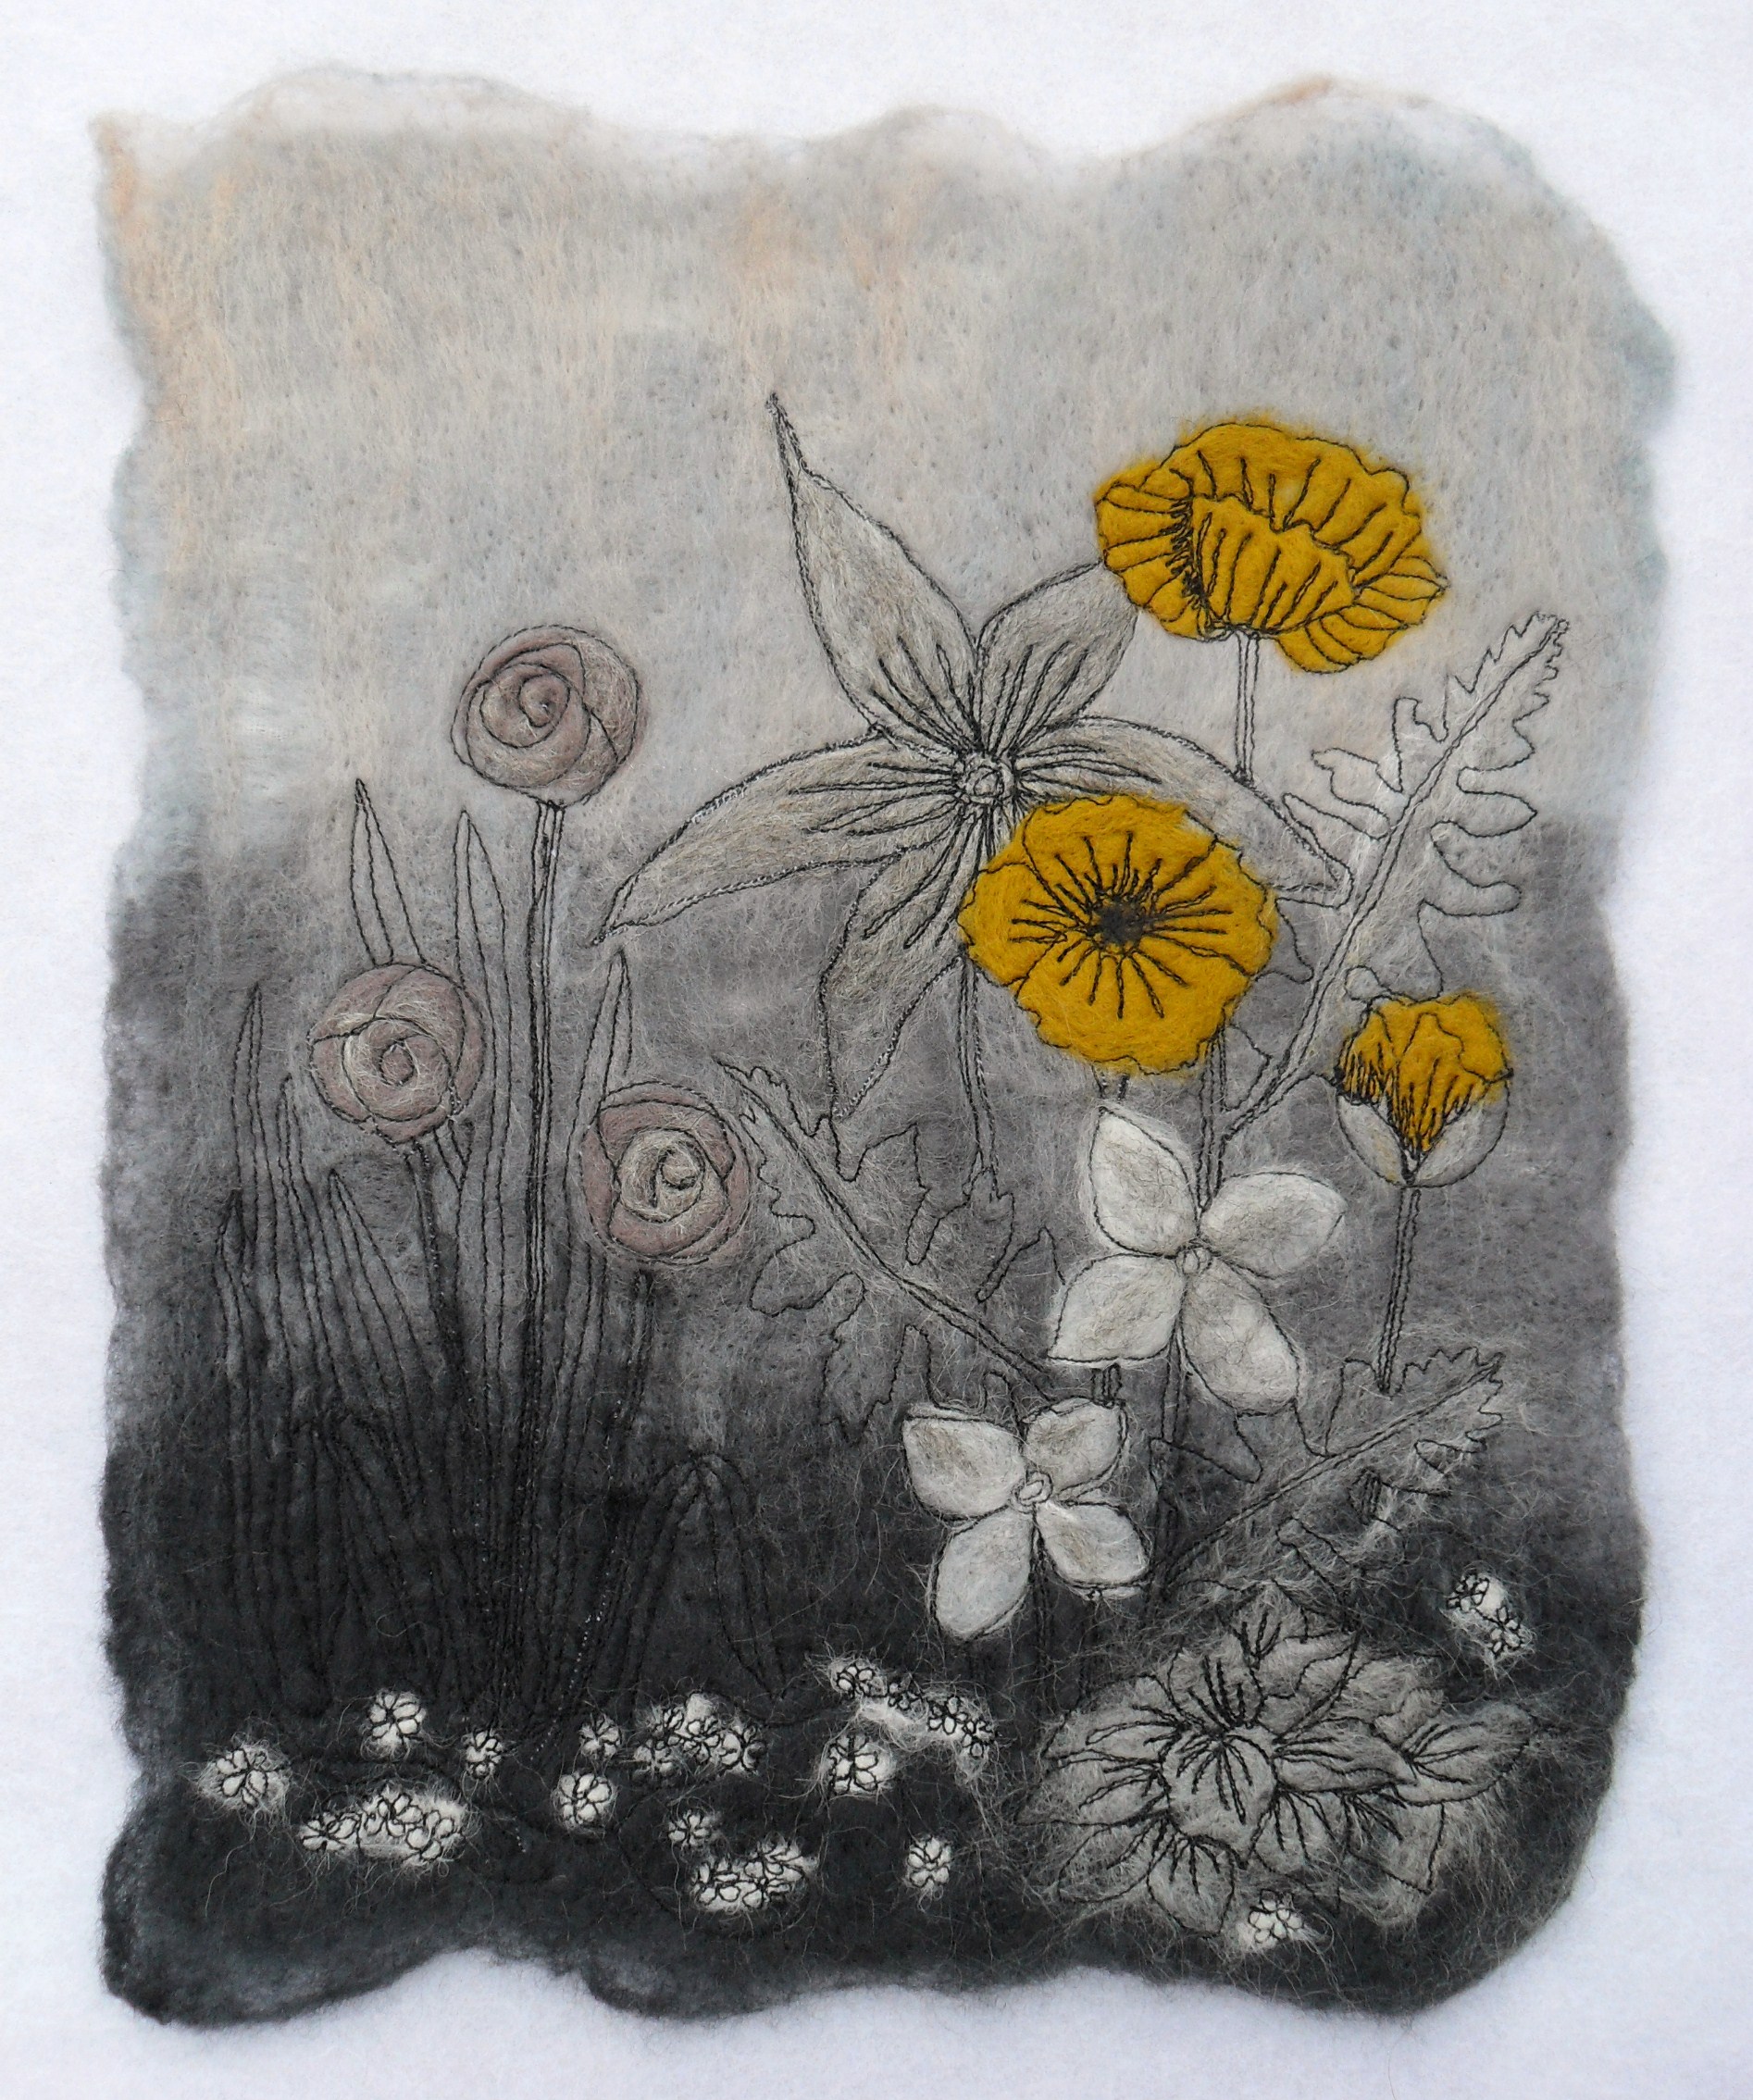
Anyway, back to the 3d piece.  It’s now finished, compete with coloured wire, organza and felting.  I decided that using all 3 panels would result in a vessel too large for the space I wanted to put it so I only used two of them.  Once the machine stitching was finished the holes were burnt out using a soldering iron and hand stitching was added across the larger openings.  The cotton covered wire was coloured to match the panels and sewn in place using zigzag stitching.  I’m really happy with how this has turned out and it’s something I would definitely like to do more of, particularly incorporating felting into my work and continuing with a more abstract theme.

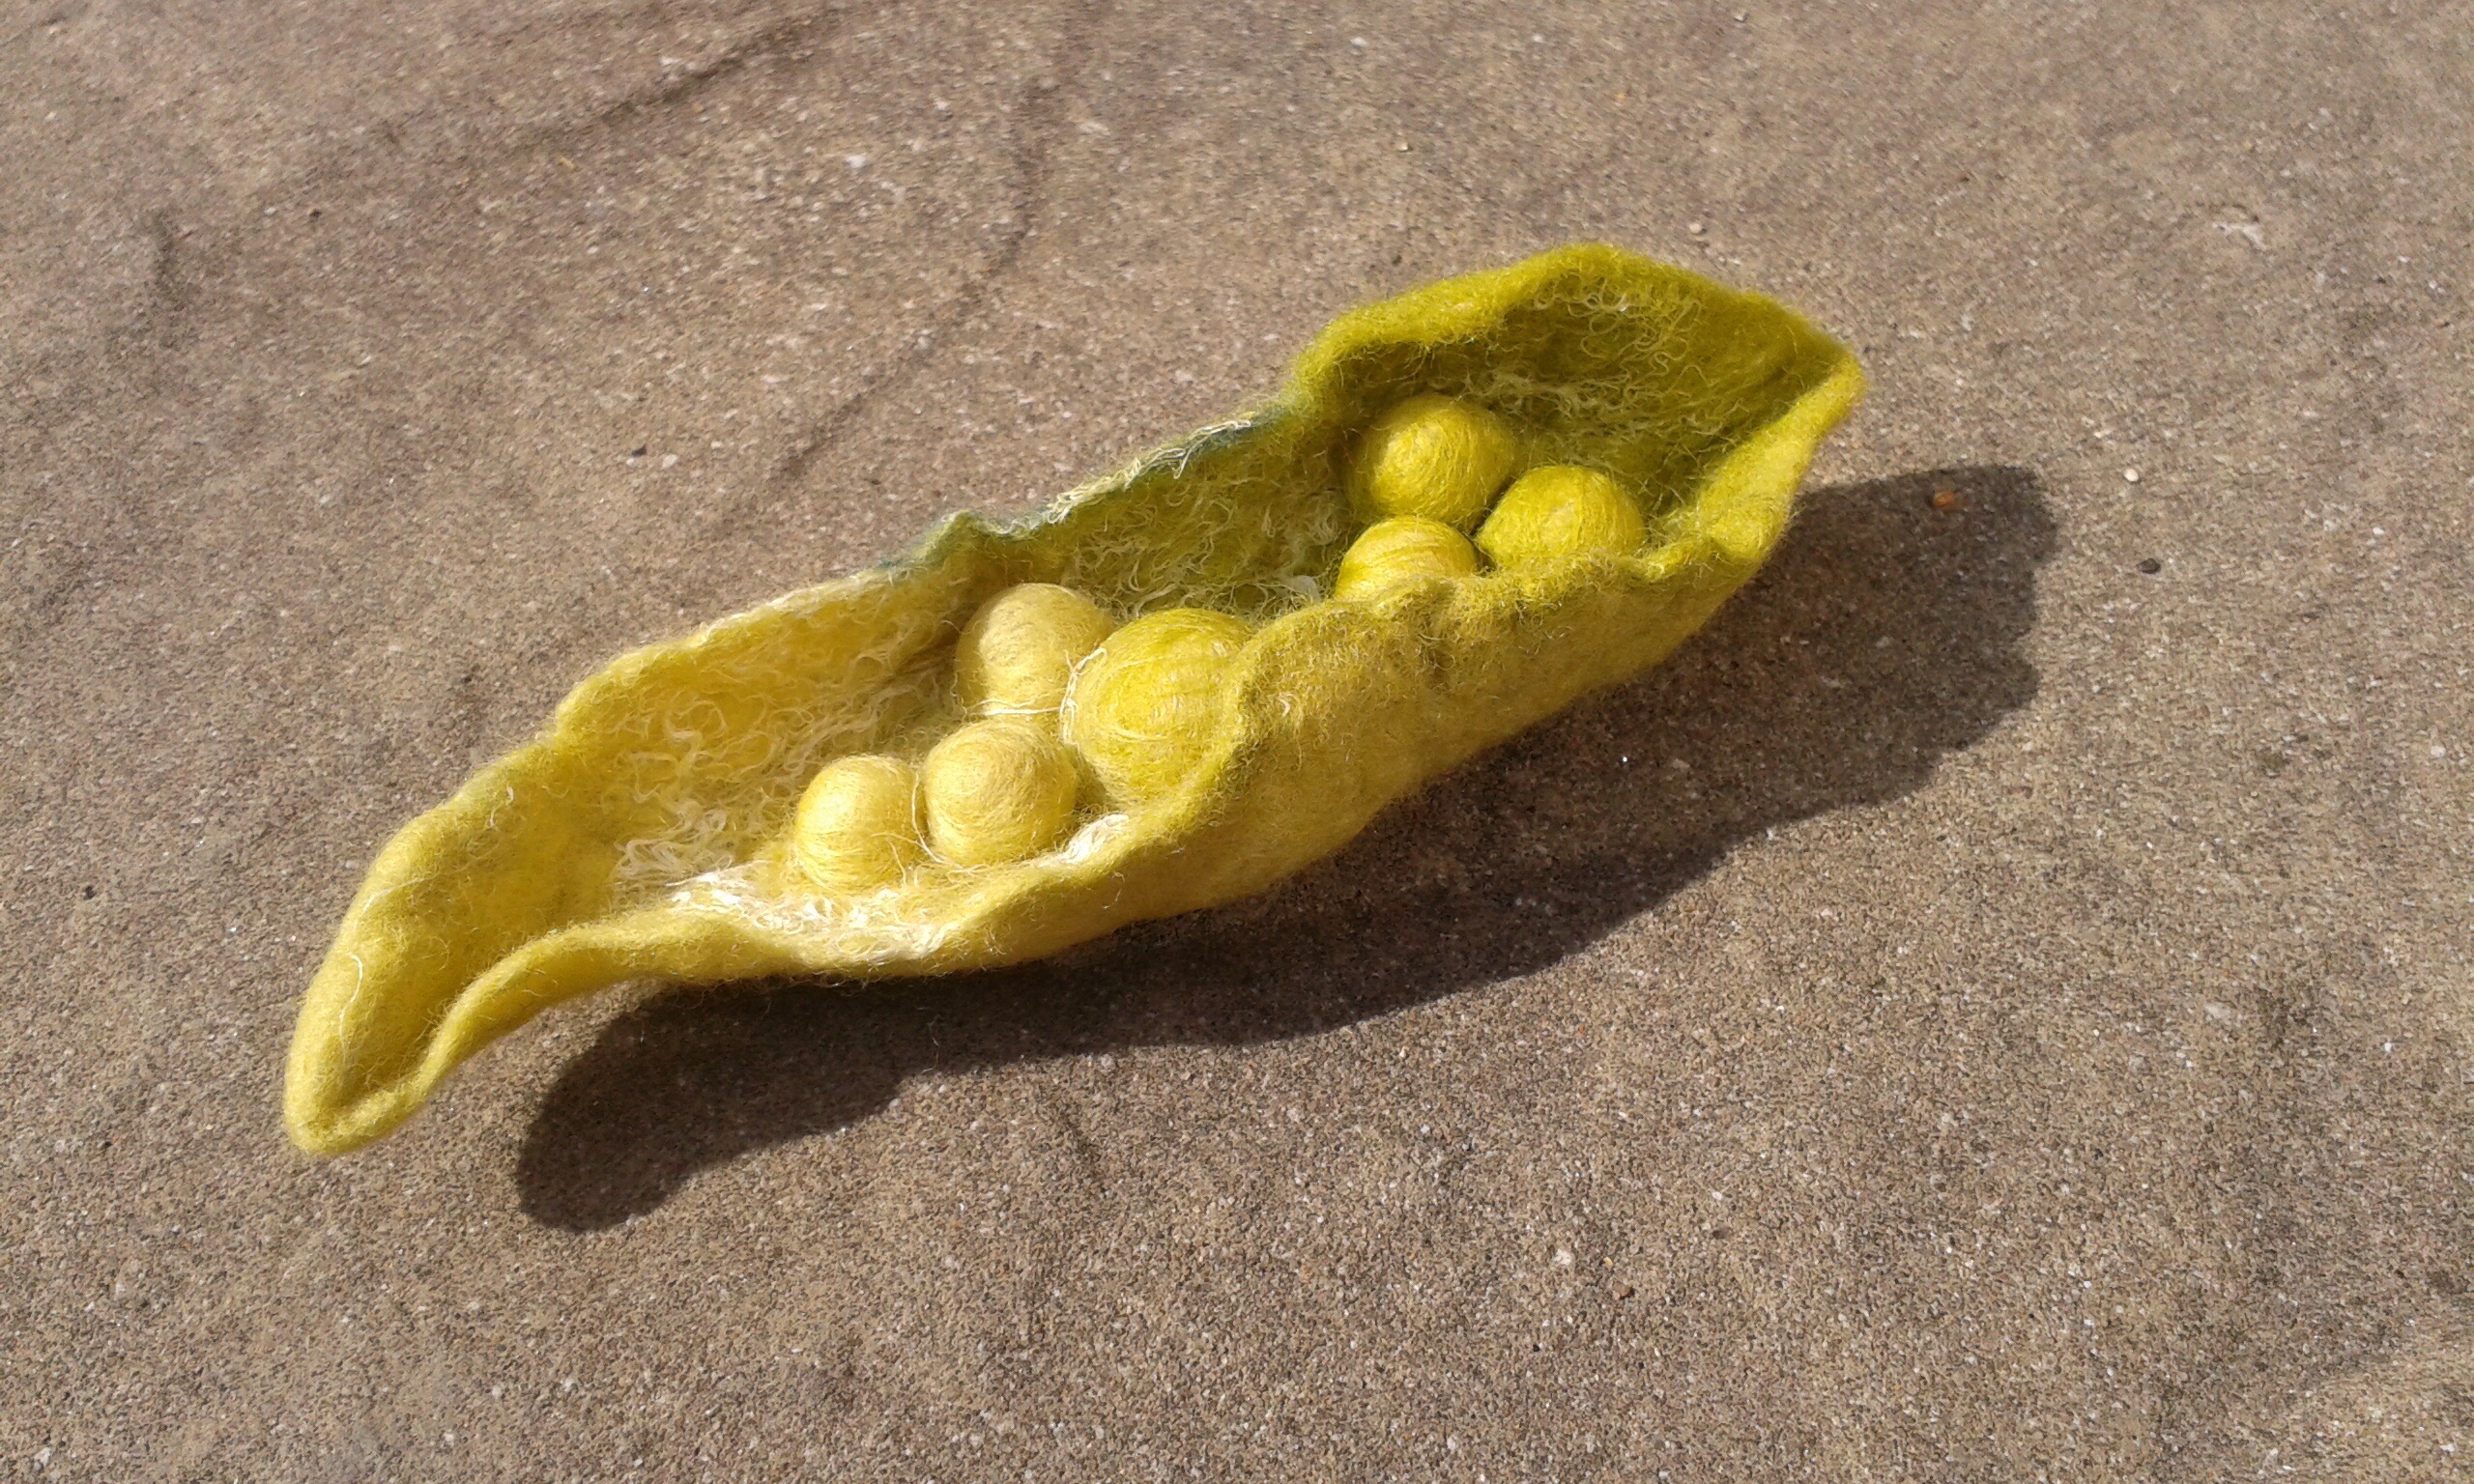
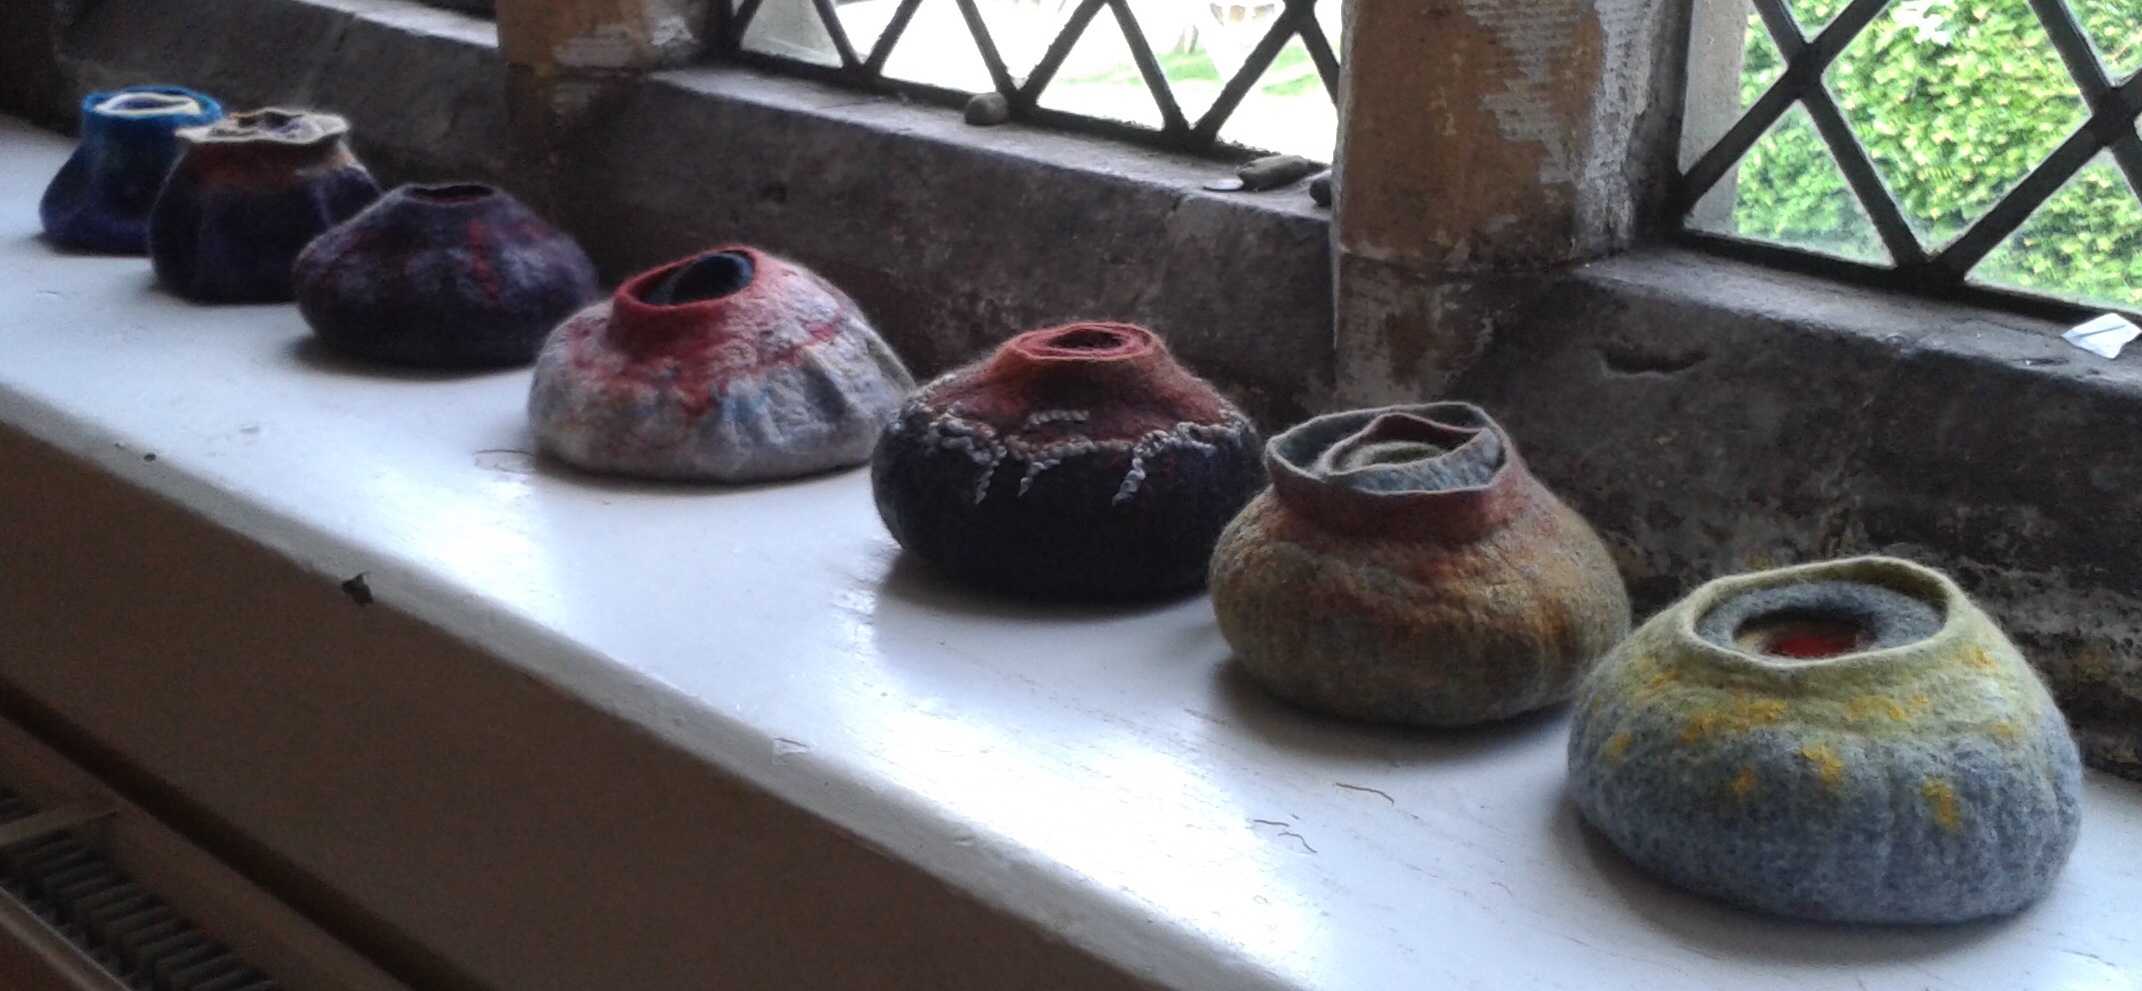
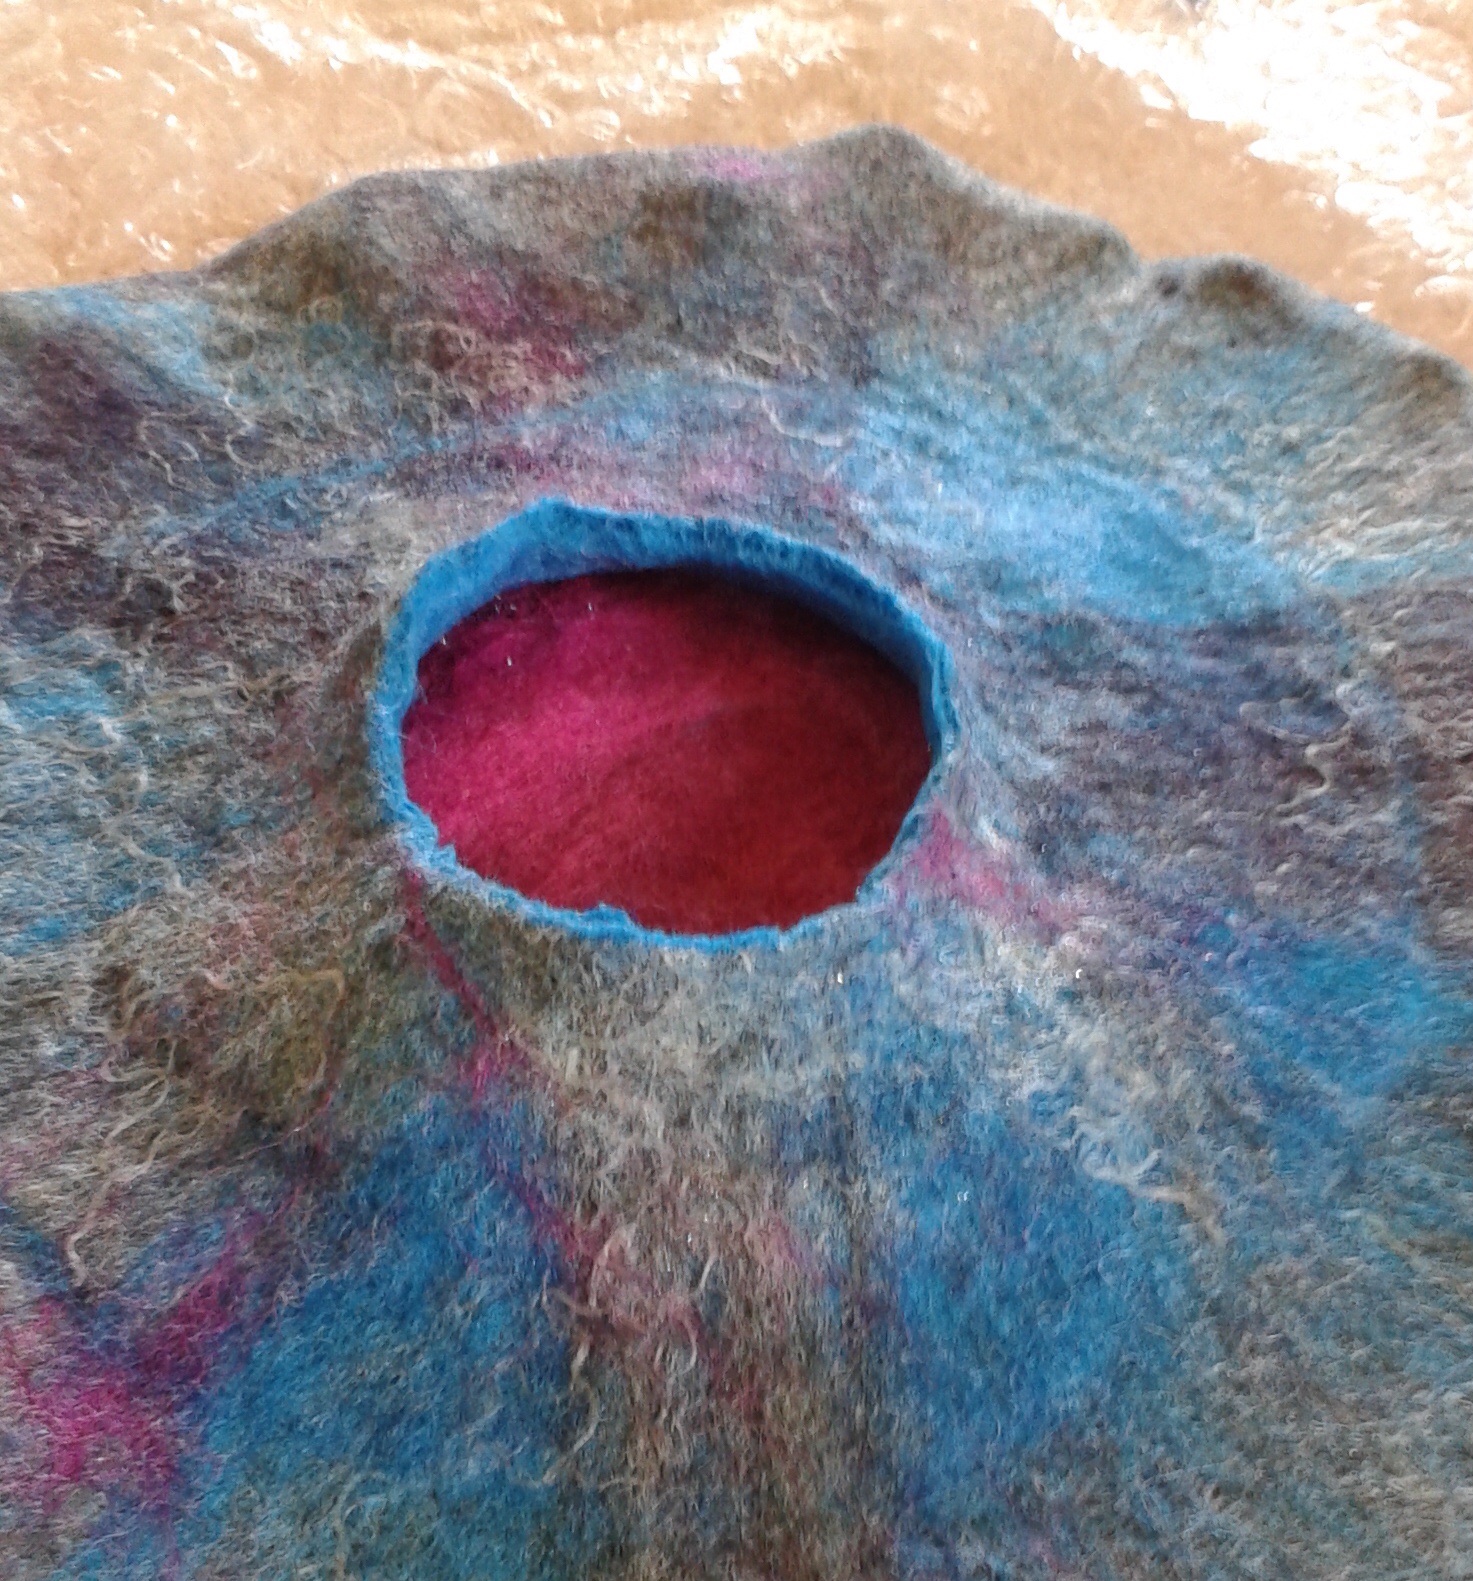
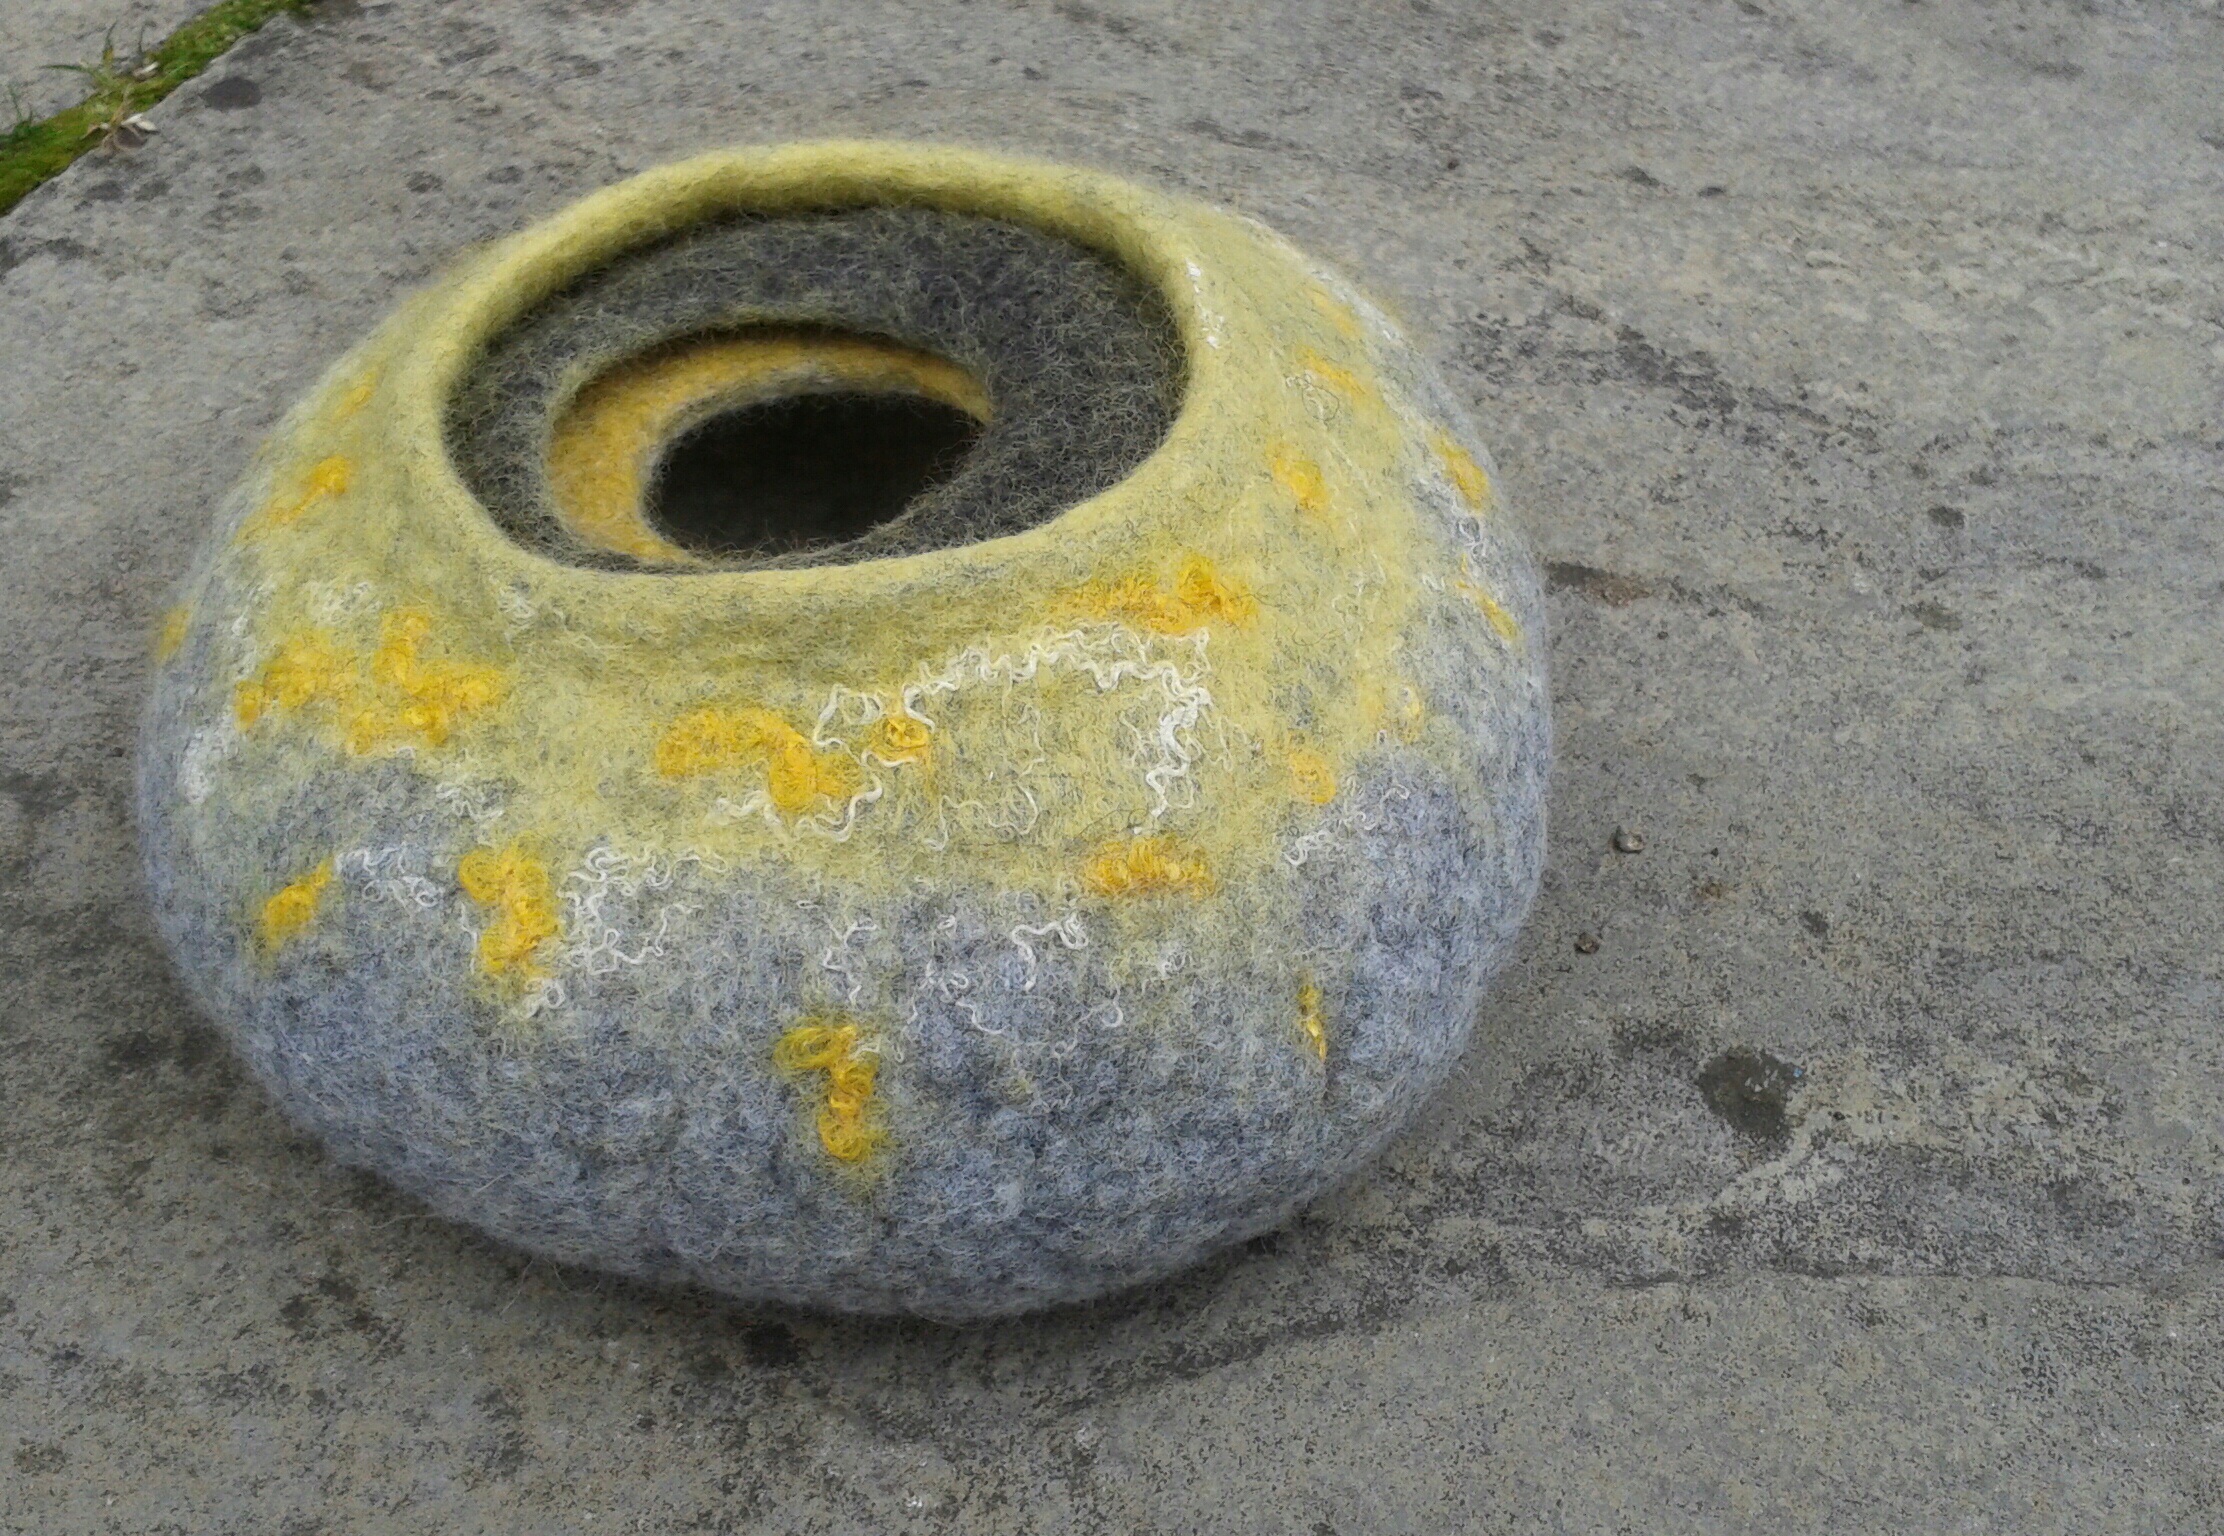
Finished vessel with the felted bowl which, along with the Flower Tower, provided the initial inspiration.


Detail showing the silver coloured organza.


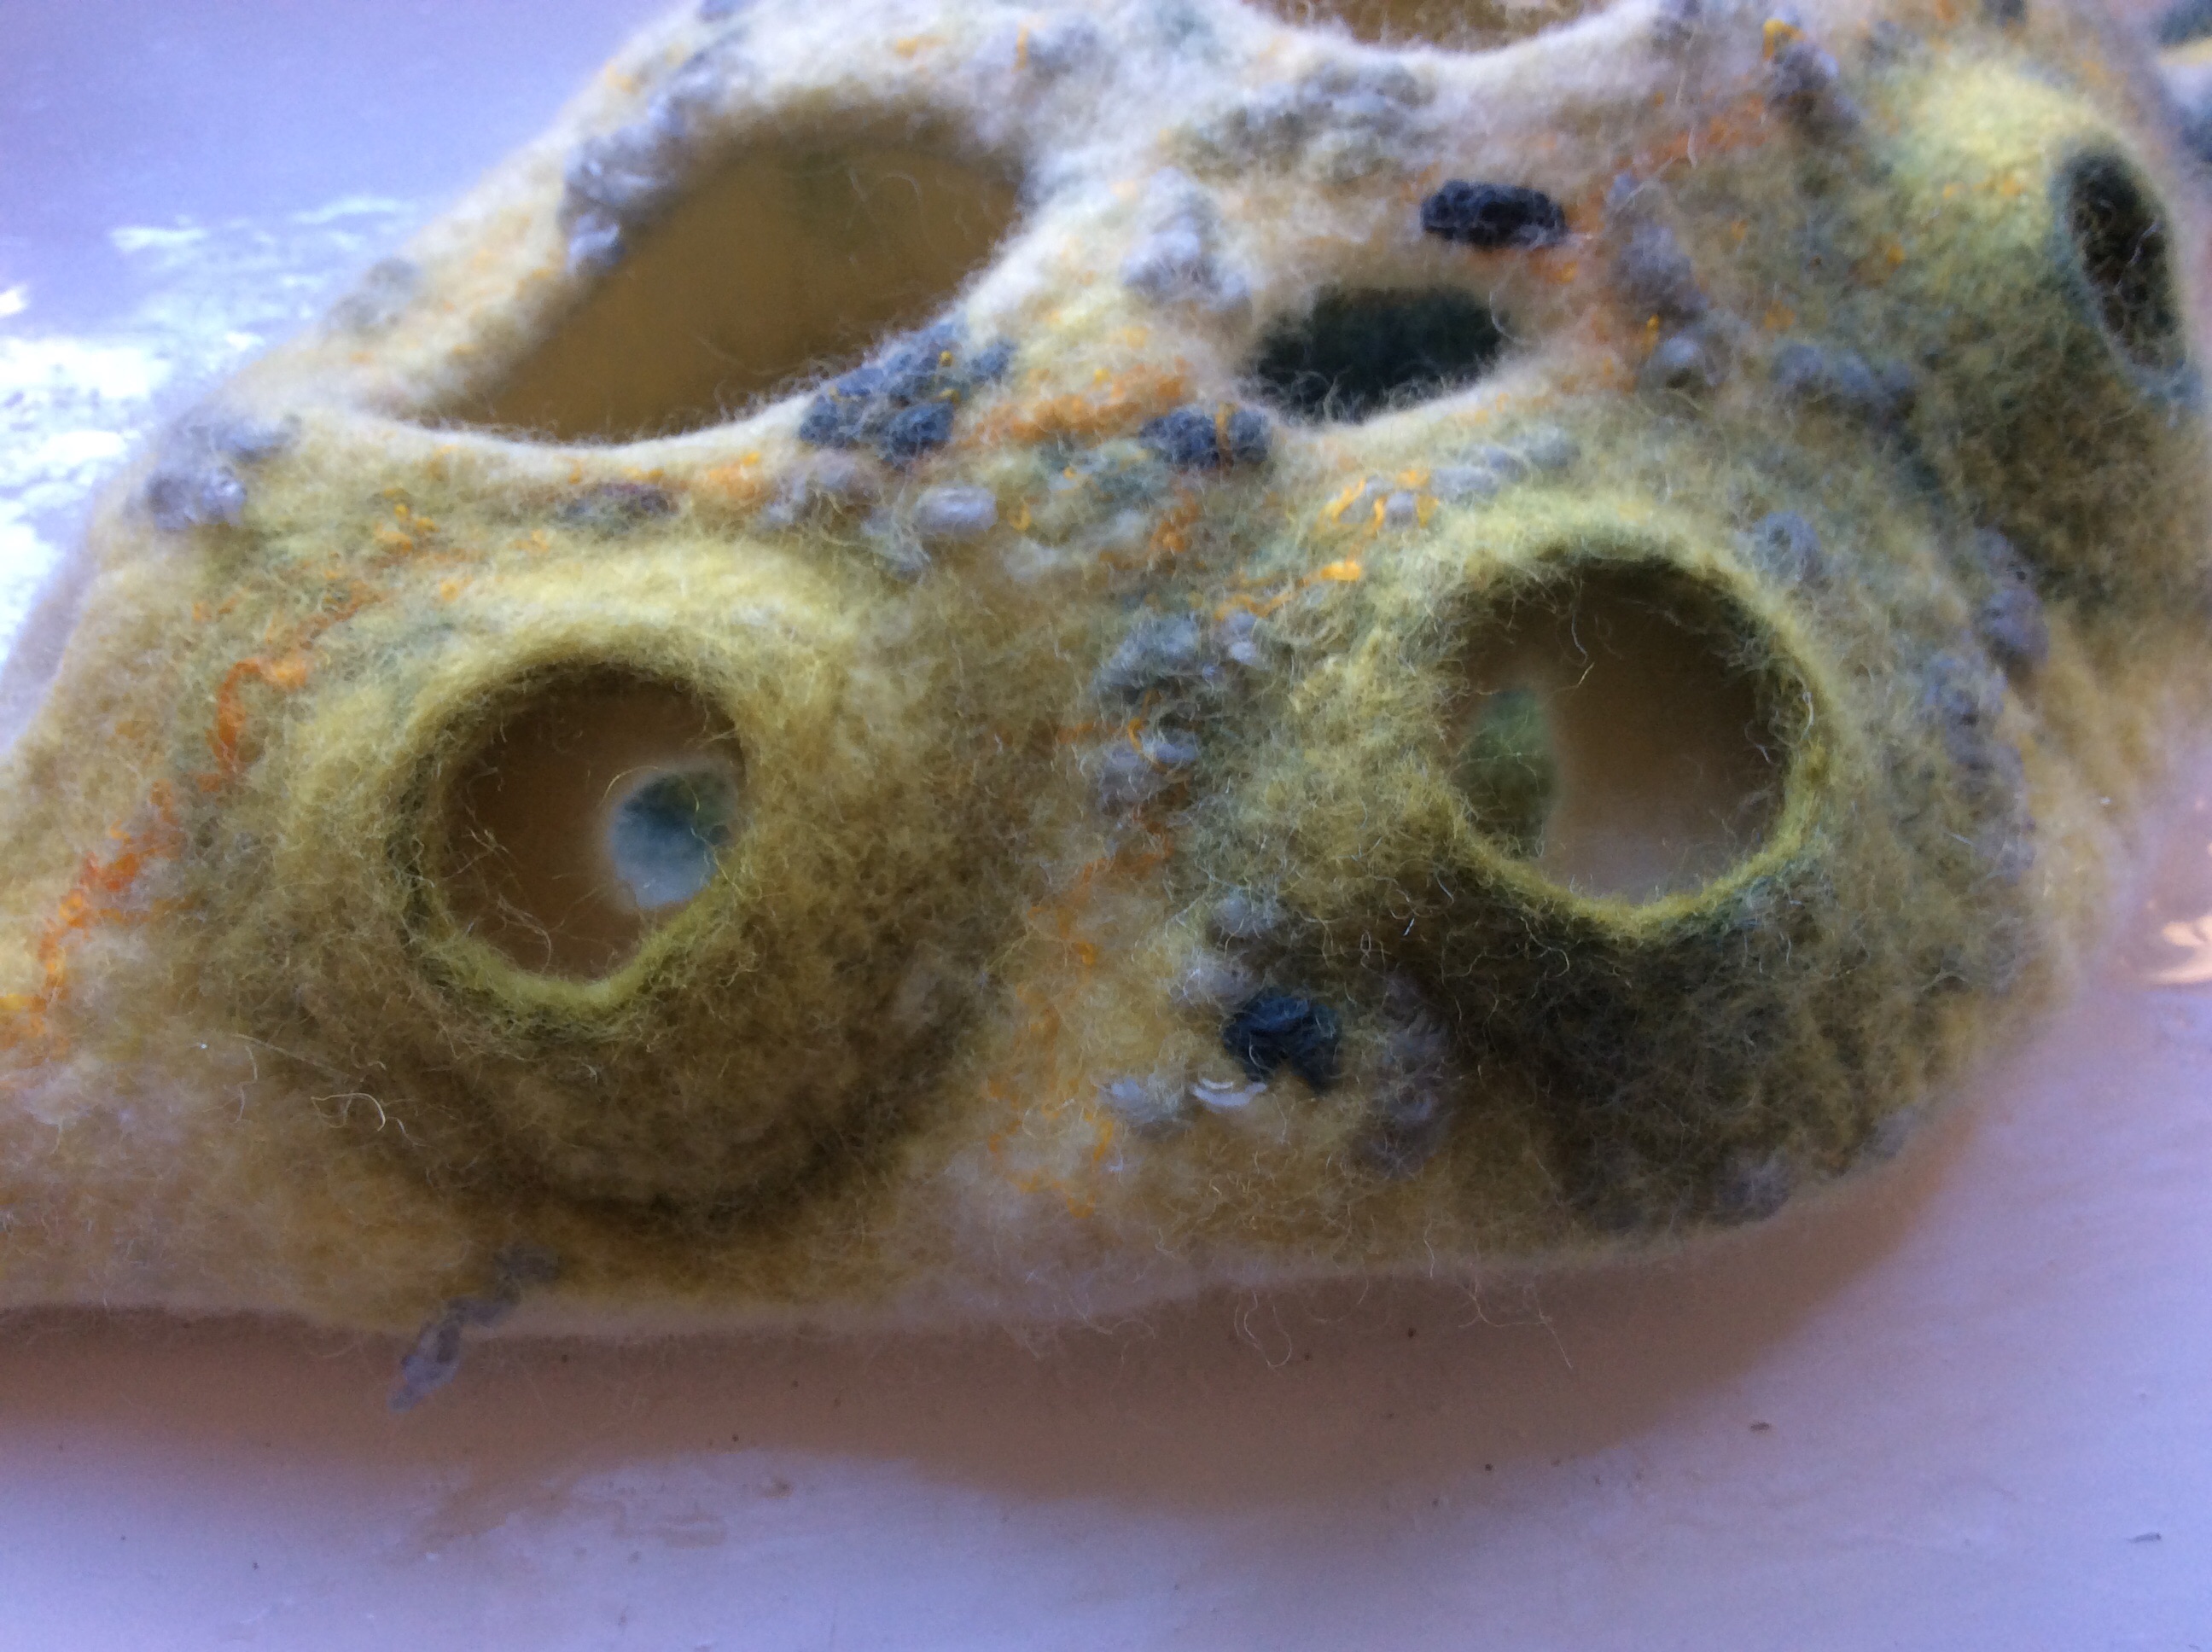
Close up showing the burnt out sections which have been decorated with hand sewn threads.


David Hockney gets a scarf…..

A felted scarf and he's nearly done!

A felted scarf and my David Hockney mixed media quilt is nearly ready for quilting!

This evening David Hockney got himself a dark red Merino wet felted scarf so now he’s nearly ready to be put together and quilted.

To finish off I’v machined four rows of stitching at the back of the figure to represent the newsprint columns, quilted around the edge of the figure and added a black border.

My David Hockney self portrait

My finished quilted version of David Hockney’s self portrait


Shibori felt samples….

Shibori is the Japanese technique of manipulating fabric by folding, squeezing, wringing or tying and today I was inspired to make a Shibori felt sample after seeing the one here that Ruth from Feltingandfibrestudio.com has created.  The texture and colour scheme Ruth used was very dramatic and I thought this could be a great technique for me to use in a seascape picture to represent waves.  I used two shades of blue Merino with the darker one on top and added some strands of pale blue knitting wool.  I stitched the folds in place before fulling and once dry removed the stitching and snipped some of the darker shade to reveal the pale blue beneath.  My piece isn’t as dramatic as Ruth’s but I am still pleased with how it worked out and can see it being a good technique to give my seascape a 3D look when I eventually get around to making it.

I made a second piece out of some green/yellow Merino prefelt and this time tied small beads into the felt before fulling.  Although I had a ‘pea pod’ in mind when I started it I wasn’t too sure how it would turn out.  I’m really happy with the result and I think there may be more Shibori experiments to follow shortly.

Felted peas in a pod


Mythical Map…


Abstract wet felted picture.I have recently had fun exploring colour and texture with another abstract wet felted project created with Merino wool.  This piece was started in one of Robyn’s workshops but as always I ran out of time so it was finished off and embellished at home.  Once it had dried I decided to decorate it using machine stitching to define the orange areas.  Once this was done, I randomly added a few old beads (from broken jewellery) and some hand embroidered stitching.  At this stage I thought the orange areas looked like land masses and the piece started to resemble a mythical ‘map’ with strange symbols which might indicate buried treasure or long lost civilisations.  I quite liked this idea so I played on this theme, adding more beads and hand stitching.


Detail of abstract picture

image

Close up detail showing beading and hand stitching on colourful wet felted picture.

Some of the beads I used were quite large so once it was finished the picture needed a deep frame.  Ikea sell RIBA ‘deep’ frames in 2 sizes (or maybe more?) which are perfect for displaying 3 dimensional work.  They are not expensive, available in black or white and come complete with a mount and fixings for hanging on the wall. I particularly like the black as these seem to create a more dramatic effect.

image


If at first you don’t succeed…

Wet felted bowls

Collection of wet felted vessels made at Jenny Peppers “Multiple Resist” Workshop.

Last Saturday I rode back up north to the beautiful little village of Hutton Buscel to take part in another of Jenny Peppers felting workshops. Once again it was a lovely day with good company, excellent tuition from Jenny, and lots of hard work from the “students”, but with great results all round.
This was Jenny’s “Multiple Resist” workshop, in which she demonstrated how to create a bowl with the illusion of two smaller bowls inside it. As with Jenny’s last workshop, we all began with the same size and shape of resist for our vessel but you can see from the photos, the end results were all very unique, which was brilliant.

The first layer is cut away to reveal the colour below.

The piece has been rubbed and rolled and now the first layer is cut away to reveal the colour of the layer below.

One of the bowls taking shape.

One of the bowls taking shape.

I chose to use a subtle colour scheme of greys and yellows and added snippets of yellow knitting wool and cream silks as embellishment.

My bowl was looking more like a beret at this stage.

My bowl was looking more like a beret at this stage.

Some of the other ladies made fabulously colourful bowls and some added extra interest by shaping the openings rather than leaving them circular.

A beautiful bowl with an unusual shaped opening.

A beautiful bowl with an unusual shaped opening.

image
image
The following photos show what a difference the workshops with Robyn from Feltybits and Jenny have made to my work. One of the key things I have learnt about making vessels is the importance of basic rubbing and rolling to strengthen the felt. My first little bowl was so poorly felted it could hardly stand up on its own but I am glad it didn’t put me off. I am a big believer in “if at first you don’t succeed….”

First attempt at a wet felted bowl...it can only get better!

My first bowl…a bit fluffy and floppy and very poorly felted!

Blue Merino Bowl.

Wet felted Merino Bowl – 2nd attempt and feel like I am getting somewhere!

Wet felted bowl made with multiple resists.

My multiple resist bowl – worlds apart from the first, flimsy vessel!

Spiky Vessels Workshop…

Eight of the finished vessels displayed on a window ledge. looking particularly alien-like

A few of the awesome finished vessels!

Several months ago I discovered a website showcasing the fabulous work of a lady called Jenny Pepper.  I was very excited to see that Jenny holds workshops, not a million miles away, and immediately got myself booked onto two of them.  Earlier this month I rode up to Scarborough to attend Jenny’s ‘Spiky Vessels’ Workshop which was being held in the beautiful village of Hutton Buscel, just a few miles outside of Scarborough.

The fibres have been laid for the basic vessels and now the spikes and craters are being added.

Hard at work applying the spikes and craters.

The workshop was fun, informative and very inspiring.  Jenny demonstrated various techniques for creating spikes, holes, craters and frills to add to a 3-D vessel.  The day was very well structured but at the same time the session was quite relaxed and we were encouraged to work at our own pace rather than trying to keep up with each other – great for me as I always seem to be the last to finish!  It  was fascinating to learn how useful ‘pre-felt’ can be and since coming home I have made myself quite a supply of it in various colours ready for future projects.  The pieces we made were really designed to be ‘samples’ but I think we all came to see them as more than this once they were finished….they seem to have an alien quality and every one of them was unique.

Adding the frill to the vessel

My vessel in the making

It was a great day all round and lovely to meet the other felters.  I am looking forward to meeting up with many of them again at Jenny’s ‘Multiple Resist Workshop in July.

My finished 3D vessel complete with spikes, holes and craters

My finished vessel

Memories of a Greek Holiday…

I can’t believe its been 2 months since my last post…holidays and family commitments have kept me away from the PC for a while but things are getting back to normal now so its time to catch up on what’s been happening ‘craft’ wise.

At the end of April (the day before we were due to fly out to Greece for a 2 week flotilla holidayRobyn was due to hold another felting workshop.  Although I knew I really ought to stay at home and do the packing I managed to somehow escape to Robyn’s studio for the day and had a great time (as always) with the other ladies as we all got creative with bits of fluff!

I wanted to do something different and create an abstract picture in this session but wasn’t sure how to approach it.  Robyn suggested a great method which began with creating small piles of ‘carded’ Merino, combining different colours/shades.  When I had sufficient piles of wool these were laid out and used to create a large sheet of multicoloured ‘pre-felt‘.

Pre-felt stage of abstract picture

The pre-felt has been cut up and rearranged.

The next stage was to cut the pre-felt into squares and rearrange it, in a different order, onto a plain background, adding bits of scrim, nepps and silks and completing the felting process.   There was so much pre-felt I ended up making two pictures, one square and one rectangular.  I enjoyed the process and was really pleased with how the pictures turned out.

Detail of abstract wet felted picture

Close up of the first picture showing the embellishment

Once we got back from holiday I picked up the pieces again and added some sari silks, a few seed beads and some machine embroidery.  I feel like the pictures have taken on a bit of a ‘sea-side’ feel and, with having the two week holiday sandwiched between starting and finishing them, they now remind me of happy times island hopping in the Ionian.

A wet felted abstract picture.

First of two abstract, wet felted pictures created with the guidance of Robyn at Feltybits.


Rectangular wet felted abstract picture

Second of the abstract pictures made at Robyn’s workshop

Fairy Shoes…

I have been meaning to post these photos for several days but where does the time go?  Last Saturday I met up with a group of other ladies at the Thomas Garrett Rooms in Heighington to take part in the ‘Fairy Shoes’ felting workshop run by Robyn Smith of Feltybits.  Once again it was a great workshop with Robyn offering lots of encouragement and advice regarding wet felting, working with a resist and embellishing.  The tiny shoes were created using Merino wool tops and decorated with seed beads.  The finished items all turned out different in colour and style and looked particularly cute when lined up for the photos!

Fairy Shoes

Creating Pictures…

When I began felting a few months ago I hadn’t imagined that it was going to turn out to be this much fun and this addictive!  At some point in the not too distant future I will have to do some housework, phone some friends and generally catch up with all the stuff I have shelved while I have been enjoying myself!   In the meantime I thought I would share the two pictures I have just done.  Both of these started out as wet felted backgrounds (Merino tops onto muslin fabric) and then I added detail with needle felting and free motion embroidery.   When they were finished I found that I liked the reverse of the pictures as much as the front…they had a real ‘sketchy ‘ quality to them.  I sometimes forget to lower the foot before embroidering so I tend to get the ‘birds nest’ effect on the back of my work.  If I can get my head around not doing this I will get a neater finish and be able to use the reverse of a picture as the front.

My version of the Flower Meadow using wet and dry felting and machine stitching.

Floral picture using wet and dry felting and machine stitching.

The second picture was inspired (albeit very loosely!) by Ruth’s Jackson Pollack challenge on the Felting and Fibre website.  I looked at some of his work and really liked the colour combination of Yellow Grey Black.  With this in mind I planned my background using three shades of grey and mixed the lightest of these with a flesh tone to warm it up a bit (remember I did say very loosely inspired!).

Fibres laid out ready for felting - three shades of grey and a flesh tone to add a little warmth.

Fibres laid out ready for felting – three shades of grey and a flesh tone to add a little warmth.

So here is the finished article….I realise it was a bit of a cop-out to do flowers (yet again) but you can’t say I am not consistent!

Yellow Poppies.

Yellow Poppies.

Reverse side of Yellow Poppies.

Reverse side of Yellow Poppies.