Hockney self portrait update…..

Thanks to Maggy for pointing out that I hadn’t posted a picture on here of my finished quilted version on Hockney’s self-portrait.   I have just added it to “Hockney gets a scarf” under the “Art Quilts” category.

If anyone reading this is interested to learn more about the Lincolnshire Quilters “David Hockney Challenge”‘, which is gaining momentum nicely, we have a blog at http://www.linqsblog.wordpress.com

David Hockney gets a scarf…..

A felted scarf and he's nearly done!

A felted scarf and my David Hockney mixed media quilt is nearly ready for quilting!

This evening David Hockney got himself a dark red Merino wet felted scarf so now he’s nearly ready to be put together and quilted.

To finish off I’v machined four rows of stitching at the back of the figure to represent the newsprint columns, quilted around the edge of the figure and added a black border.

My David Hockney self portrait

My finished quilted version of David Hockney’s self portrait


Hockney gets a shirt…..

Work in progress

Work in progress

The mixed media Hockney quilt has been shelved for a couple of weeks but today I made a start on his clothing. Based on his 1954 self portrait, I am bringing him into the next decade.  Along with his iconic dyed blond hair and round specs I decided to swap his check shirt for something a little more flamboyant!

Hockney Challenge…..adding the hair.


I want my version of Hockney’s collage ‘Self Portrait‘ to be a fun piece constructed from a mixture of materials and methods.  The face is being built up with layers of synthetic fabrics, bonded together using an 18w Antex soldering iron.  My first attempt was with a 30w iron and a fine point bit….it was awful!  The fabric burnt and I couldn’t control the cutting edge as the iron was too hot and the point too thick.  I took advice from Margaret Beal on her website and bought a lower wattage iron with an extra fine bit…..it’s a lot easier when you use the right tools!

For the mop of blond hair I chose to use a technique which I originally saw demonstrated by Jan Tillett on Youtube.  This involved free machine sewing onto water soluble stabiliser which was held in an embroidery hoop.  I traced the outline of the hair onto the stabiliser before sewing back and forth with yellow and cream thread, overlapping the stitches so that they held together once the background fabric was washed away.  The hair took shape very quickly and I am really pleased with the texture.   The next job will be to select fabrics for the clothes.

Hope Hockney doesn't sue!

Creating the hair using soluble stabiliser.

Portrait of Hockney made from fabric and thread.

The mop of blond hair plonked in place!


More Mixed Media…..

I have been asked to show more detailed images of how I created the butterfly and dragonfly pictures seen in my last post so here is version number three with extra photos.

The various items used was the same for all of the pictures.

Various items used to create the pictures.


Butterflies and dragonflies cut out from Farfella wallpaper from B&Q

Farfalla wallpaper sample from B&Q was used for the insects

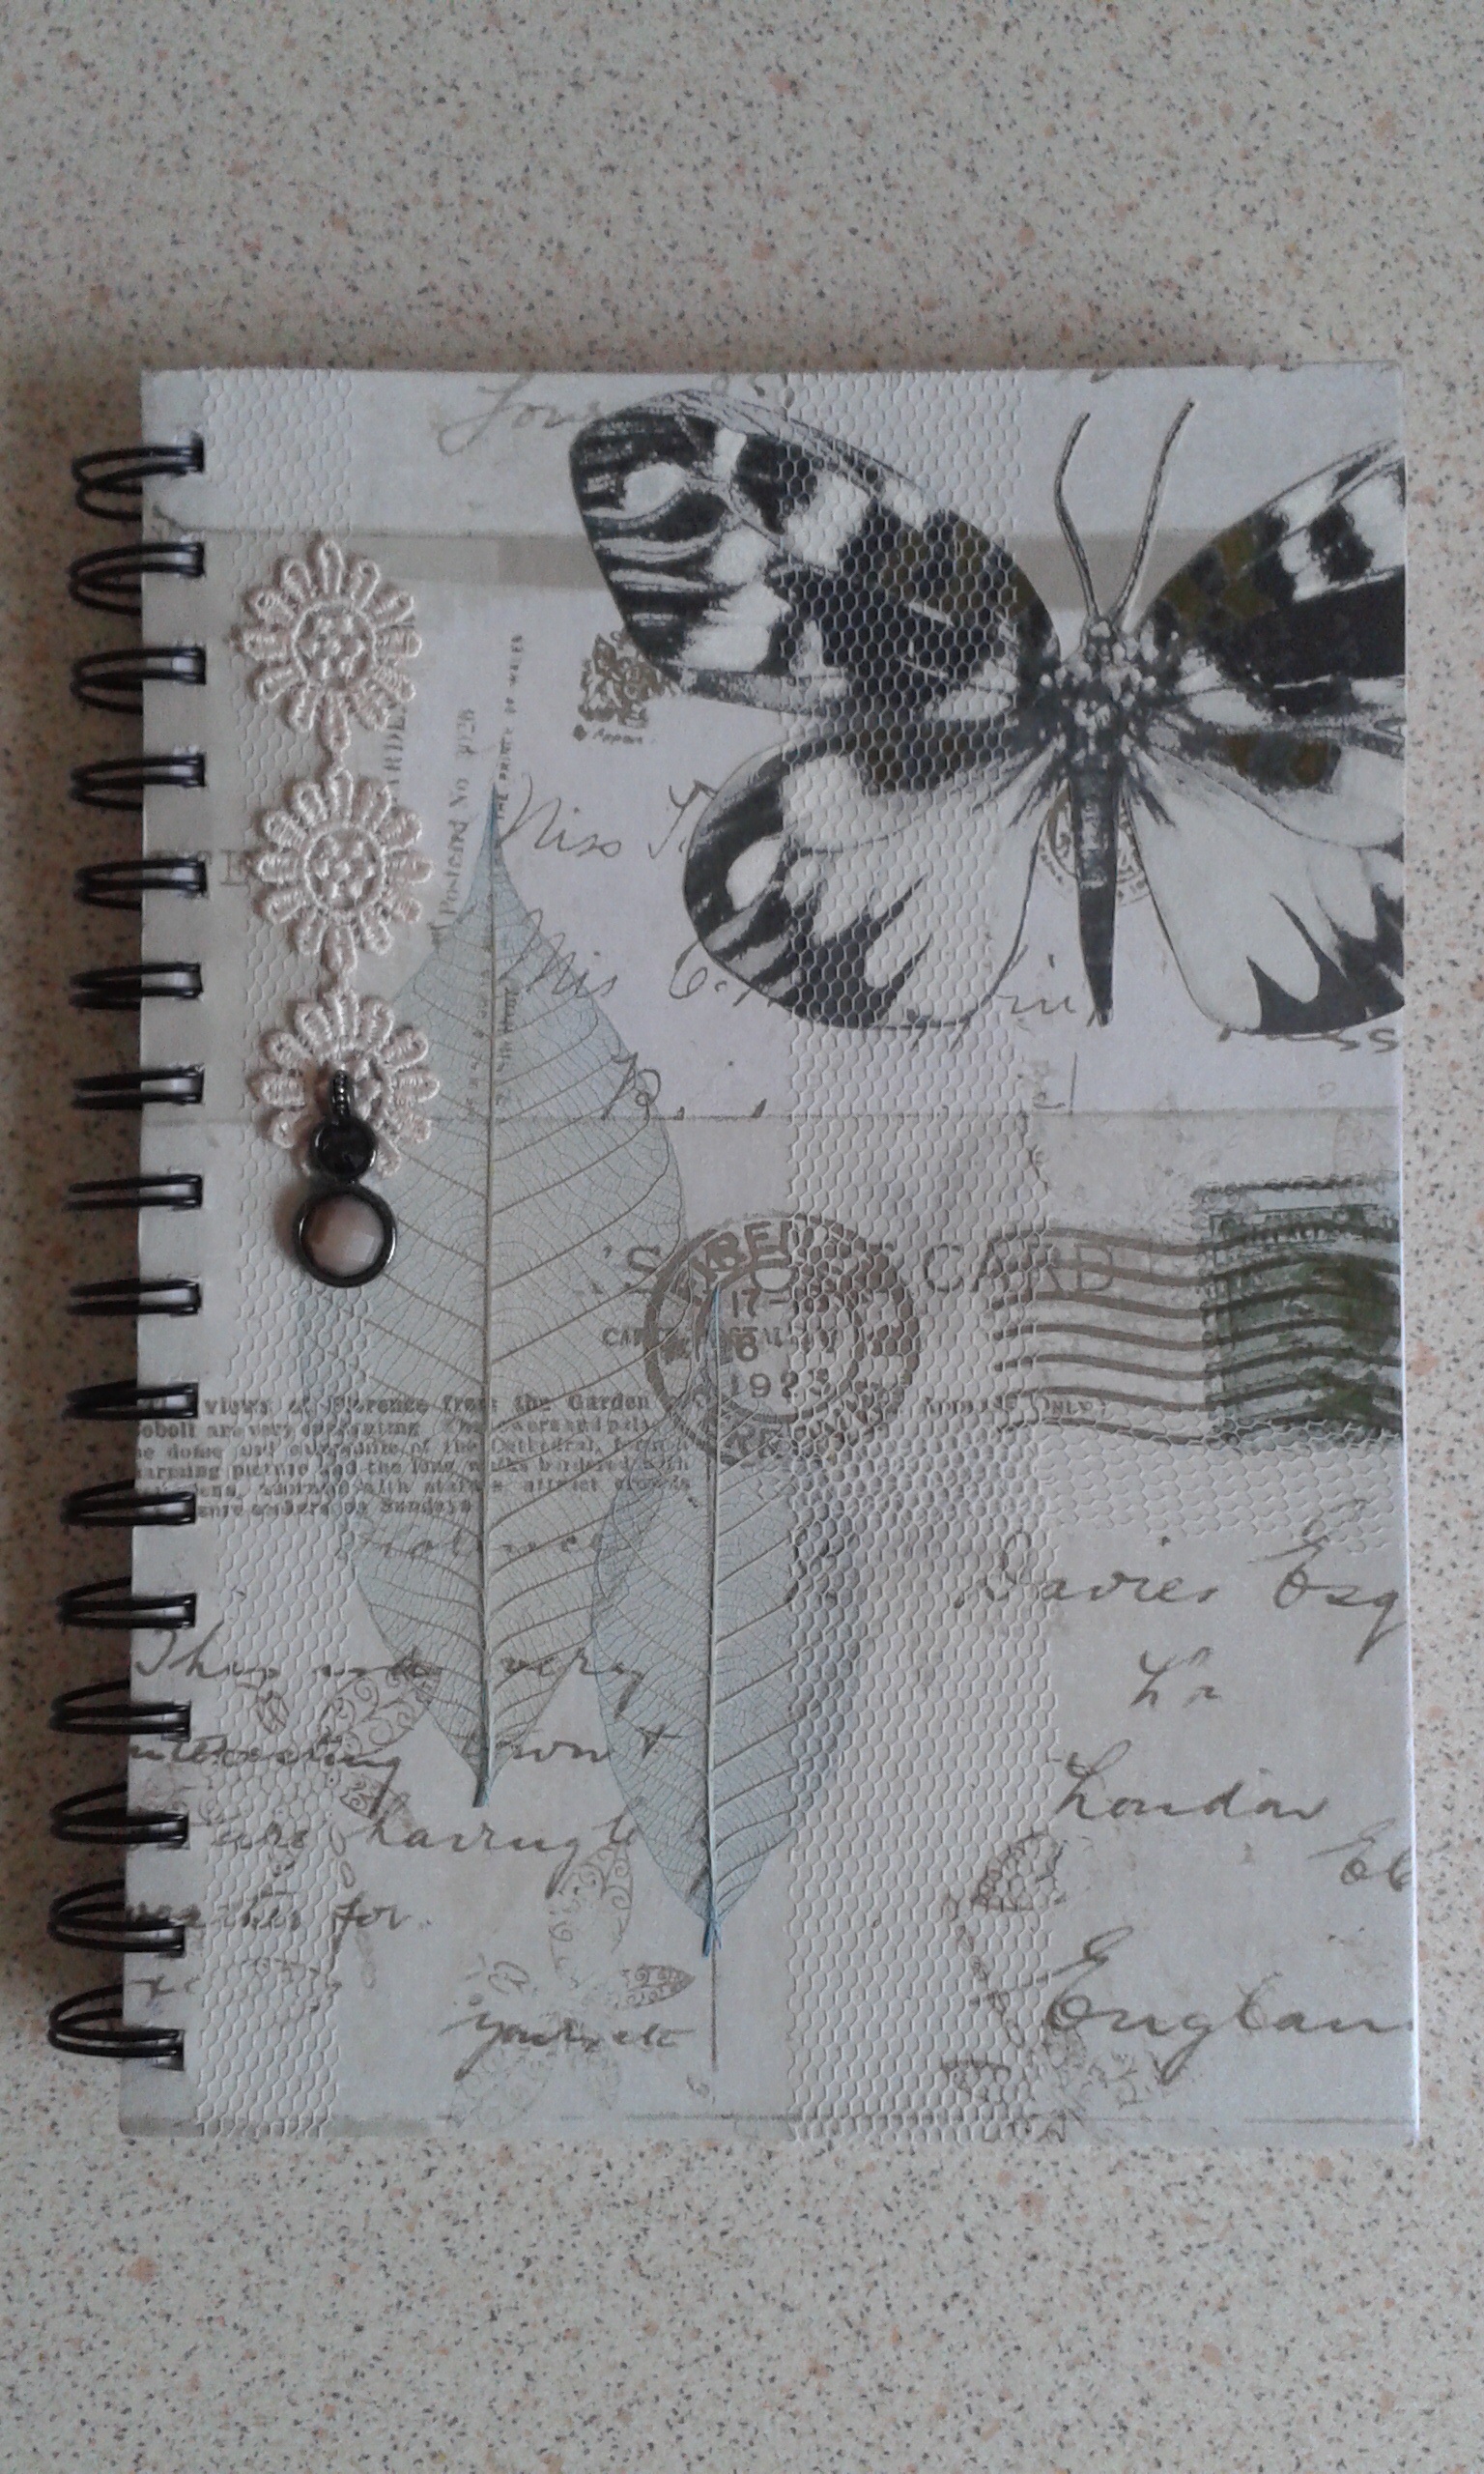
The insects were all cut from a sample of ‘Farfalla’ wallpaper by Statement available from B&Q and the ‘text’ on the first dragonfly picture was torn from a sample of ‘Travel’ wallpaper by Colours, again from B&Q. I used a limited colour pallet of Daler Rowney sap green and process magenta for the first two versions.


Travel wallpaper from B&Q was used on the first of the dragonfly pictures and on the book cover.

Travel wallpaper from B&Q was used on the first of the dragonfly pictures and on the book cover.

Each of the pictures began with a background which was stamped using acrylic paint on a wide piece of lace. It worked out blotchy and had very little detail but, as it was only the background, I figured it didn’t matter.

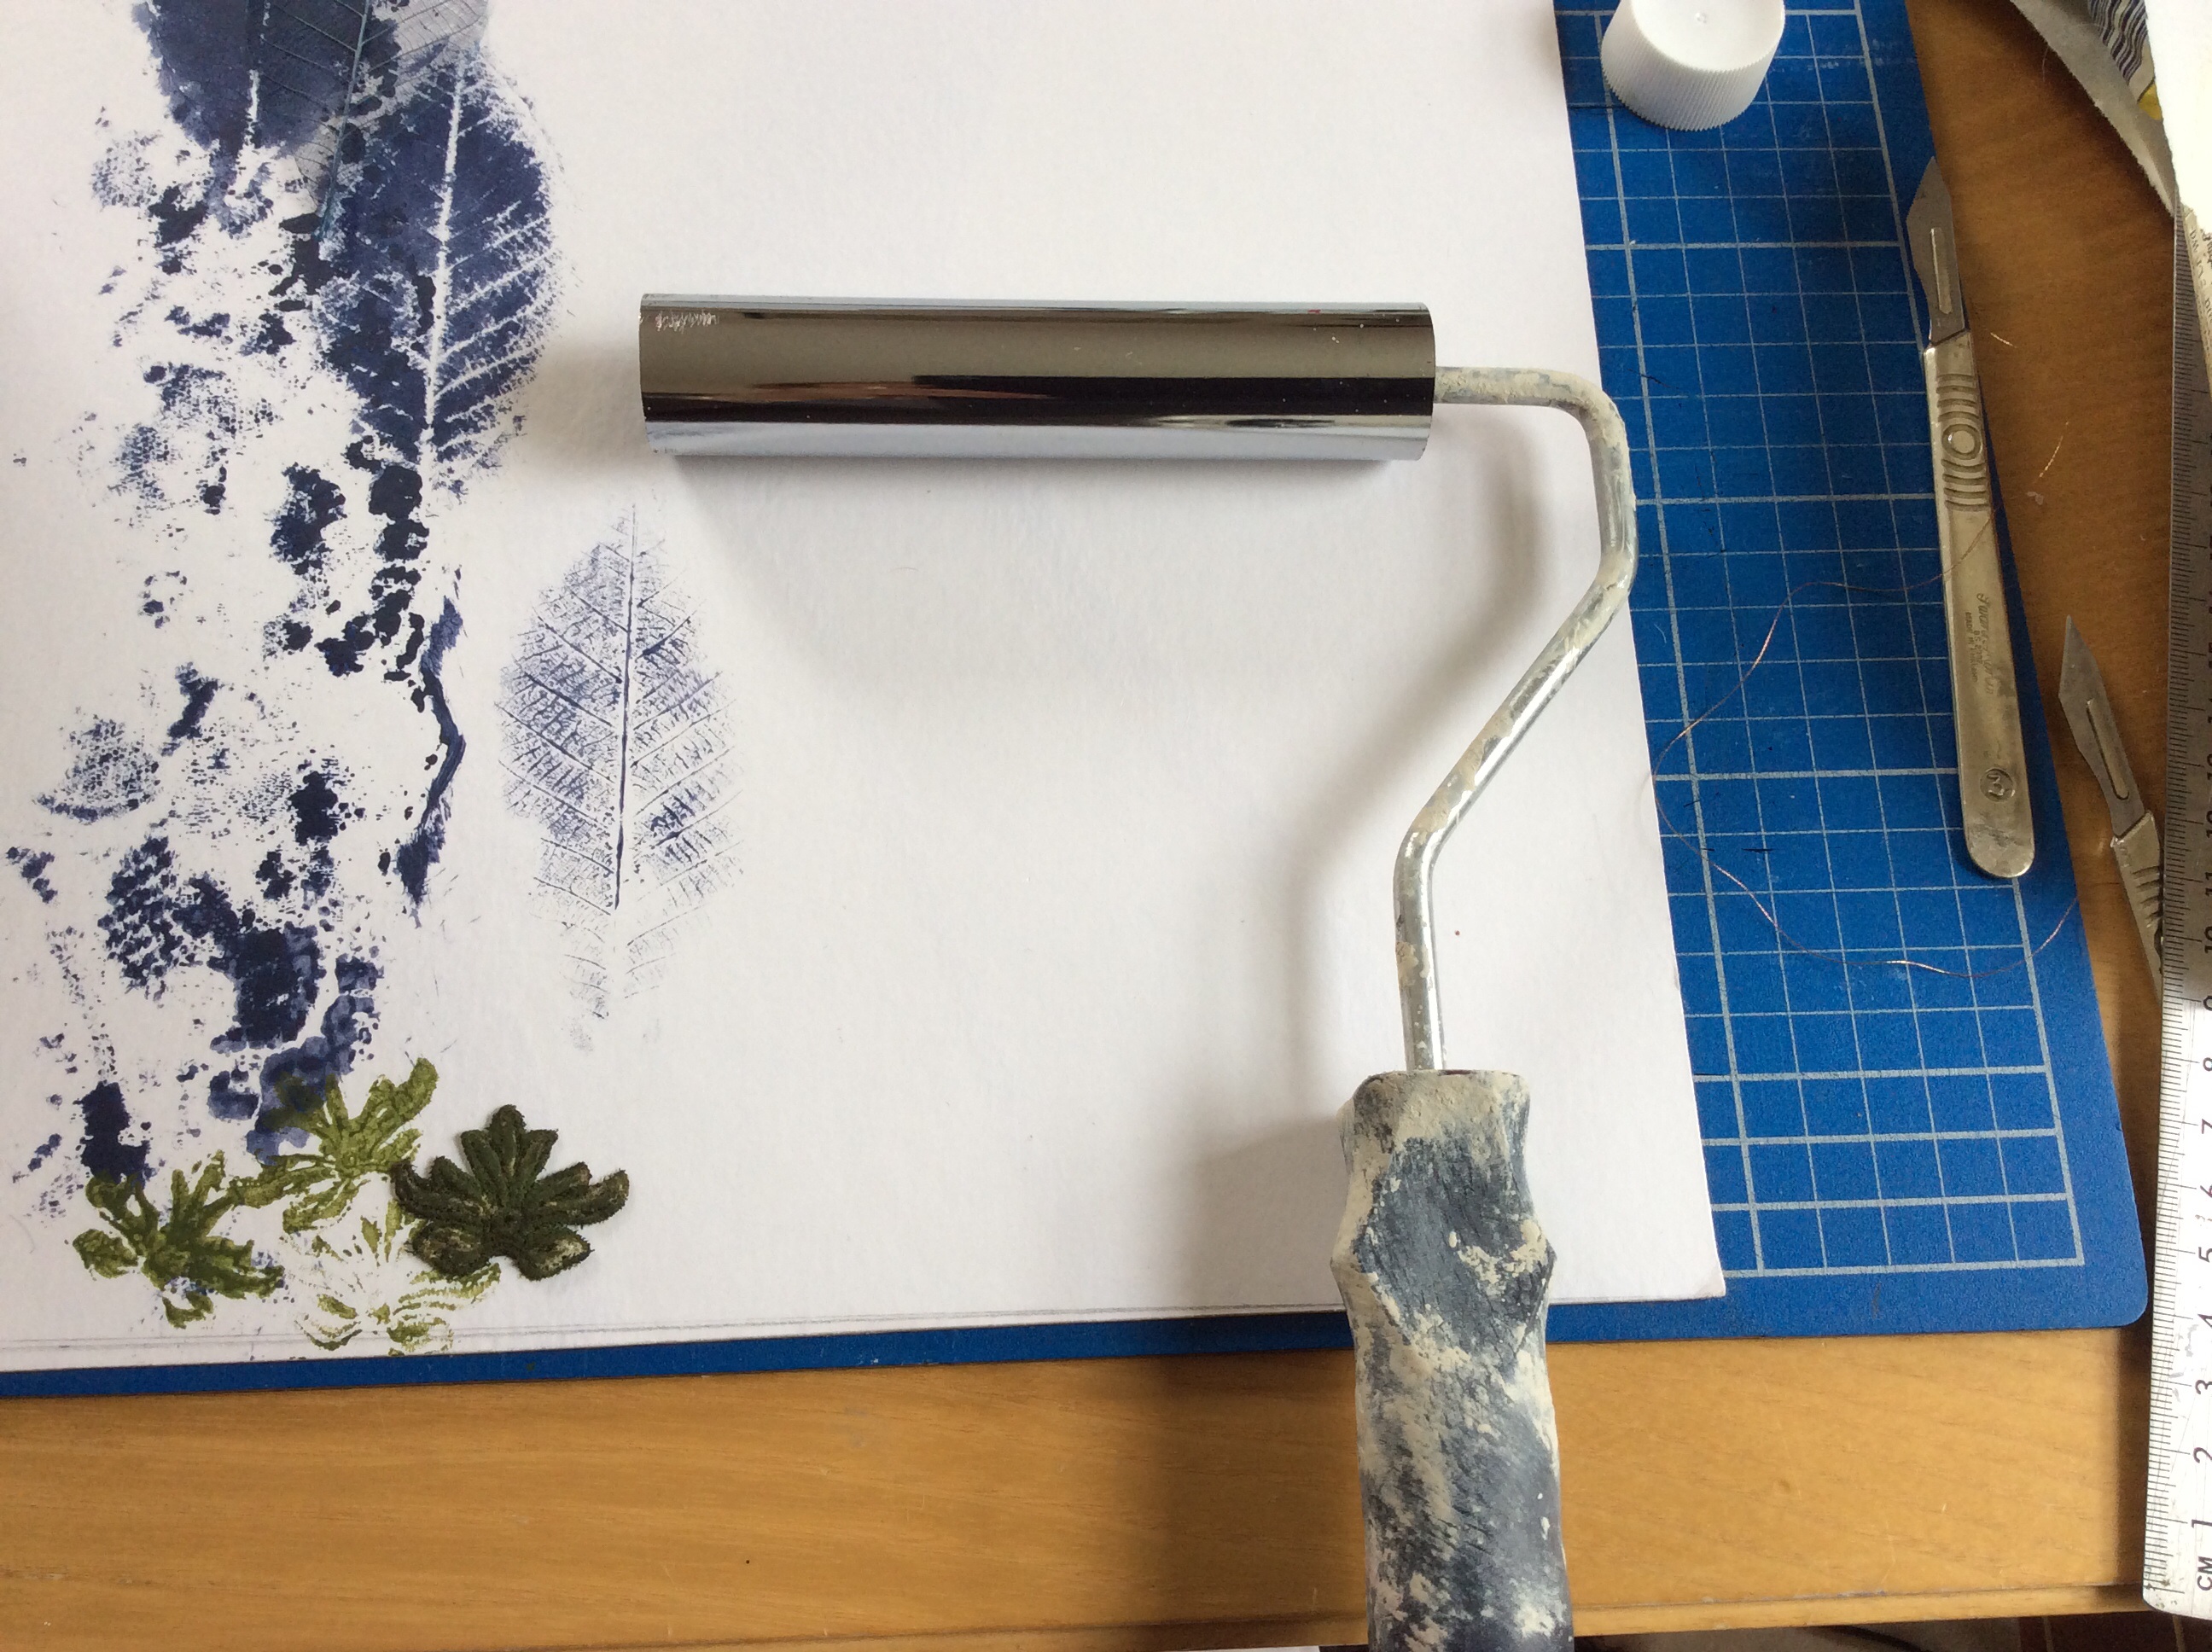
In the latest picture I took my colour scheme from a sample of B&Q ‘Newsprint’ wallpaper. I began by mixing Daler Rowney ultramarine with process magenta and yellow ochre to get the background shade I wanted. This was painted onto bits of lace and onto a ‘leaf’ and these were stamped using a homemade brayer. First time round I did it using a small tin but this time progressed to my deluxe version (a piece of metal clothes rail cut down to approx 3 inches and pushed onto a small paint roller).

Acrylic paint is mixed to compliment the blue seen in the Newsprint wallpaper.

Mixing acrylic paint to match the blue shade seen in the ‘Newsprint’ wallpaper.


Frugal crafting with my home made brayer.

Frugal crafting with my home made brayer.

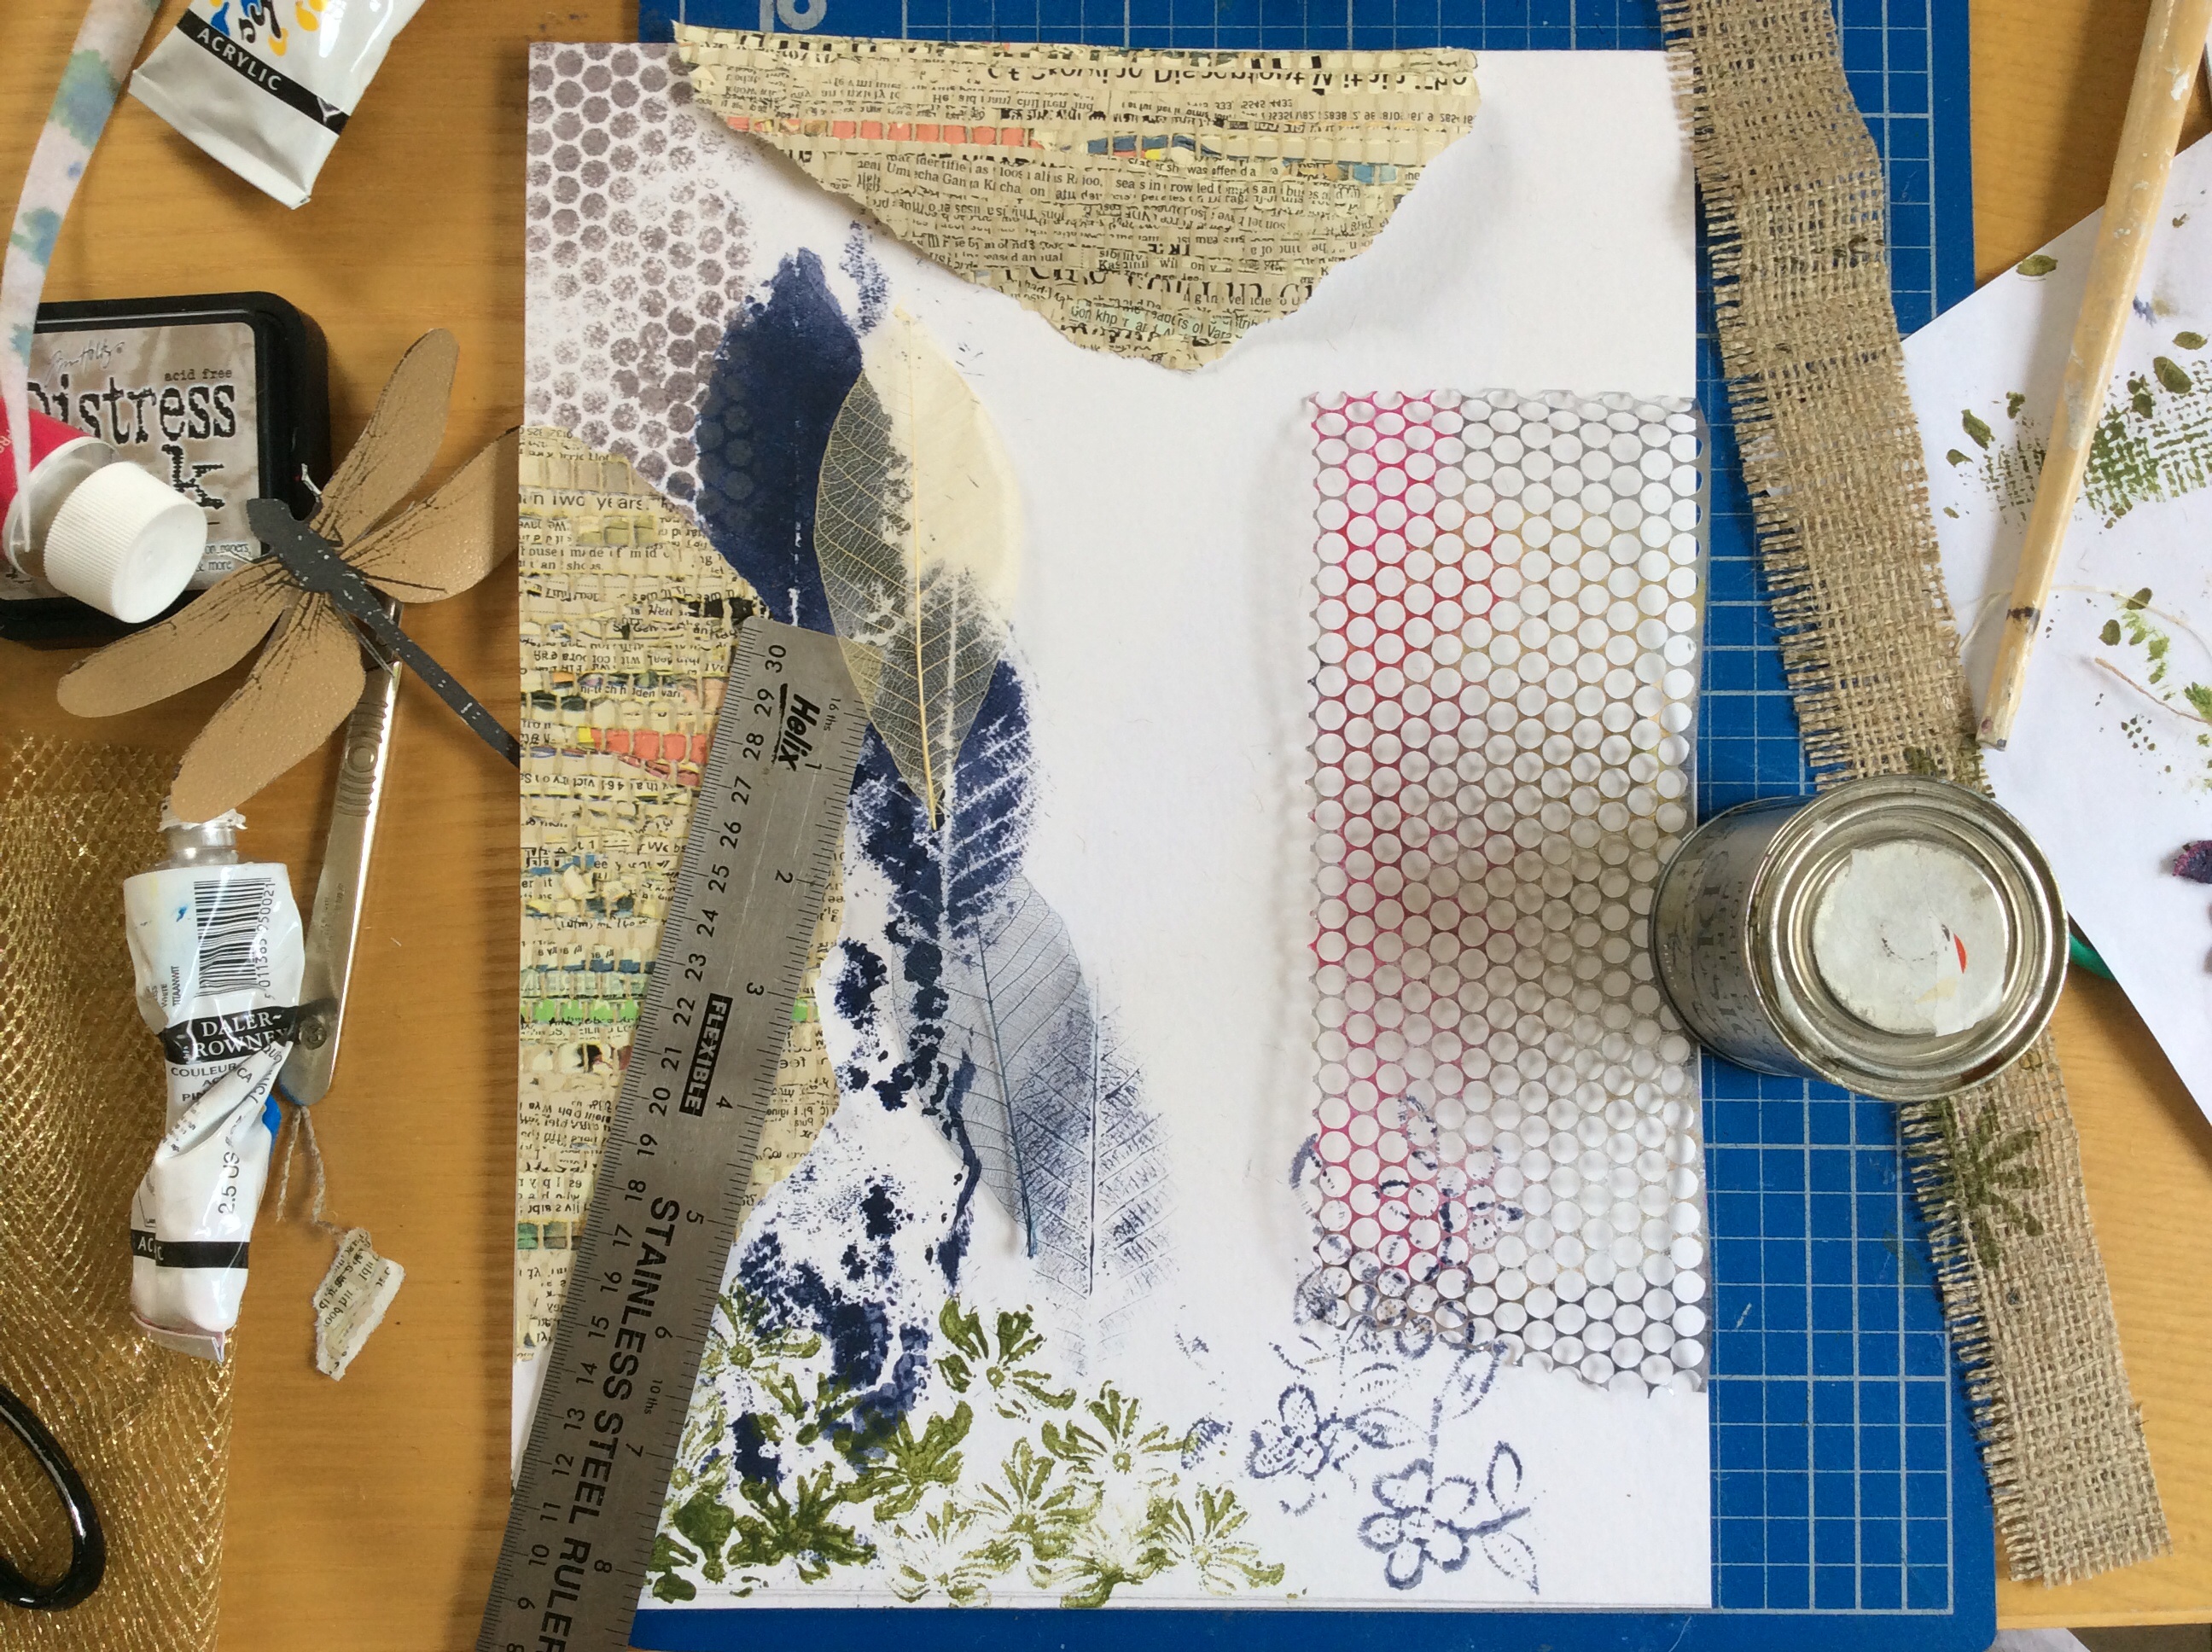
As the background started to take shape I loosely laid the papers to get an idea of where I wanted them.

The papers are loose laid to establish their positioning.

The papers are loose laid to establish their positioning.

More stamping was done using a funky foam flower (central area) while the green stamp in the bottom left corner was made from a leaf shape, again cut from lace and painted with acrylic (a little yellow ochre and magenta mixed with sap green). Sequin waste was used as a stencil, top left and on the right hand edge. For this a little more ochre, a lot more magenta and a little white was added to the background blue and applied with a sponge.


Stencilling with sequin waste.

Stencilling with sequin waste.

More stamping and stencilling.

More stamping and stencilling…..the hessian is loose laid and will change position before I’ve finished.

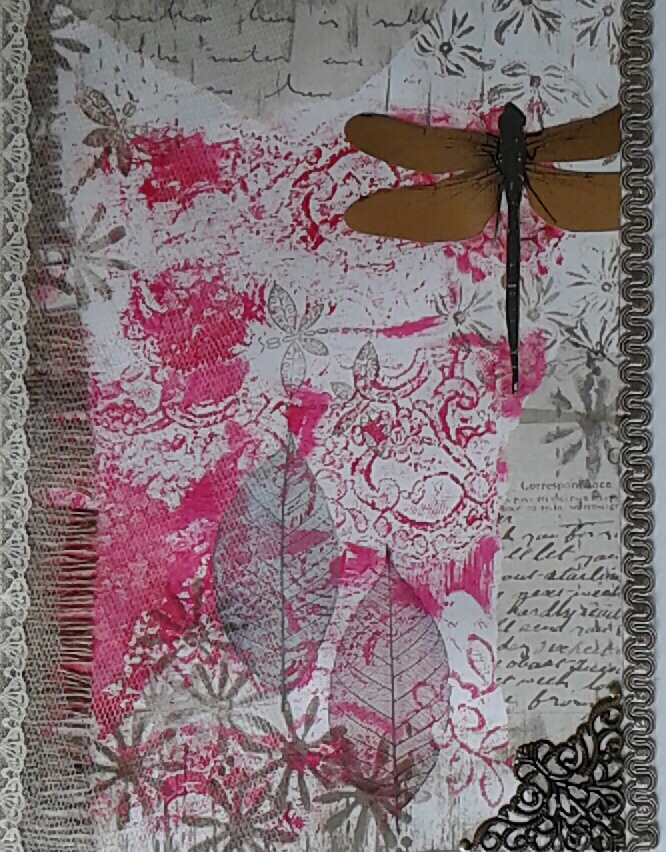
Several transparent leaves, in coral, yellow, blue and teal, were applied using PVA. Rather than pasting the leaf it’s far easier to simply lay them on the paper and apply the paste directly on top, it soaks through easily. The large dragon fly was pasted in place and strips of netting were laid vertically on the paper, and again, pasted over with generous amounts of PVA. As the acrylic paint is permanent once it’s dry you can paste over it without fear of smudging. I discovered this isn’t the case with the Distress Ink, it will smudge, so I was careful to avoid getting any PVA on the tiny dragon flies, which were the last stamps to be applied.

Detail showing the netting and leaves.

Detail showing the netting and leaves.

The ‘Newsprint’ paper was finally glued down and a border of hessian, bleached with Miltons to tone it down a little, was added to the left hand edge using a cool melt glue gun. I got my gun from The Range, it was very cheap but is in use constantly and I would definitely recommend them. To finish off bead accents were applied, again using the glue gun.

Dragonfly mixed media picture in blue.

Third of the insect mixed media pictures.

You could go on forever adding layers of transparent fabric and trims, it’s quite addictive and a fun way of experimenting with different materials/techniques.

Mixed Media…..


Mixed media image

I’ve been looking at several mixed media projects on youtube recently, such as art journals, altered book covers, etc and thought it would be interesting to have a go myself. I only possess one stamp, which has a couple of dragonflies on it, so I began by searching my stash for anything I could make use of as stamps/stencils. For the backgrounds I stamped with bits of painted lace and a foam flower and used sequin waste as a stencil. The butterfly, dragonfly and areas of text were all taken from B&Q wallpaper samples and the leaves were from Crafty Notions. imageStrips of white netting, added randomly, give another texture and this also has the effect of softening some of the areas. I love hessian so this had be included somewhere along with a few beads and a bit of lace.  My A5 sketchbook was next to get a makeover using the same papers, lace, etc….this was fun to do and looks like being my latest obsession!

Altered book cover